
NEXORA FIN · HELP CENTER
Nexora CRM User Manual
Step-by-step help for CRM records, sales, voice, AI, reporting and workspace administration.
Screenshots use fictional training data. Controls depend on your role, enabled modules and provider connections.
Getting started
Login and password recovery
Open Workspace login, enter your staff email and password, then choose Login. Use Forgot Password to request a reset for your staff email. After signing in, check that your name and workspace are correct. Use your profile menu to sign out on a shared device.
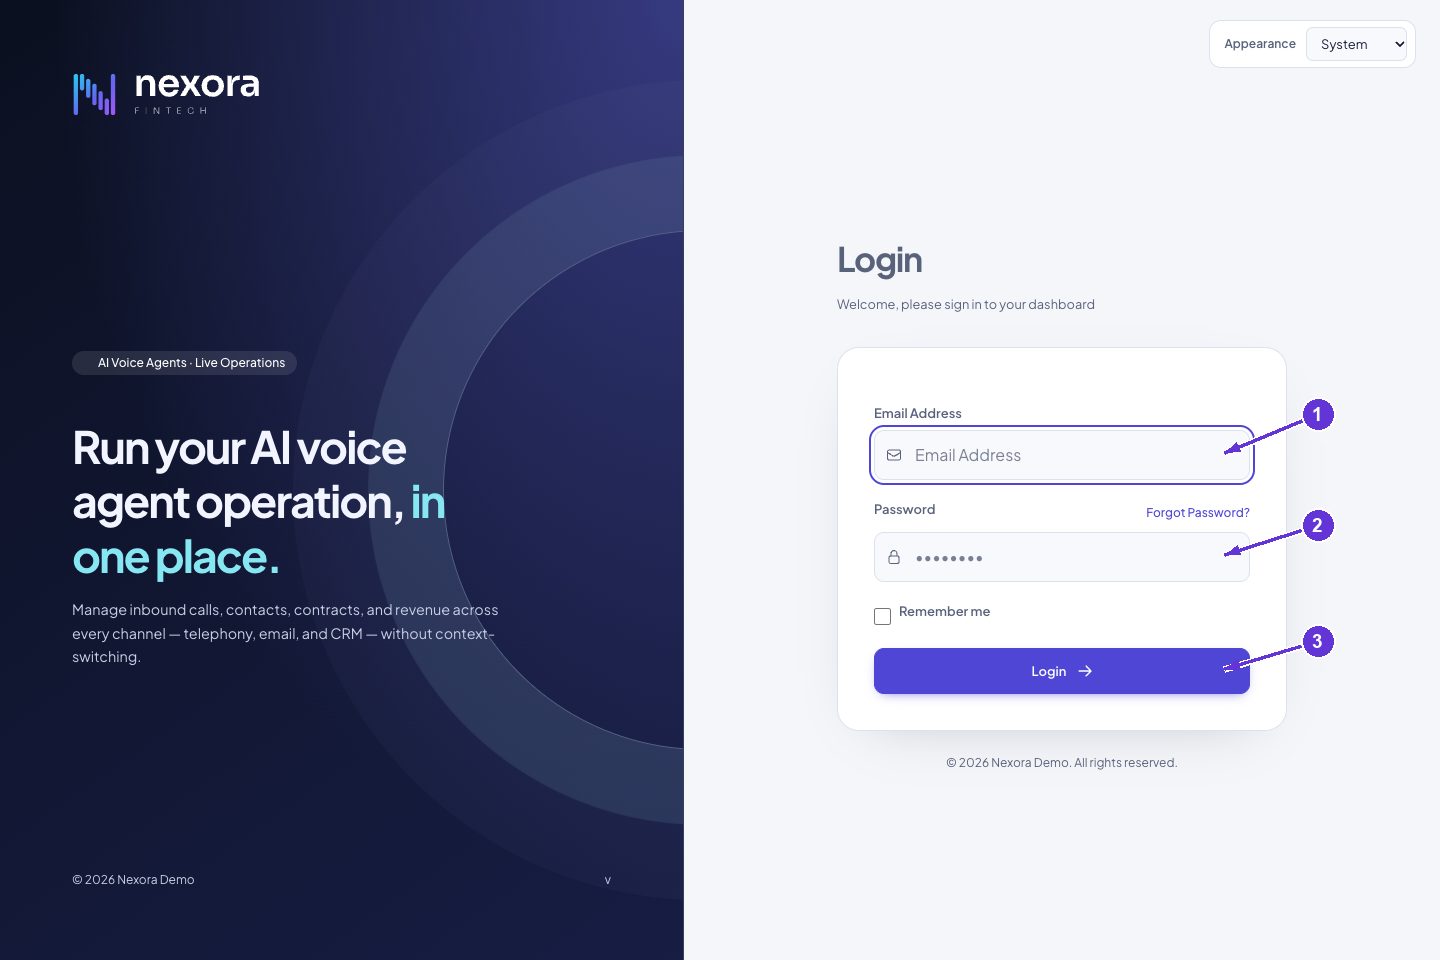
- Email Address
- Password
- Login
Find a page
Open Find a page in the sidebar or press Ctrl+K (Command+K on macOS). Search by the feature name and open the matching result. Expand the matching sidebar group to see related pages. A missing control can depend on permissions.
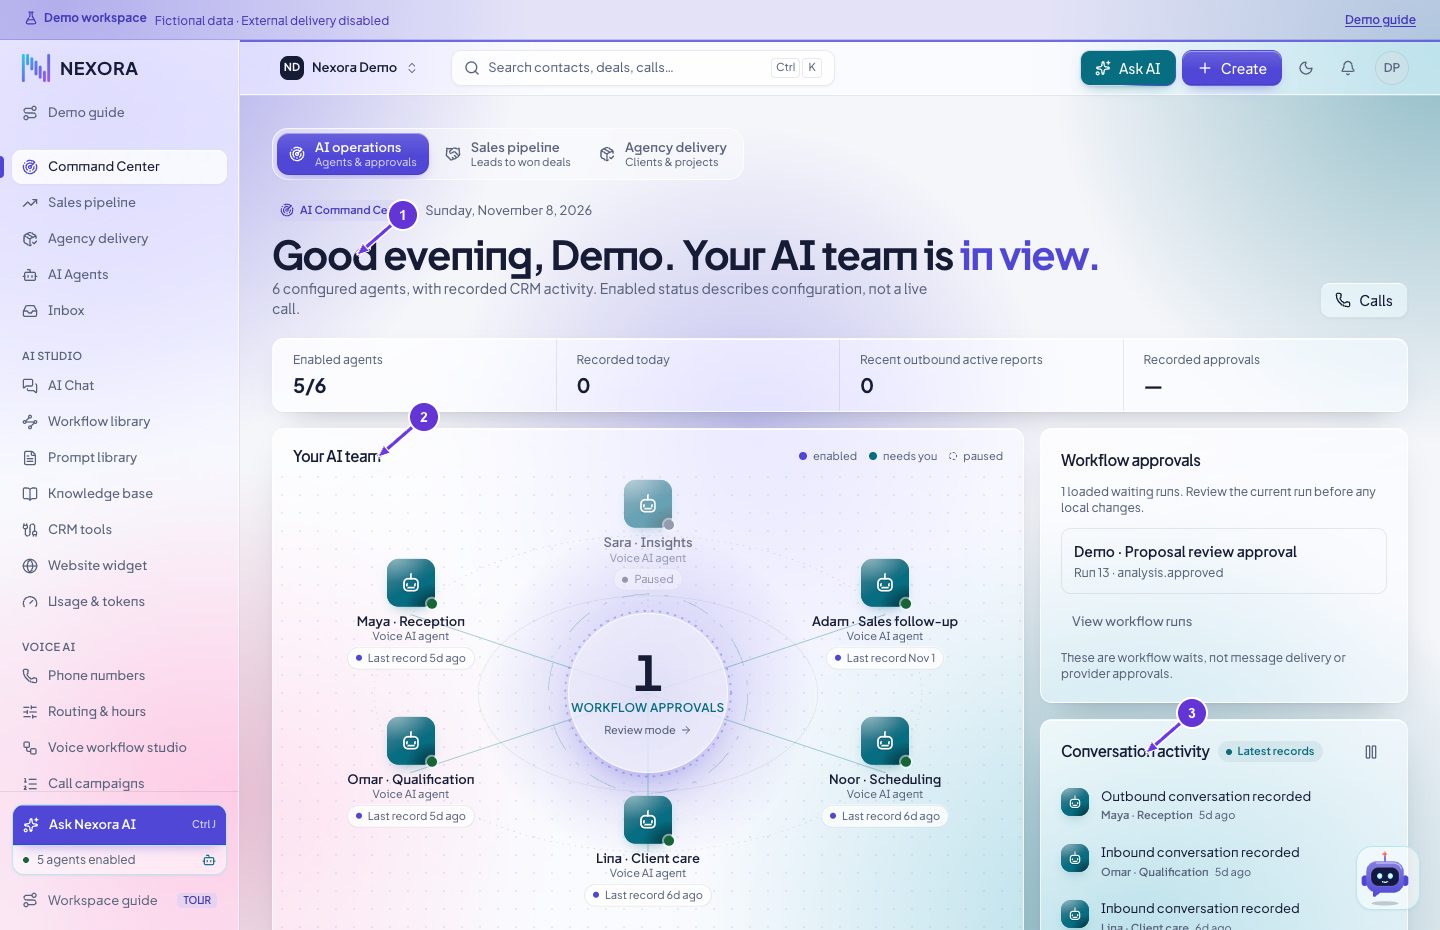
- Good evening, Demo. Your AI team is in view.
- Your AI team
- Conversation activity
Command Center
Open Command Center for agent activity, workflow approvals and recent conversations. Use Refresh dashboard before interpreting a count. Open a call or workflow to inspect its underlying record. Analyze current snapshot suggests checks from the visible facts.
- Good evening, Demo. Your AI team is in view.
- Your AI team
- Conversation activity
Create edit and review records
Find the record before creating a duplicate. Open the action for the exact row, complete the required fields and save. Reopen the record to verify the result. For exports, confirm the filter and selection. For removal, review related activity, permissions and the confirmation shown by the page.
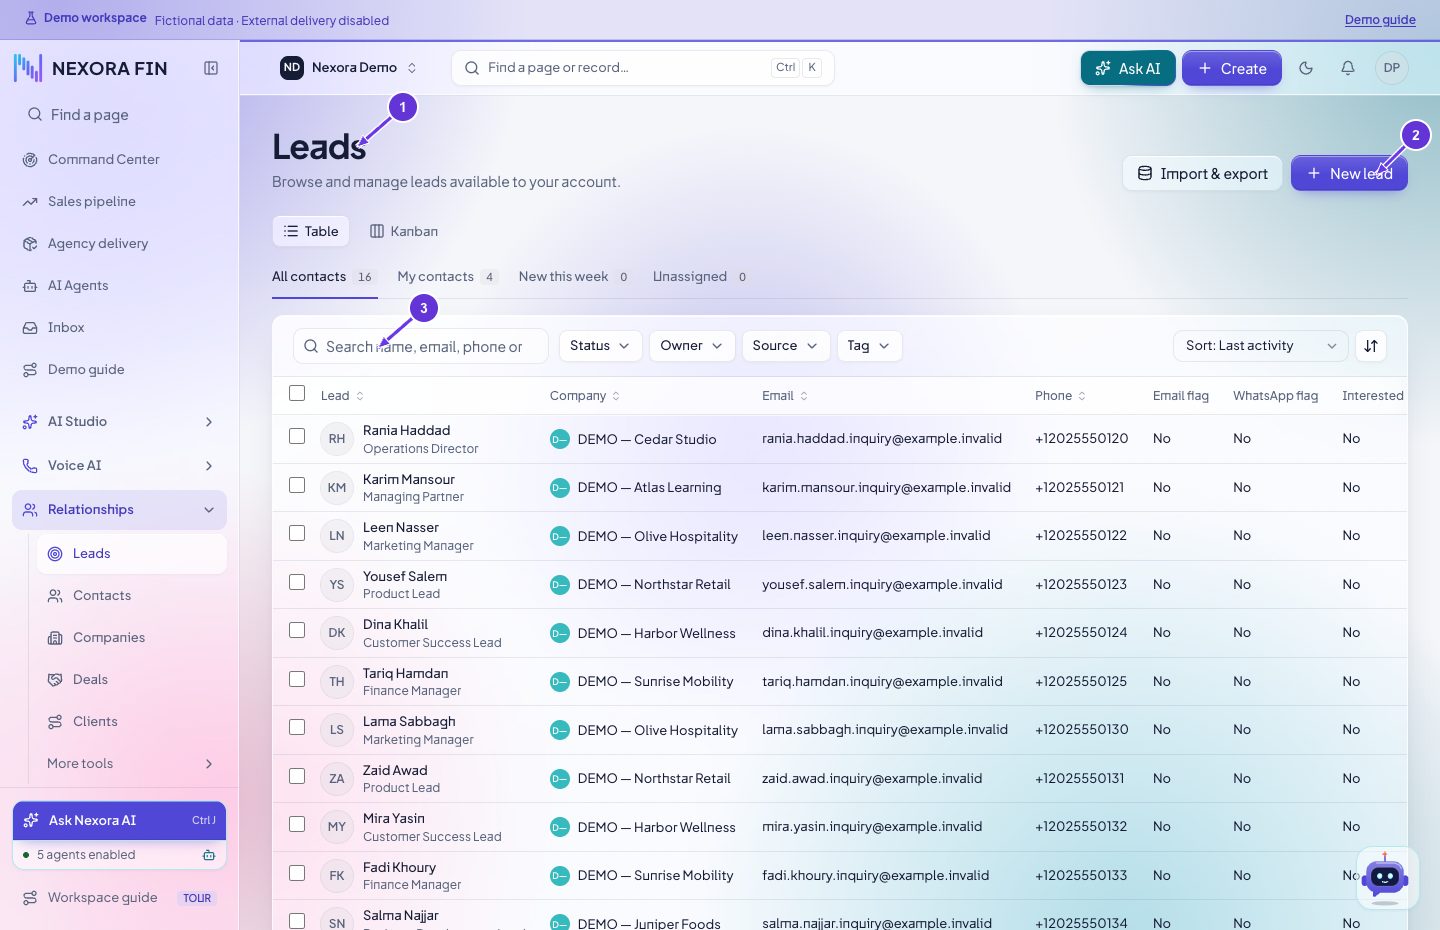
- Leads
- New lead
- Search leads
Client portal
Sign in with the email linked to your customer contact. Review the projects, documents and support tickets shared with your account. Open the specific invoice, estimate, proposal or contract to see the actions available to you. Use the portal recovery link if you cannot sign in.
Open in CRMResolve missing actions and delayed results
Confirm that you are in the correct workspace and have the right role. If a save or send outcome is uncertain, reopen the same record and check its history before retrying. For voice, compare Call event delivery with the provider and workflow history. For messages, check the delivery state and the configured sender.
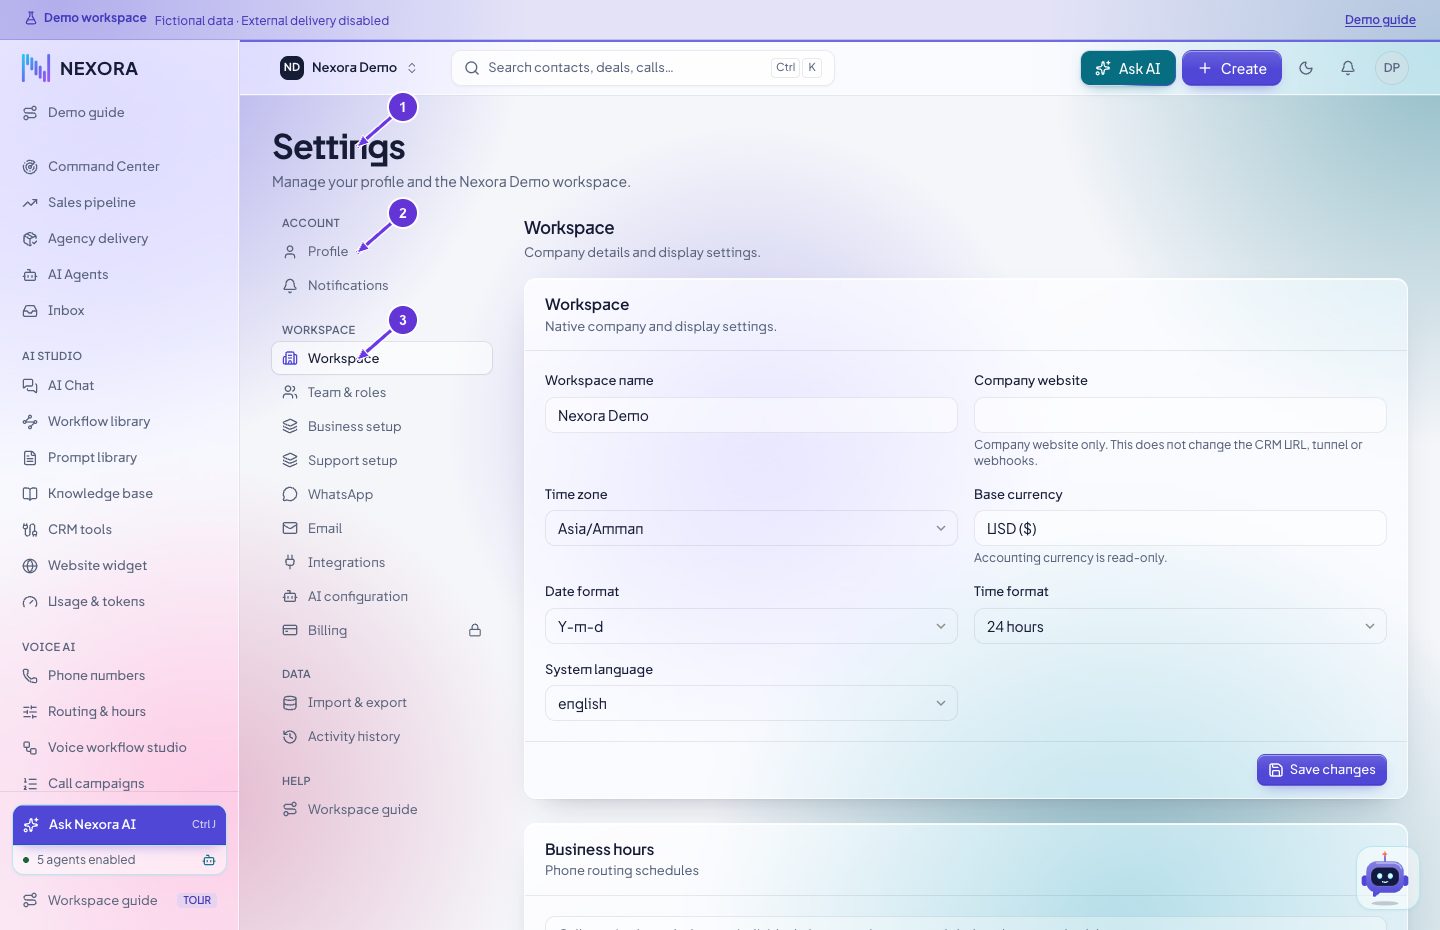
- Settings
- Profile
- Workspace
Workspace settings
Open Settings and choose the relevant category. If an option is absent or read-only, ask an administrator to review your role and permissions. Sign out using the profile menu to end the session. Never share credentials in AI Chat.
- Settings
- Profile
- Workspace
Workspace overview
Open the workspace overview for summary metrics. Use the source pages to verify totals, especially if a section shows limited access or missing data.
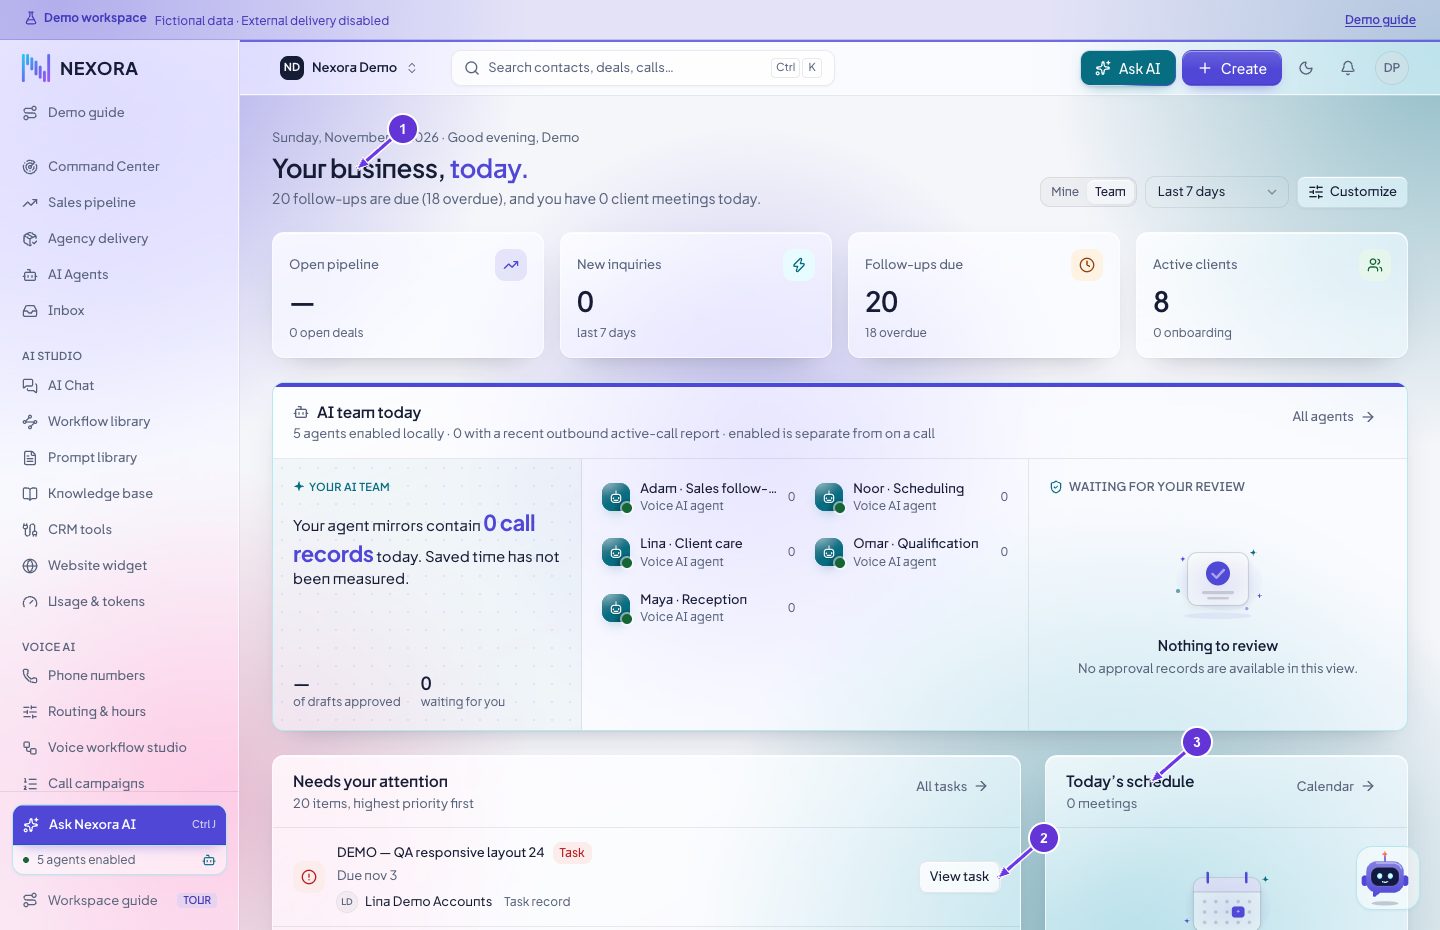
- Your business, today.
- View task
- Today’s schedule
Workspace guide
Open Workspace guide to follow the available walkthroughs, then open the linked pages and complete the relevant setup using your role.
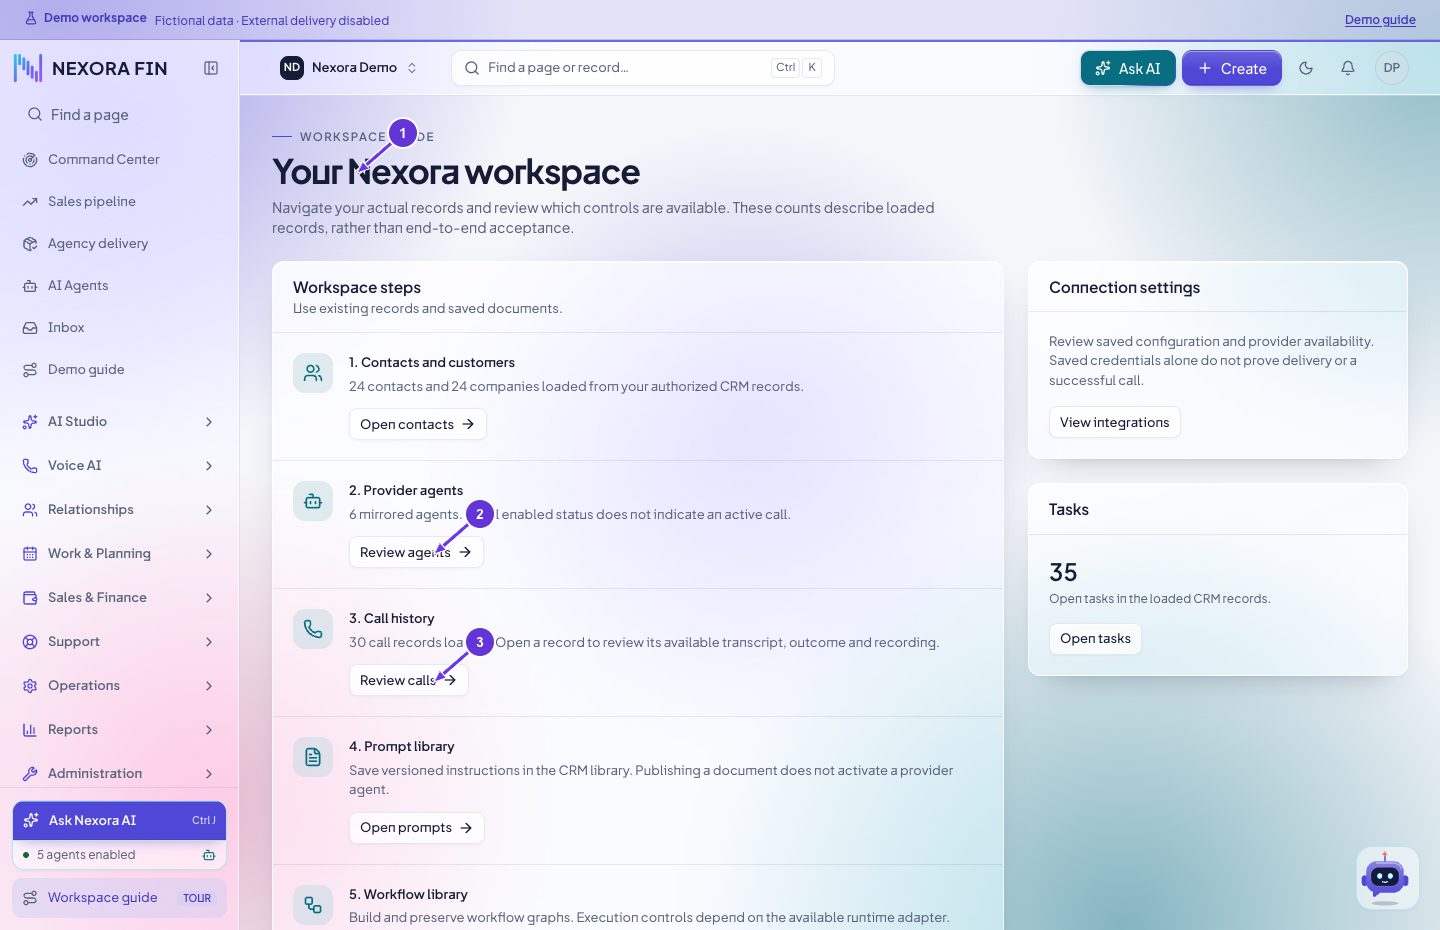
- Your Nexora workspace
- Review agents
- Review calls
Sales and relationships
Sales pipeline
Open Sales pipeline to review stages. Use Deals to find the underlying opportunity, review its owner and current stage, and save any permitted changes on that record. Check the record after a stage change.
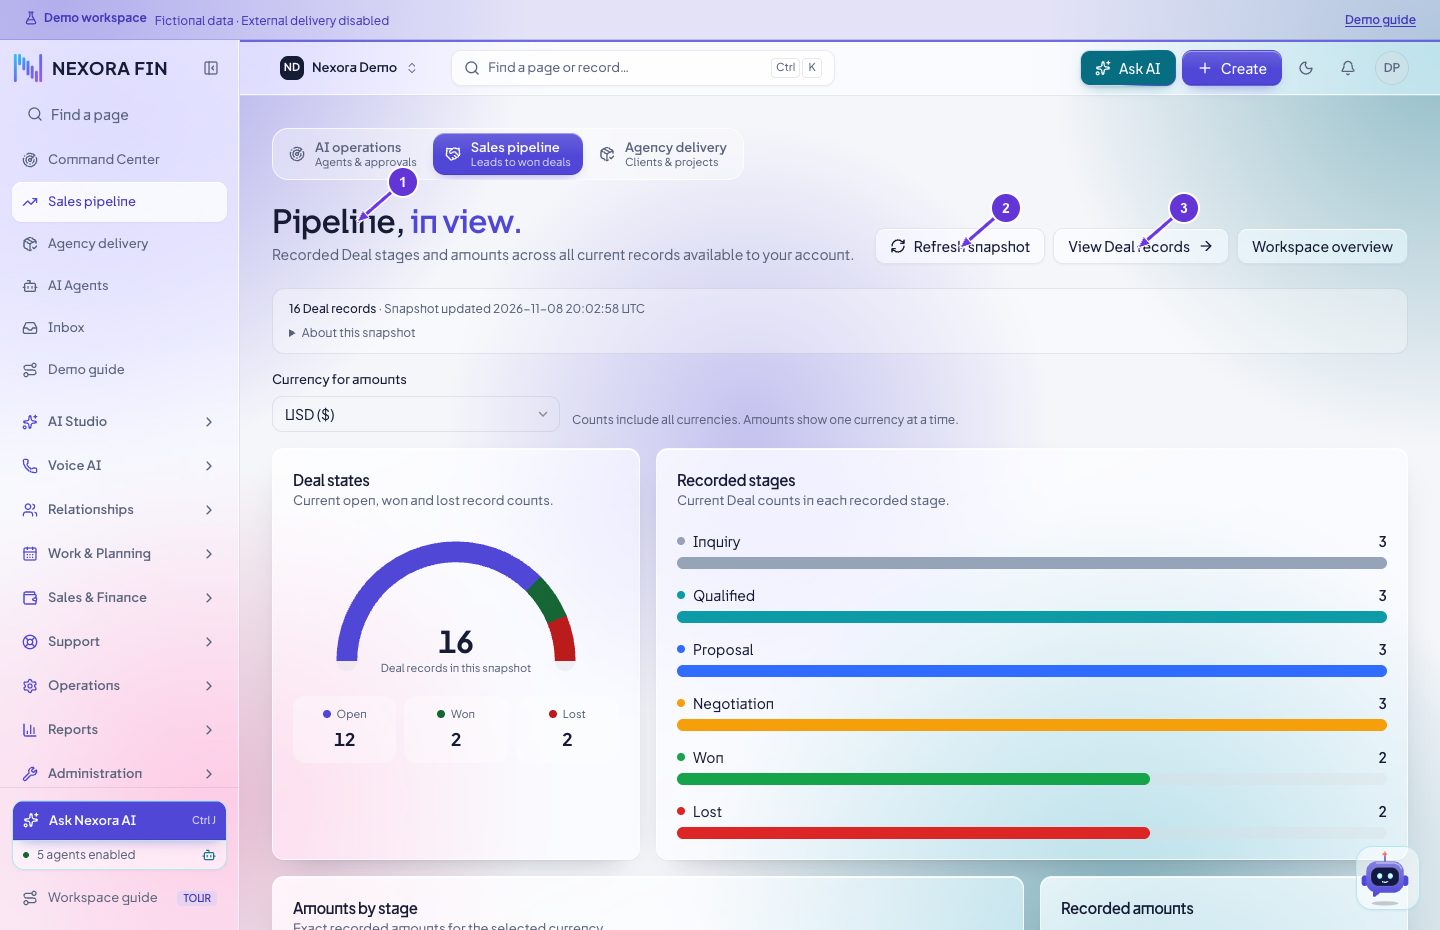
- Pipeline, in view.
- Refresh snapshot
- View Deal records
Leads
Open Relationships → Leads. Filter or search first to check for an existing lead. Select New lead, fill the required fields, choose source and status if available, and save. Search for the new record and open it to confirm the saved details.
- Leads
- New lead
- Search leads
Lead details and Kanban
Open the lead from the list or board to review contact information, source, status and related activity. Use Edit to update the record. To move it through the pipeline, confirm the target status in the board or record editor. Before deletion review attached records and dependent activity, then confirm only the intended lead.
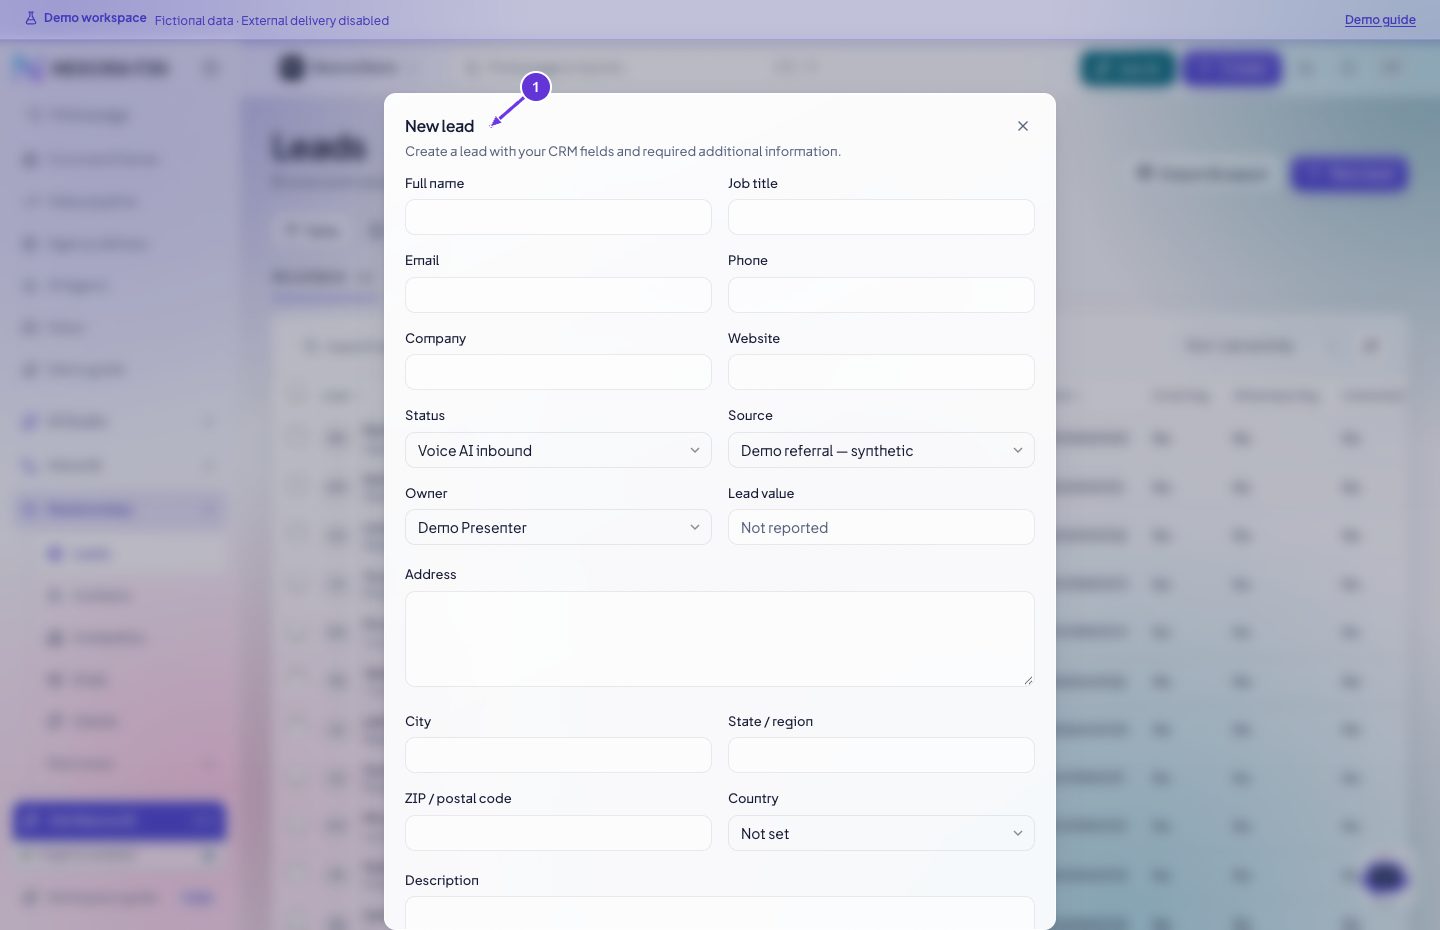
- New lead
Convert a lead
Open Relationships → Leads and select the exact lead. Use the conversion action where available, review the contact and company details, then confirm the resulting customer record.
- Leads
- New lead
- Search leads
Website demo request intake
Use the public demo form with the intended topic or scenario. After confirmation, open Leads and filter by Website Demo and Demo requested. Open the matching record and check the selected scenario in its description. Assign follow-up or book the meeting from Calendar when appropriate.
- Leads
- New lead
- Search leads
Contacts
Open Relationships → Contacts. Use filters to distinguish lead records from saved customer contacts. To add a customer contact, open the client and use its contacts controls. Open the saved contact to confirm the email and linked customer.
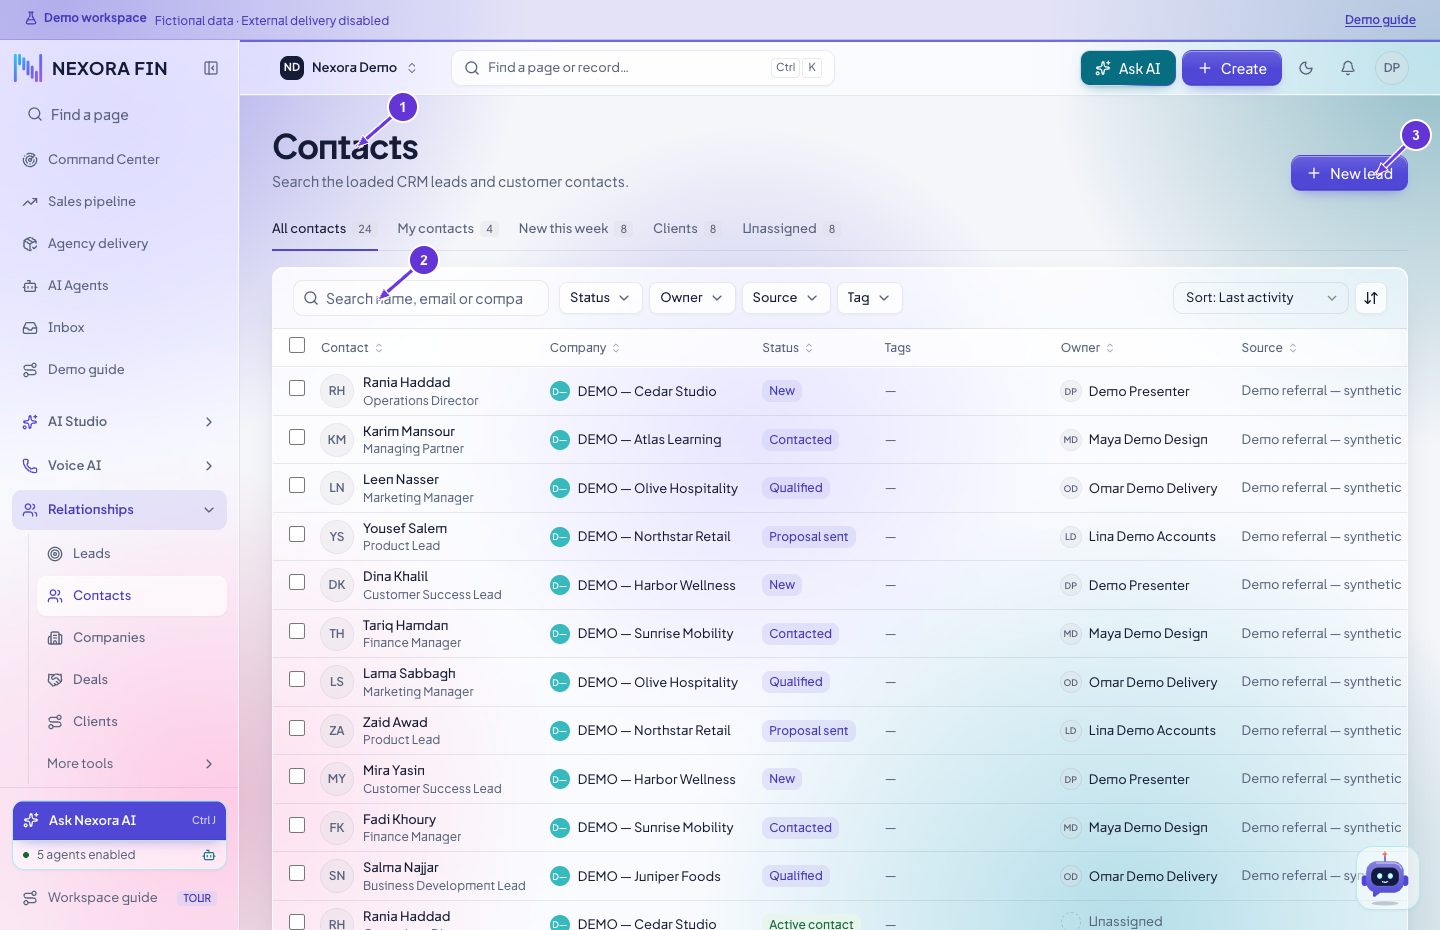
- Contacts
- Search contacts
- New lead
Clients
Open Relationships → Clients and select the client. Review the overview, contacts and related activity. Use the available Create or Edit controls, then reload the client to verify the saved values.
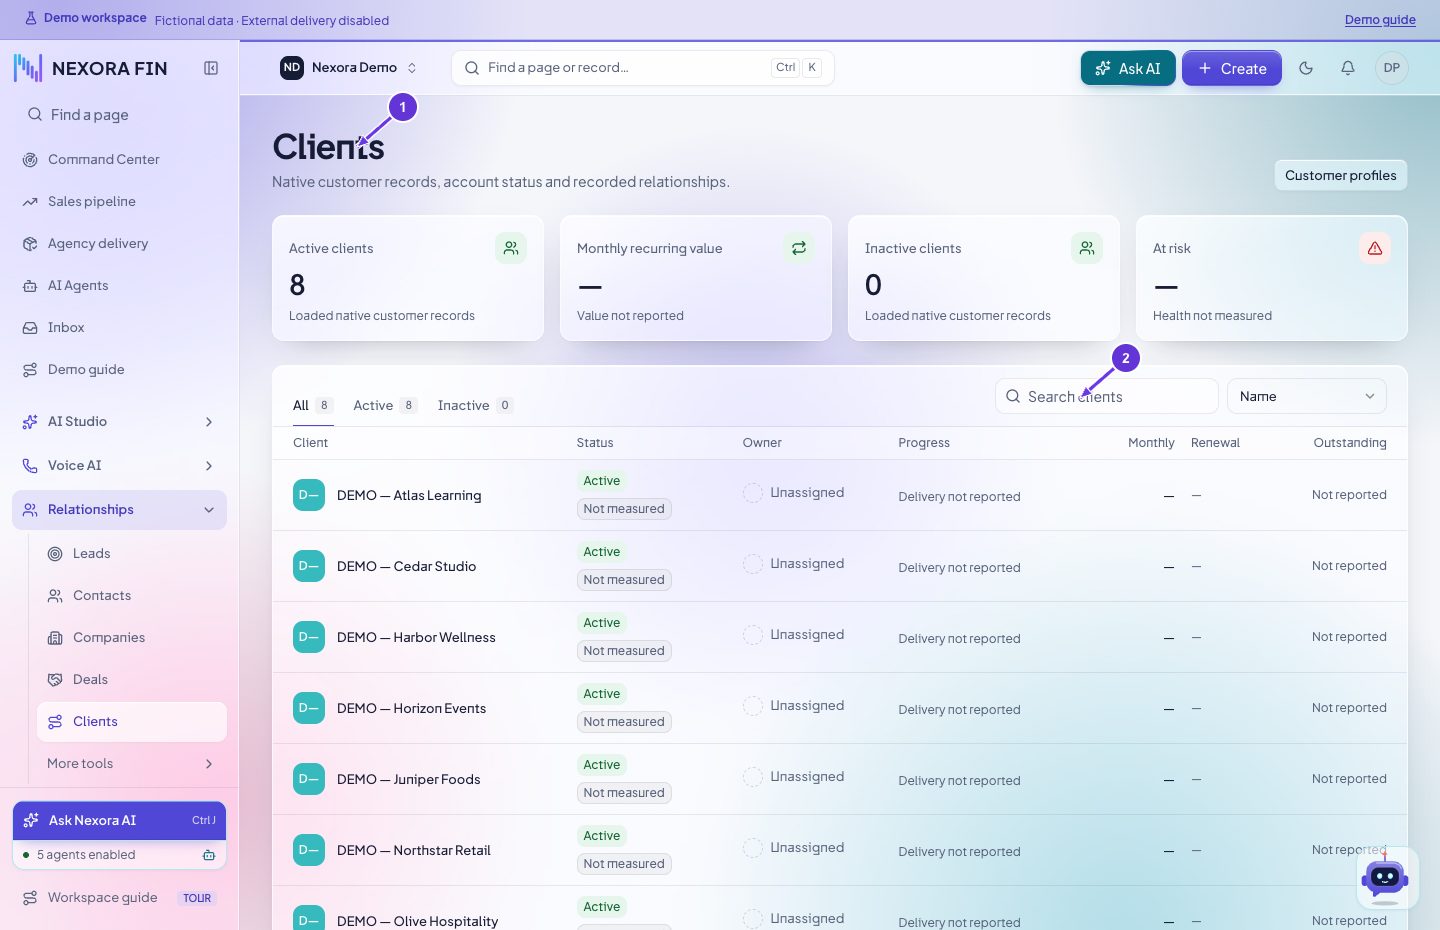
- Clients
- Search clients
Deals
Open Relationships → Deals. Choose the create action, link the opportunity to its customer or lead, select a stage and complete the required fields. Save and reopen the deal. In AI Chat, use CRM records and attach the deal to ask about that record.
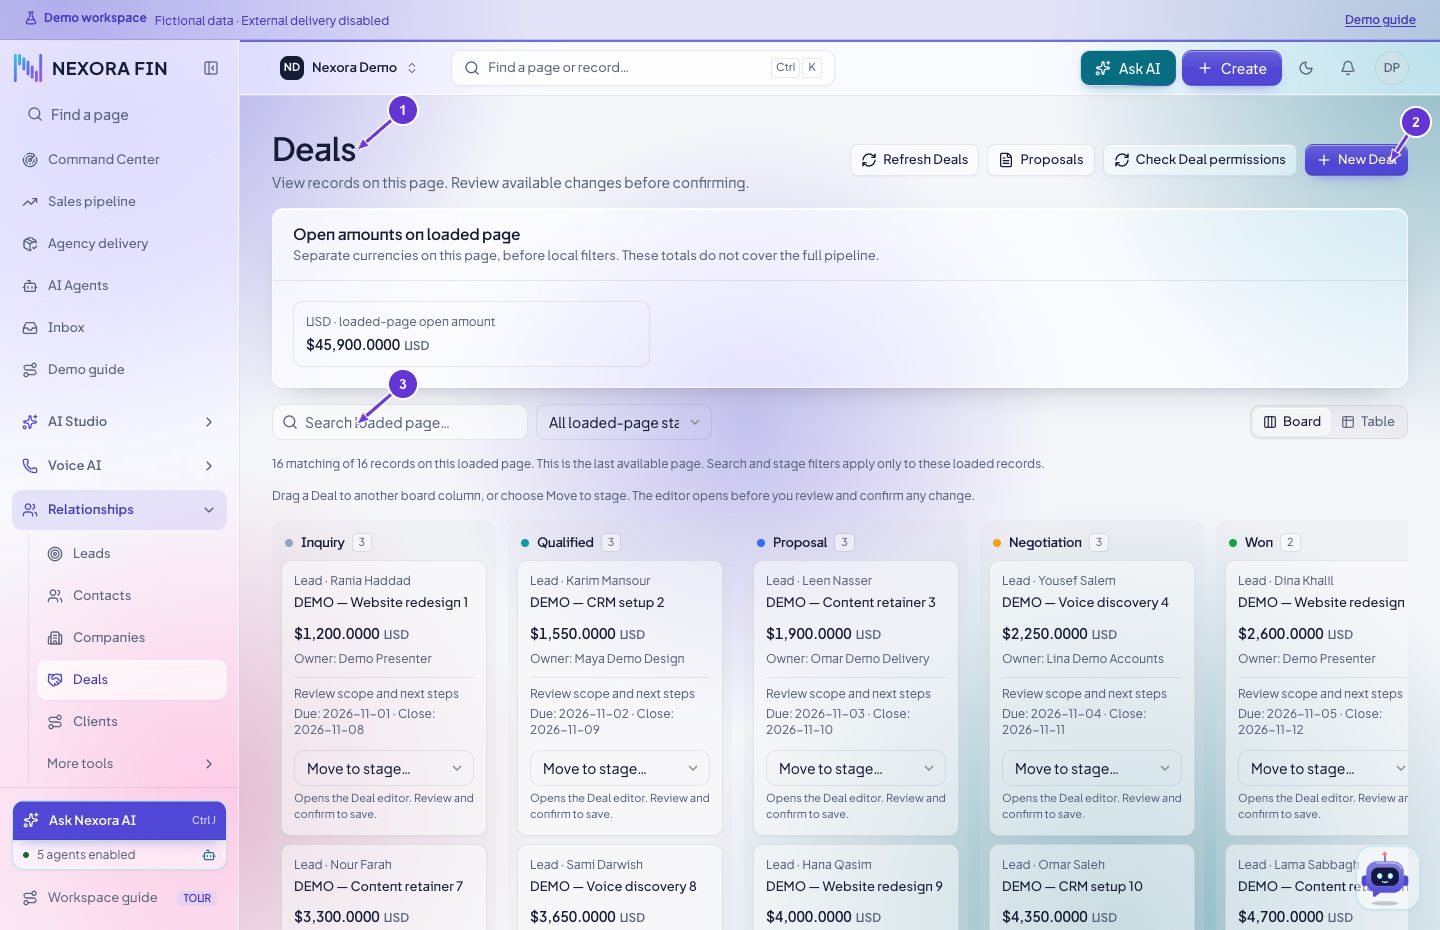
- Deals
- New Deal
- Search loaded Deal page
Companies
Open Relationships → Companies and select the organization. Review its linked contacts, customers and activity before editing the record.
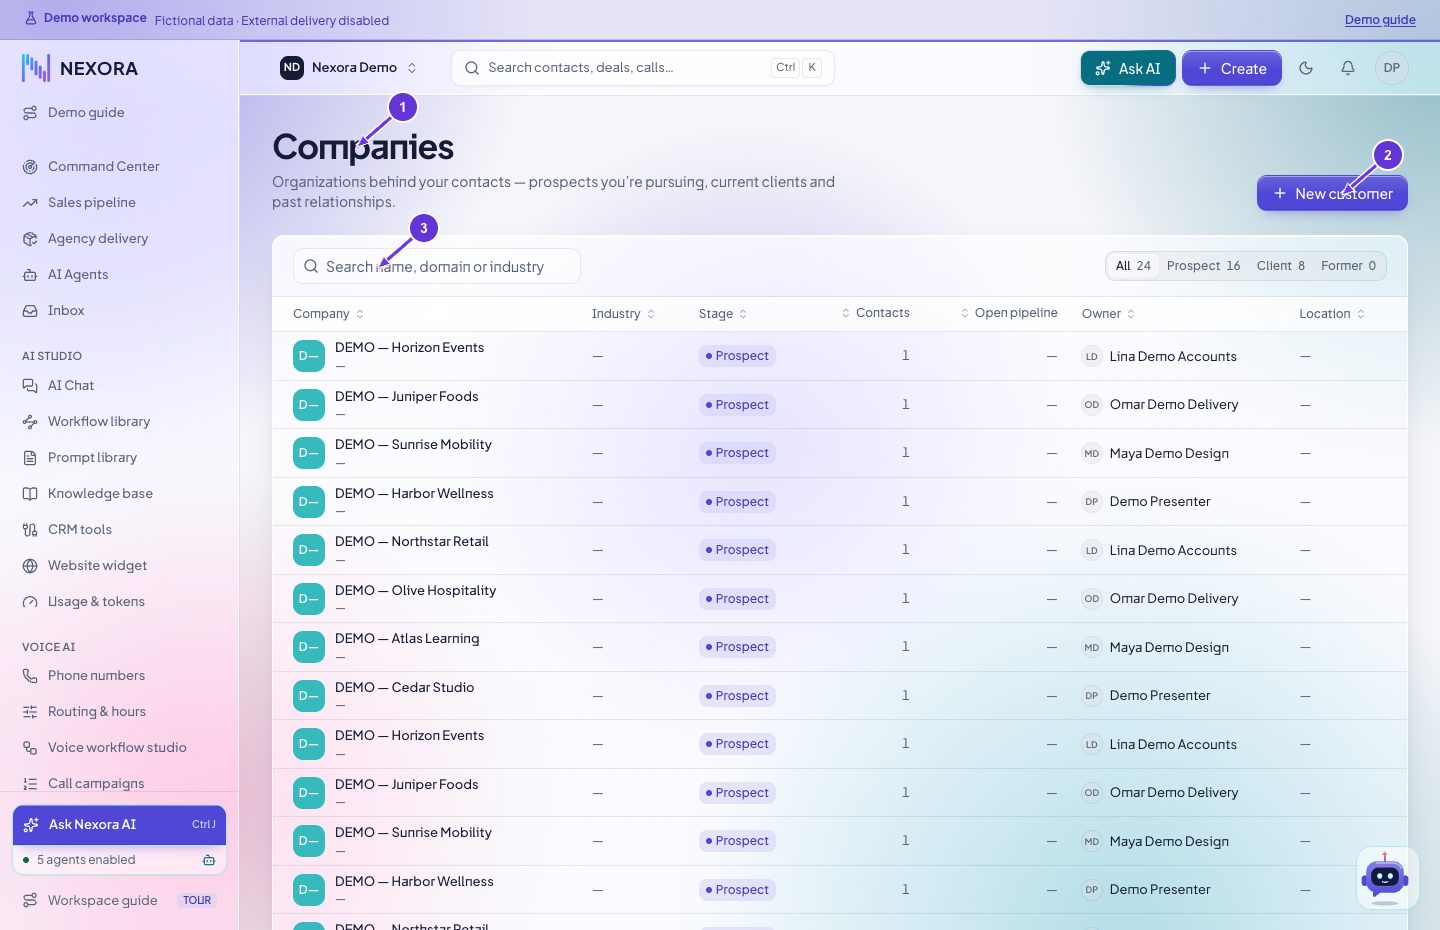
- Companies
- New customer
- Search companies
Advanced lead tools
Open Relationships → Advanced lead tools. Filter by status or source, select the exact rows, and review the selected set before exporting or performing a bulk action. Use Leads to verify the updated records.
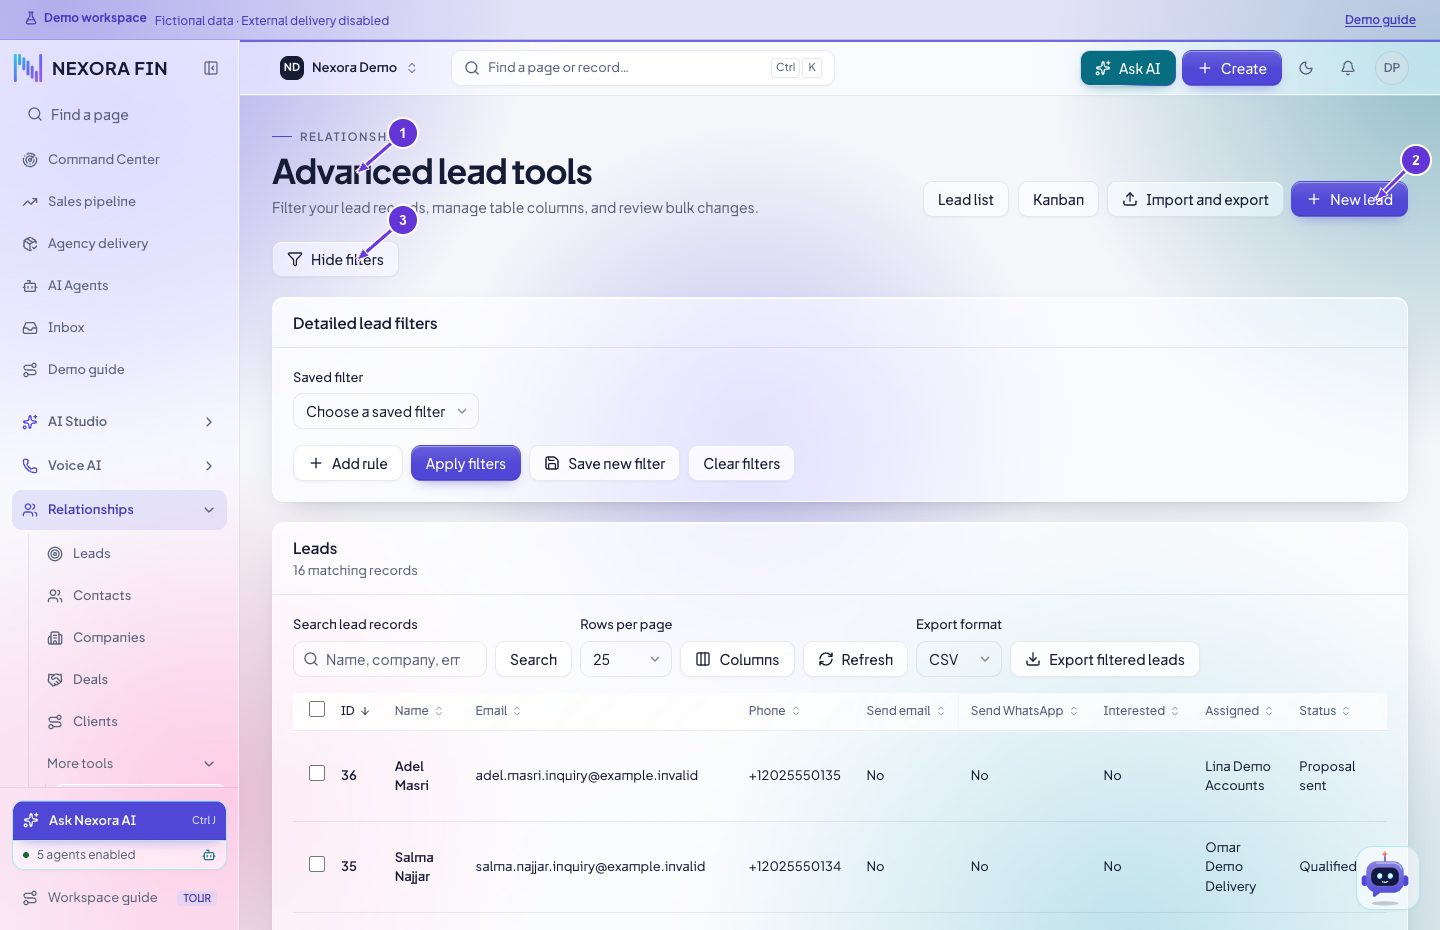
- Advanced lead tools
- New lead
- Hide filters
Surveys
Open a survey and review its questions, audience and recorded responses. Preview before publishing or sending.
Open in CRMCustomer groups
Create or edit the grouping label, save it, then check it appears when editing a customer. Review current assignments before deleting a group.
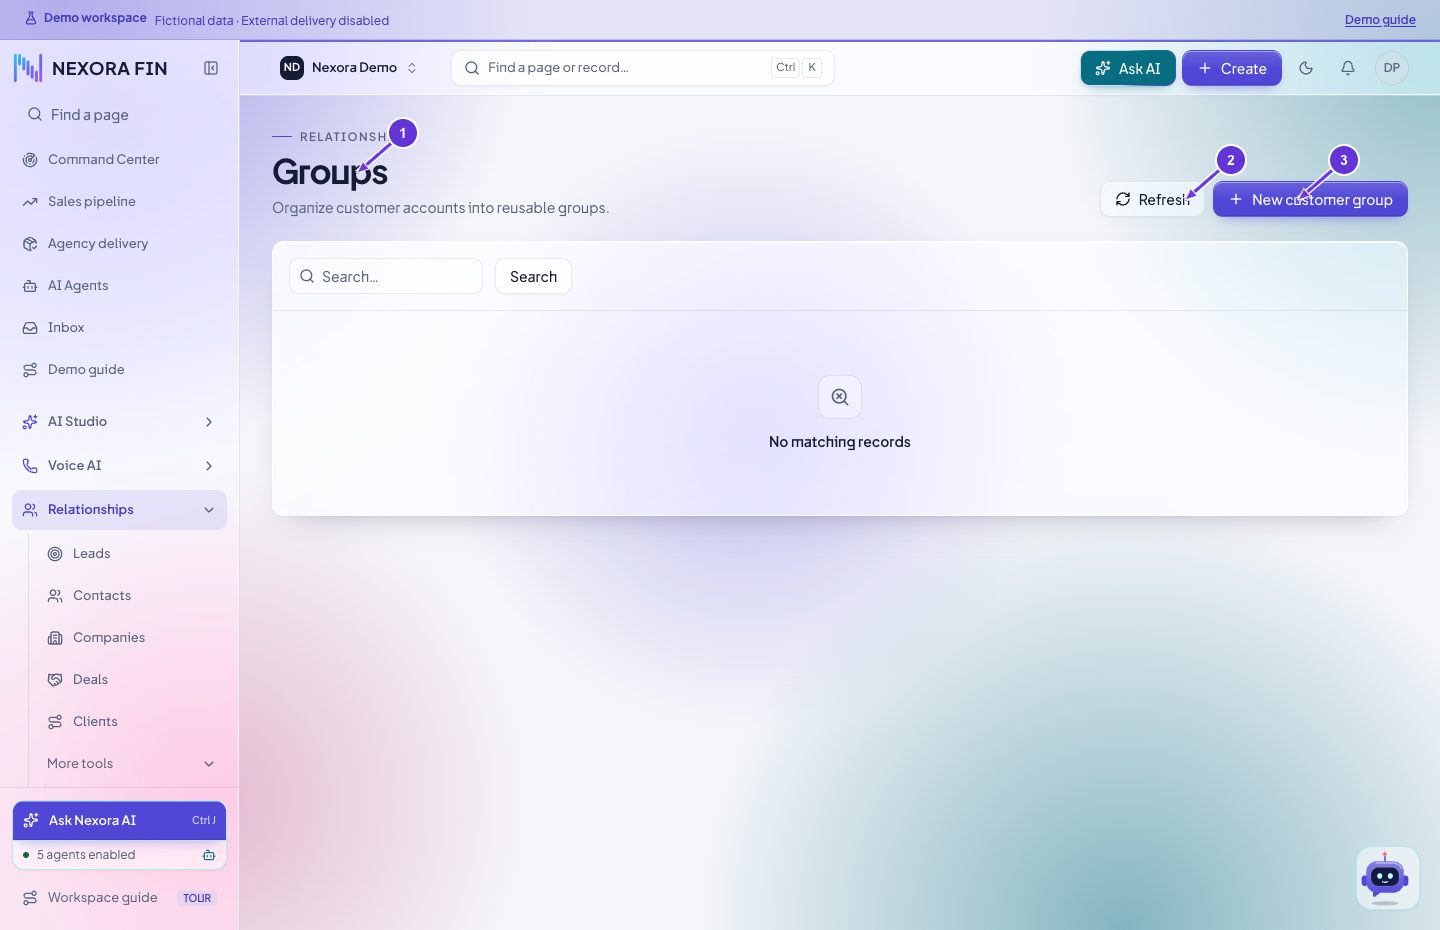
- Groups
- Refresh
- New customer group
Import leads from email
Review the incoming mailbox and mapping settings. Save the configuration and send a controlled test to the configured mailbox to verify lead creation.
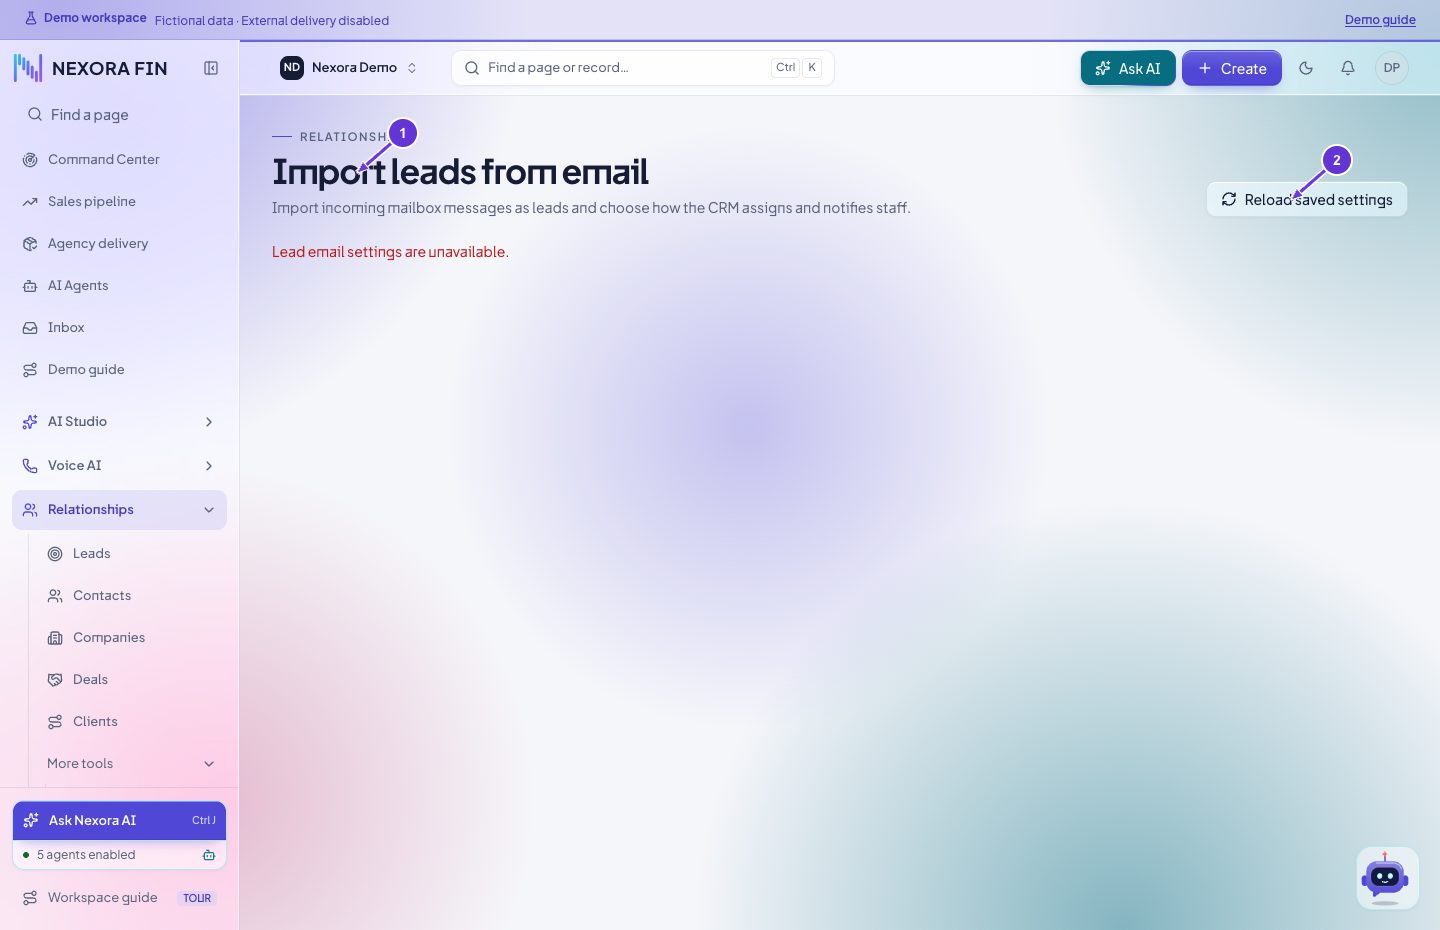
- Import leads from email
- Reload saved settings
Website lead forms
Create or edit the form and required fields, review assignment and submission behavior, and use the generated embed code. Test one submission and find the resulting lead.
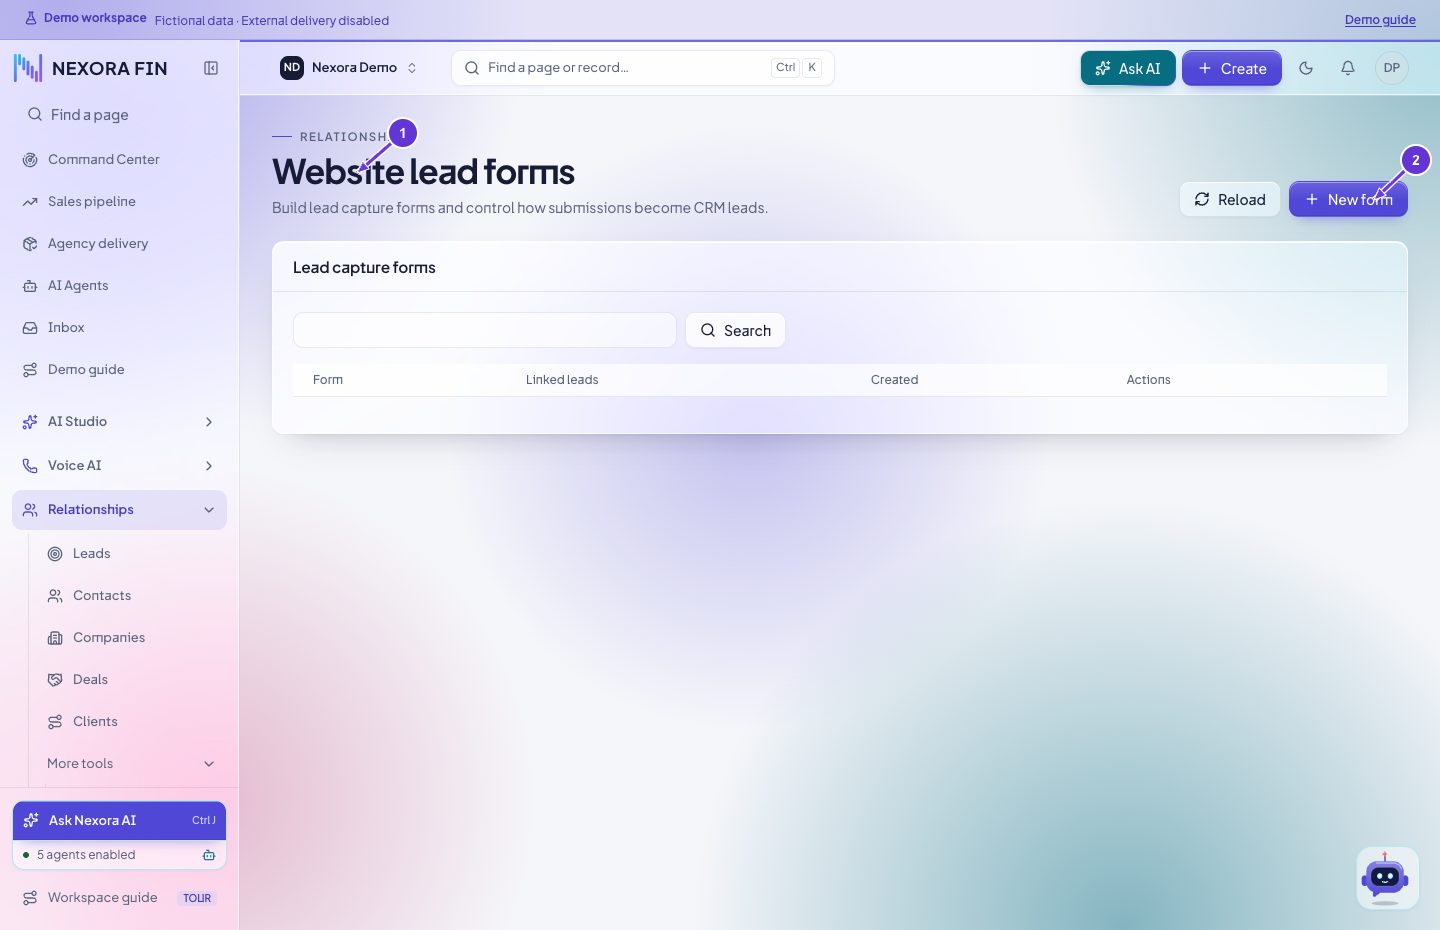
- Website lead forms
- New form
Customer privacy
Find the exact customer or privacy request. Review the data scope and available actions before export, deletion or consent changes.
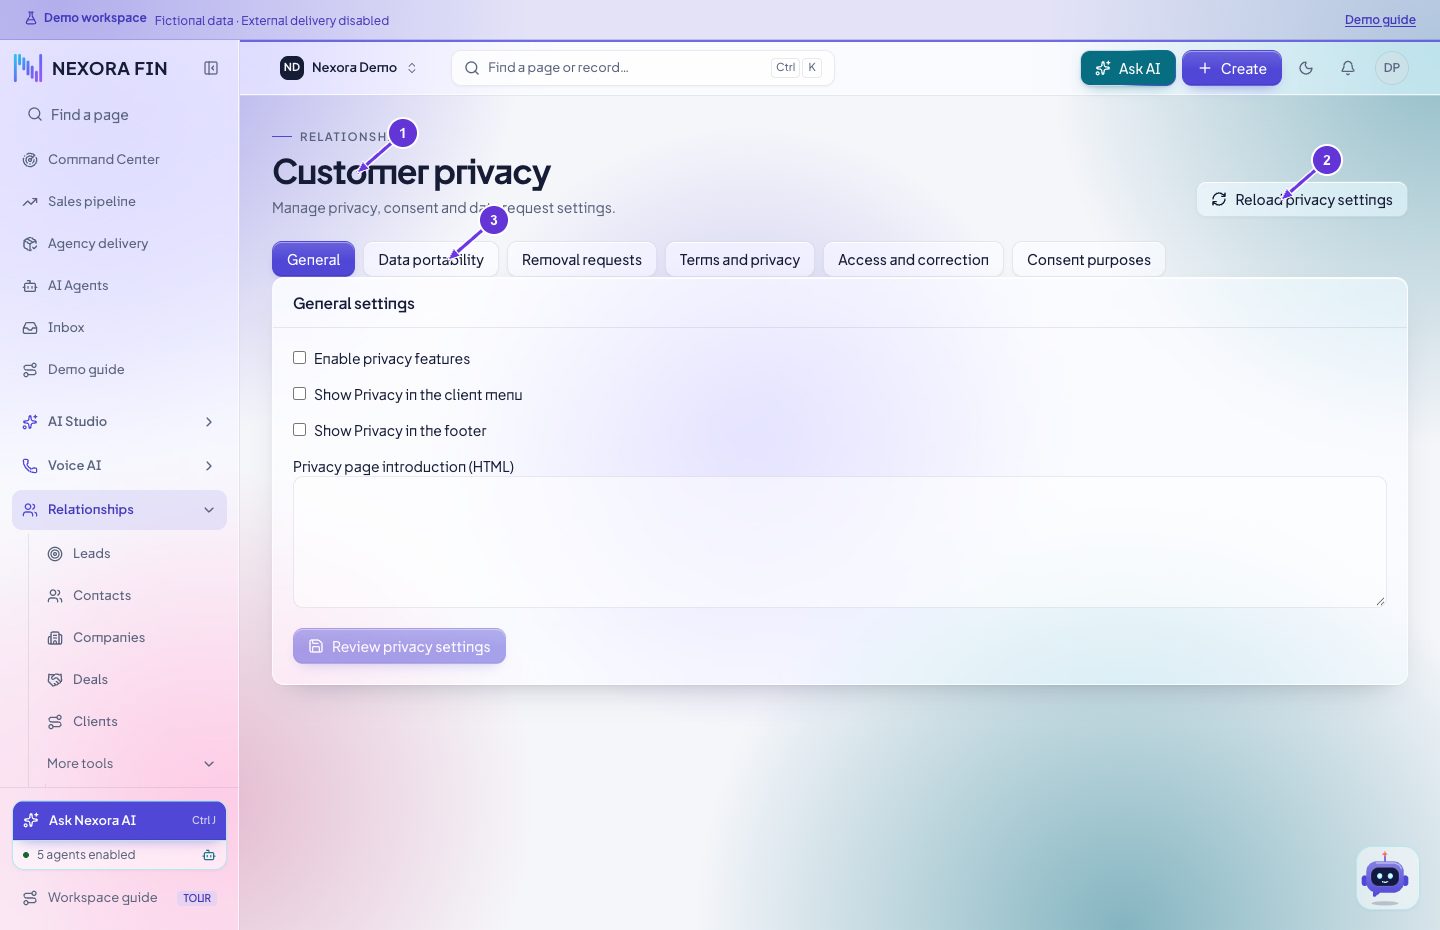
- Customer privacy
- Reload privacy settings
- Data portability
Work and planning
Agency delivery
Review the delivery view by client and project. Open the underlying project or task to inspect dates, ownership and current progress.
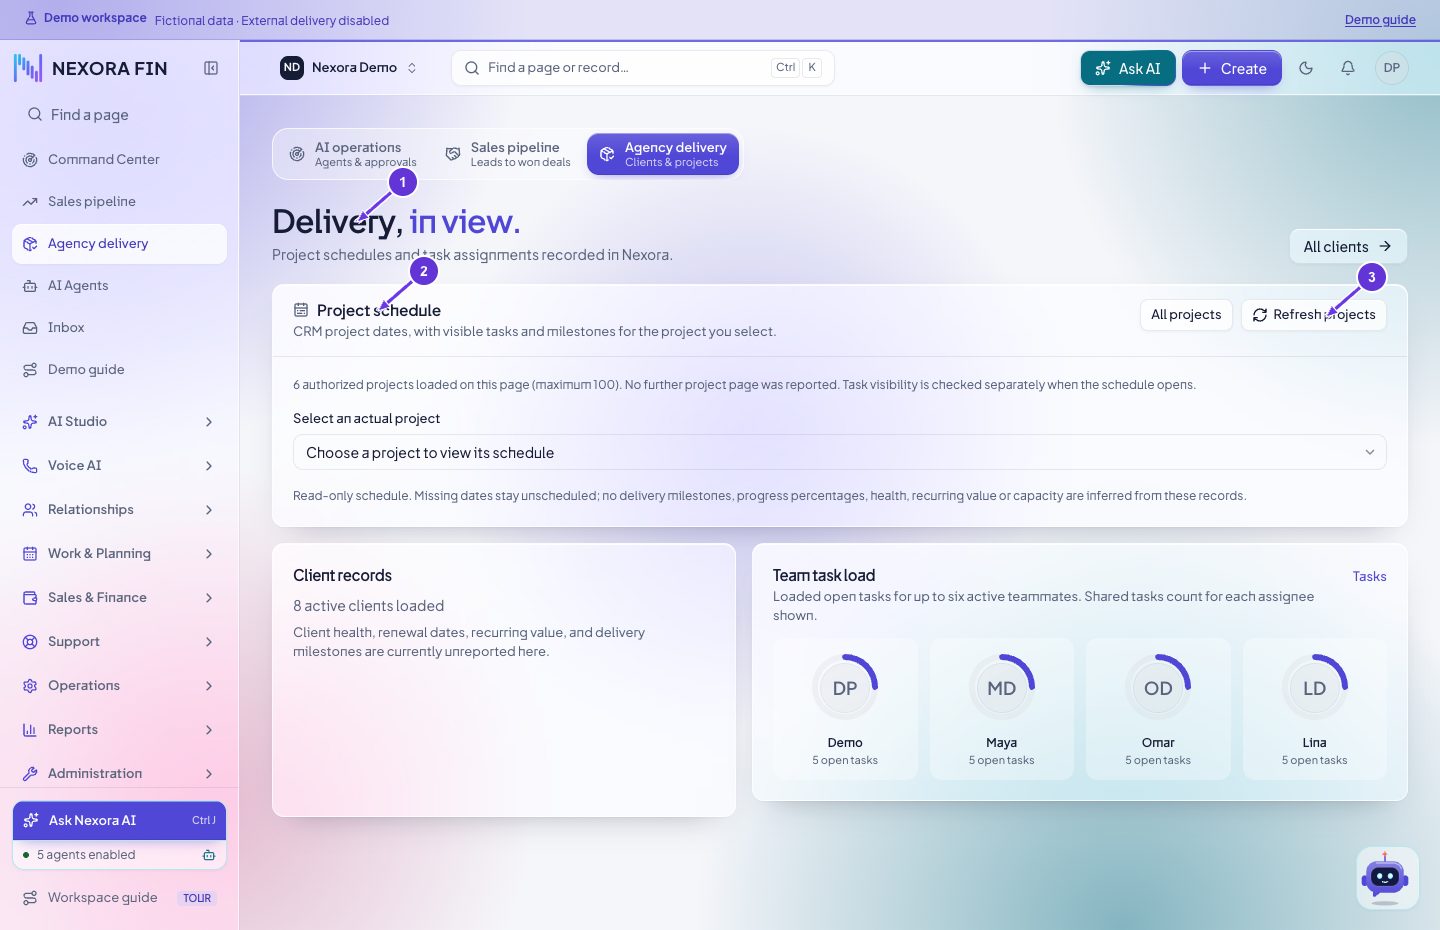
- Delivery, in view.
- Project schedule
- Refresh projects
Calendar
Open Work & Planning → Calendar. Change the date range or switch between Day, Week, and Agenda to find an event. Open it to confirm the time. If New event is available, use it to choose the date and time in the workspace time zone and save.
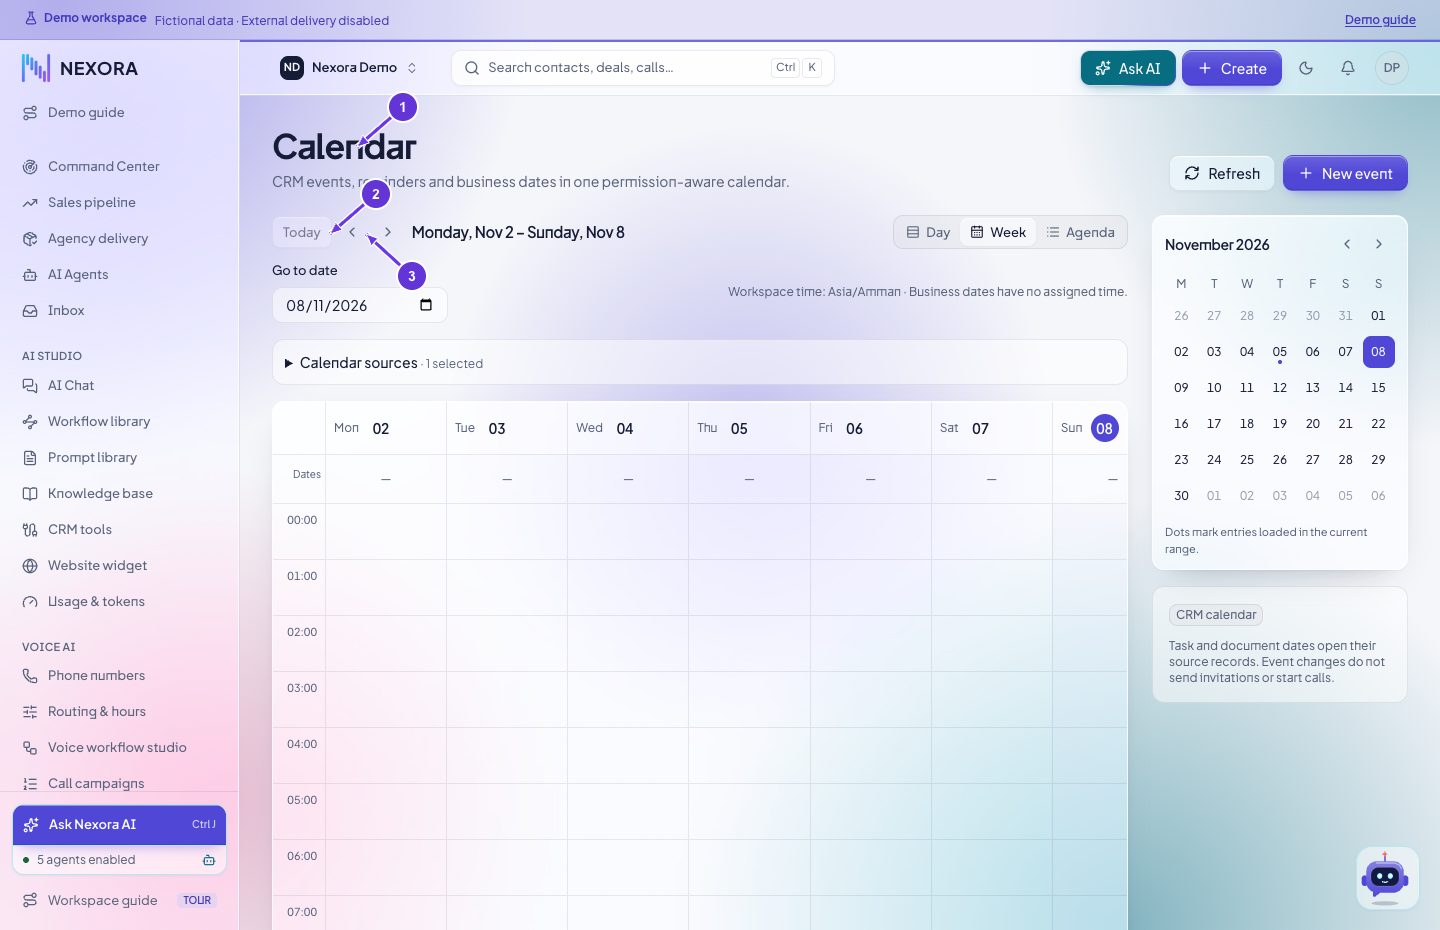
- Calendar
- Today
- Previous week
Book an appointment from the calendar
Open Appointments and choose the staff calendar and date. Select a lead and an available time, enter the title and save. Reopen the saved appointment to verify the lead, time zone and start time. To move or cancel it, use the appointment action so availability is updated with the record.
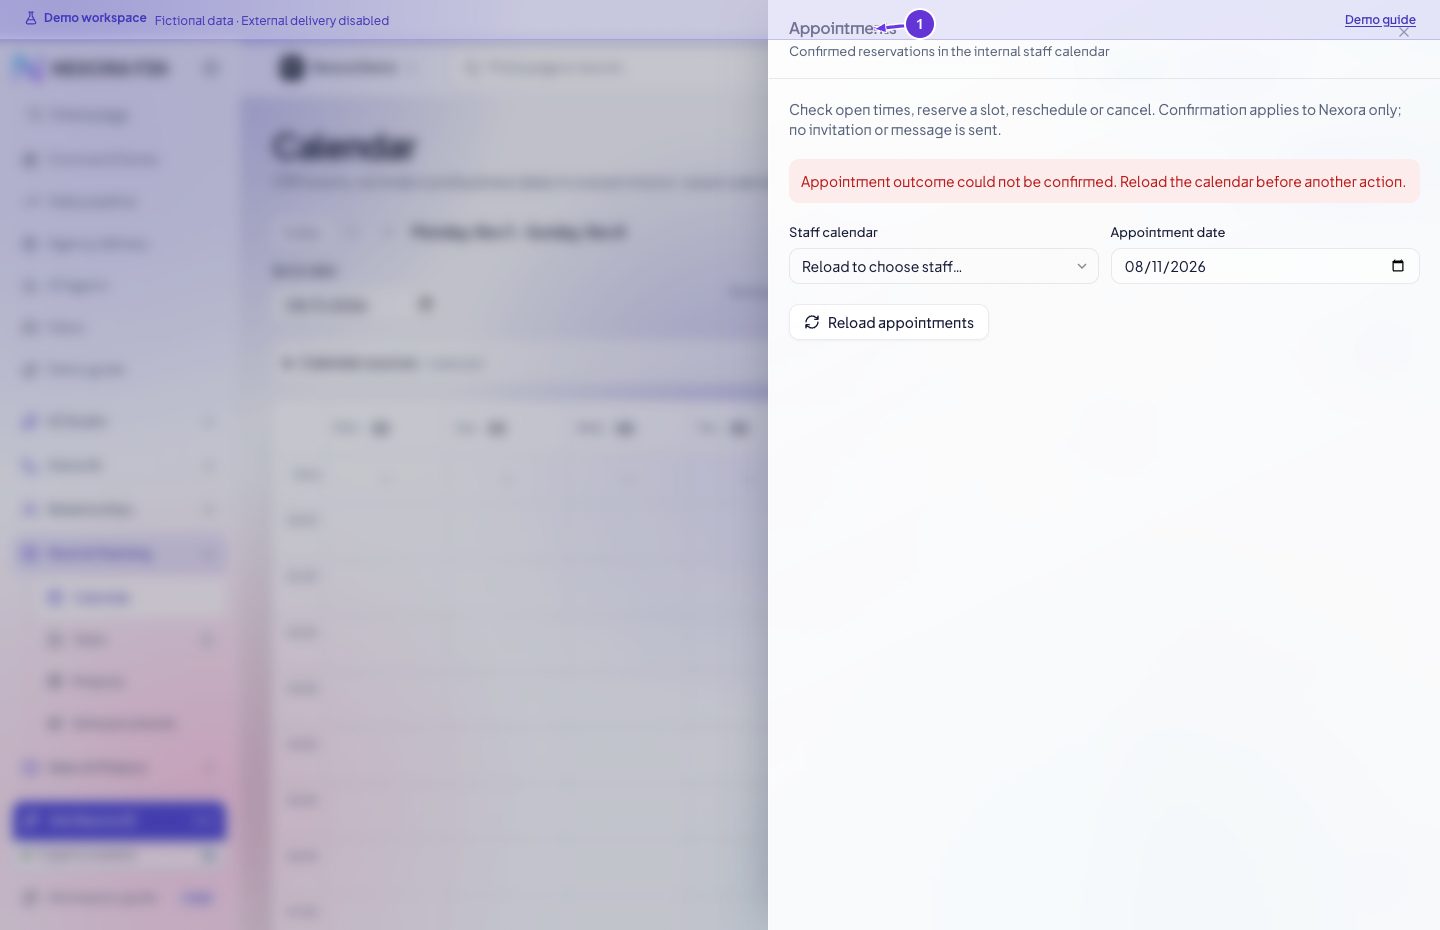
- Appointments
Tasks
Open Work & Planning → Tasks. Choose New task, enter a title and set the due date, priority, assignee and related record as needed. Save, reopen the task and check that the owner and due date persisted.
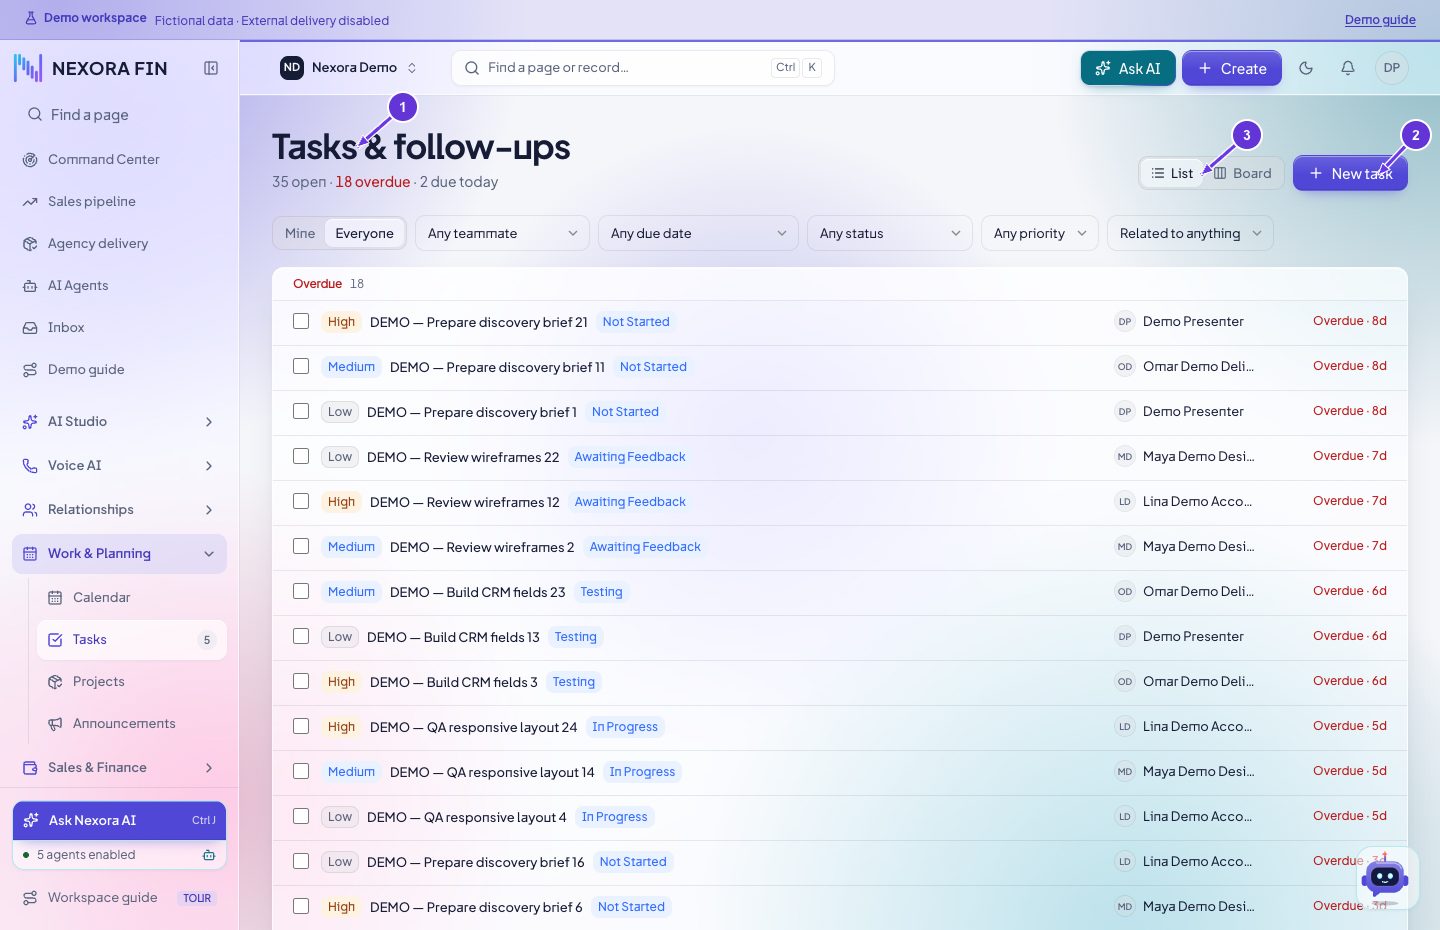
- Tasks & follow-ups
- New task
- List
Projects
Open Work & Planning → Projects. Open the project to review its status, milestones and related tasks. Use the permitted Create or Edit action and reopen the saved record to confirm the changes.
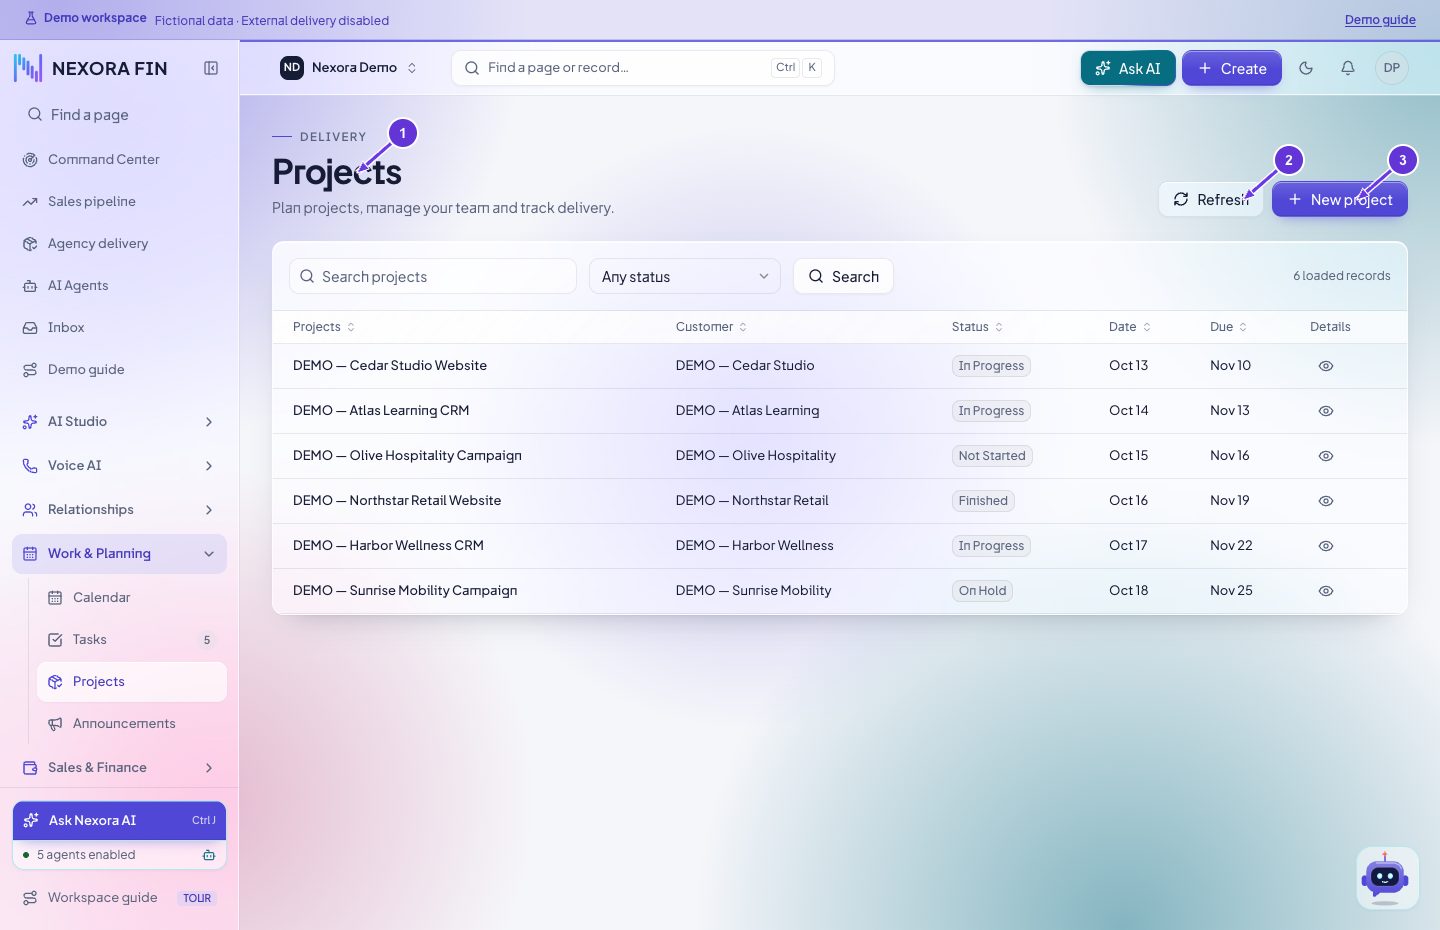
- Projects
- Refresh
- New project
Project workspace tabs
Open the project and use the sections available to your role. Review Overview for status, Tasks and Milestones for delivery, and Discussions, Files and Timesheets for collaboration and tracking. Check the project identity before adding or editing an item.
- Projects
- Refresh
- New project
Announcements
Open Work & Planning → Announcements. Prepare the title and message, then check staff and customer visibility before saving. Reopen the announcement and verify its audience and display.
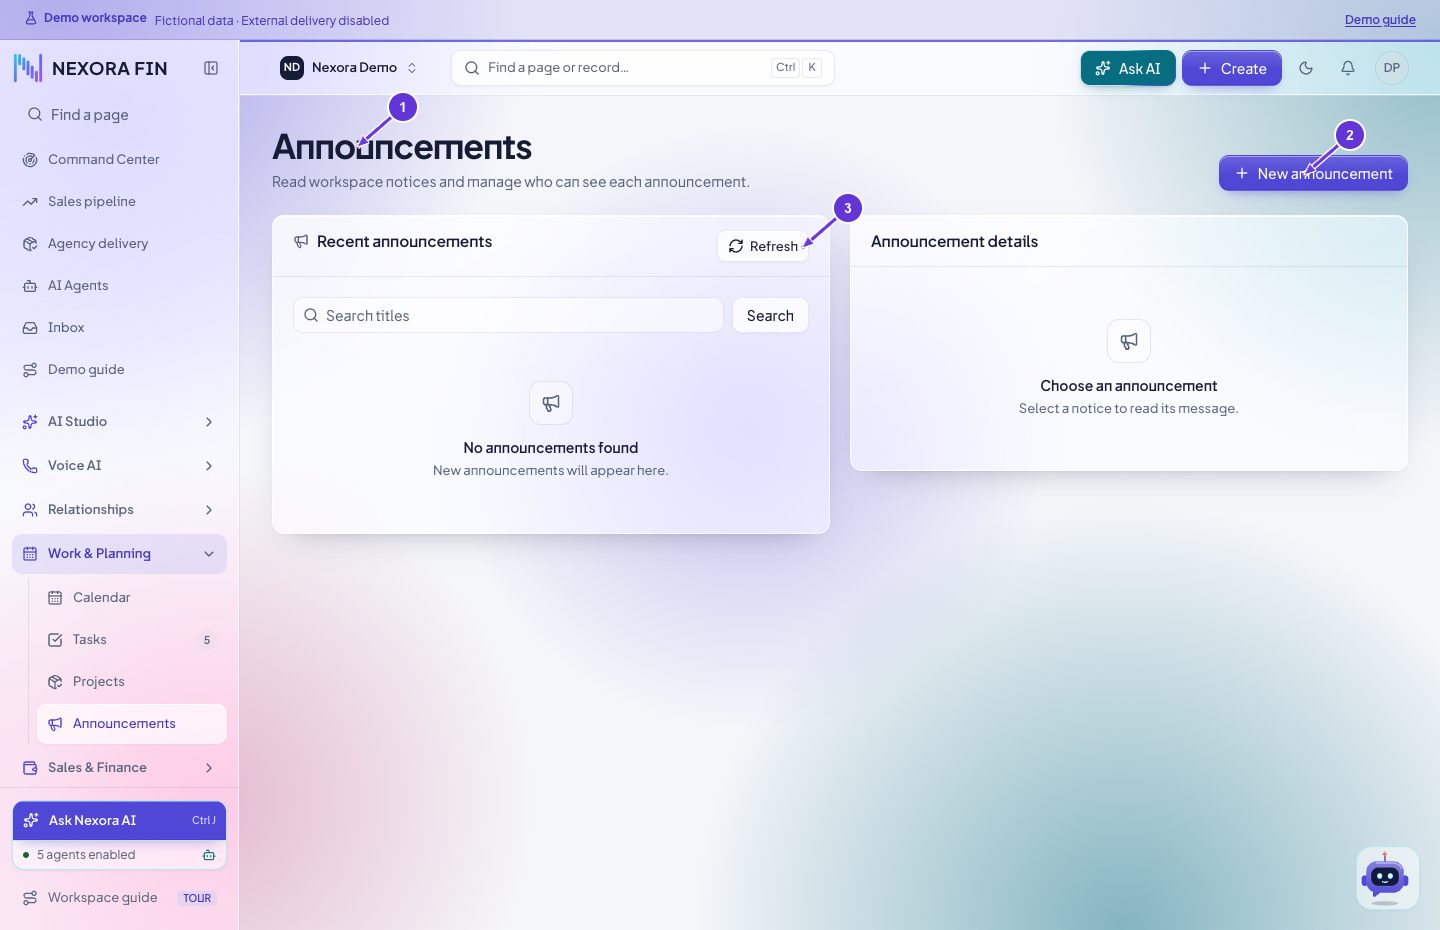
- Announcements
- New announcement
- Refresh
Goals tracking
Open the goal and review its period, metric and progress. Check the underlying record before modifying the goal.
Open in CRMAI studio and agents
AI Agents
Open AI Agents and select the agent, then Configure. Use the settings sections to change the desired values, review the change and save. Reopen the agent and verify the provider response. Phone assignments and local CRM eligibility are separate controls.
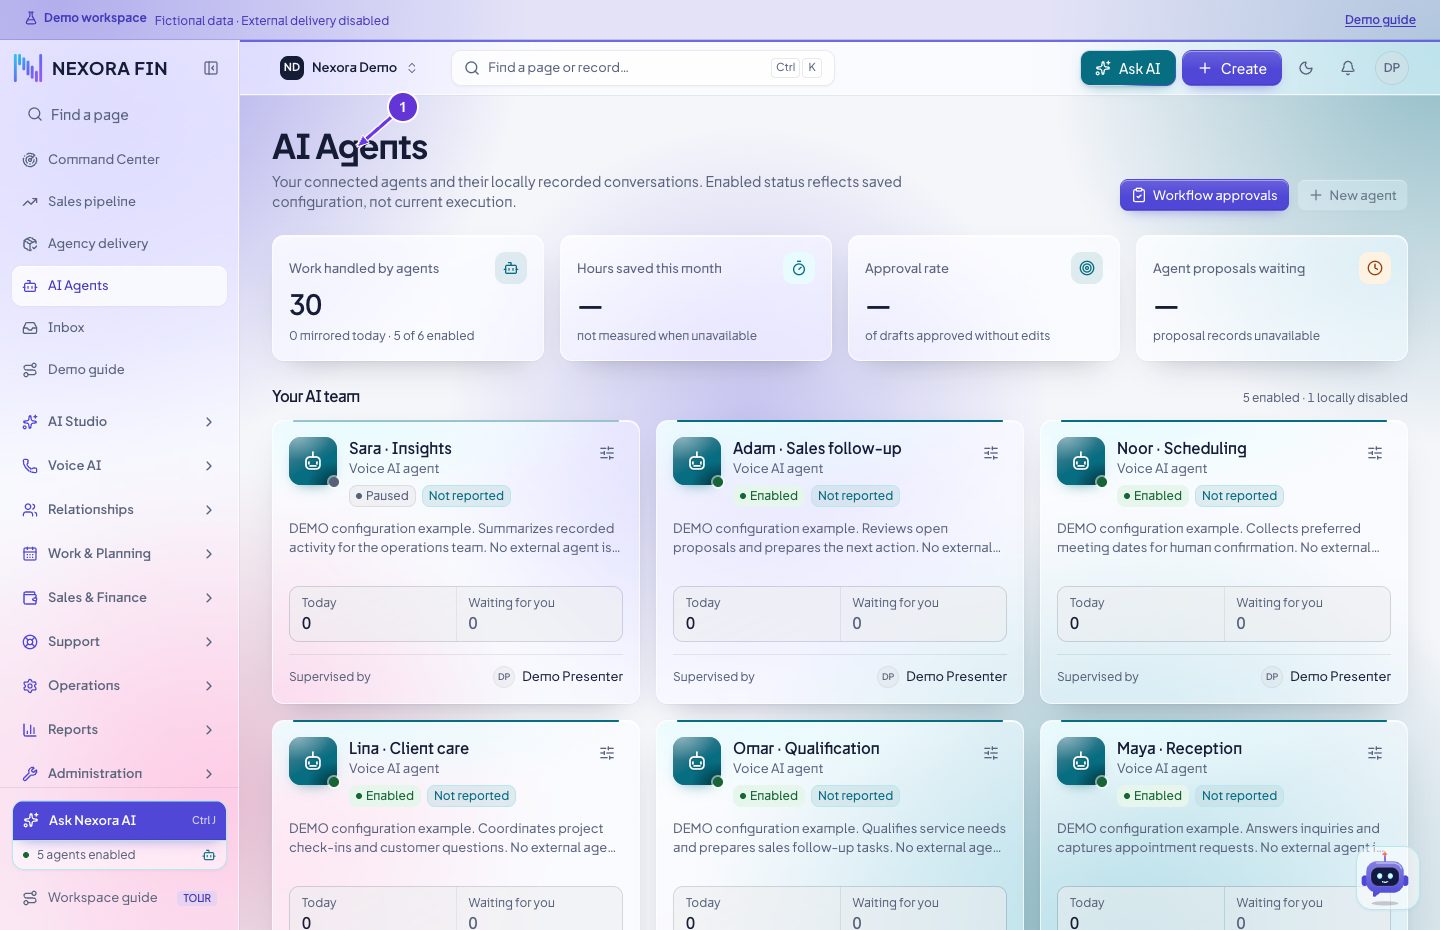
- AI Agents
Agent Overview tab
Open AI Agents and select the agent. Open Overview to review its provider, settings summary and available connections.
- AI Agents
Agent Activity tab
Open AI Agents and select the agent. Open Activity to review recorded conversations and recent events, then select a call for details.
Open in CRMAgent Configure tab
Open AI Agents and select the agent. In Configure, change the specific supported setting, review the proposal and verify the saved provider values.
Open in CRMAgent Test tab
Open AI Agents, select the agent, and open Test. Check the testing availability notice. When the page reports that the provider sandbox is not connected, the composer and Send are disabled and no test is run here. Verify the provider connection before choosing an authorized testing method.
Open in CRMAI Chat
Open AI Studio → AI Chat. Use Product help for step-by-step instructions, or select CRM records and attach a supported record for a scoped answer about its contents. A follow-up in Product help can use earlier support turns in the same chat. Keep passwords and keys out of chat.
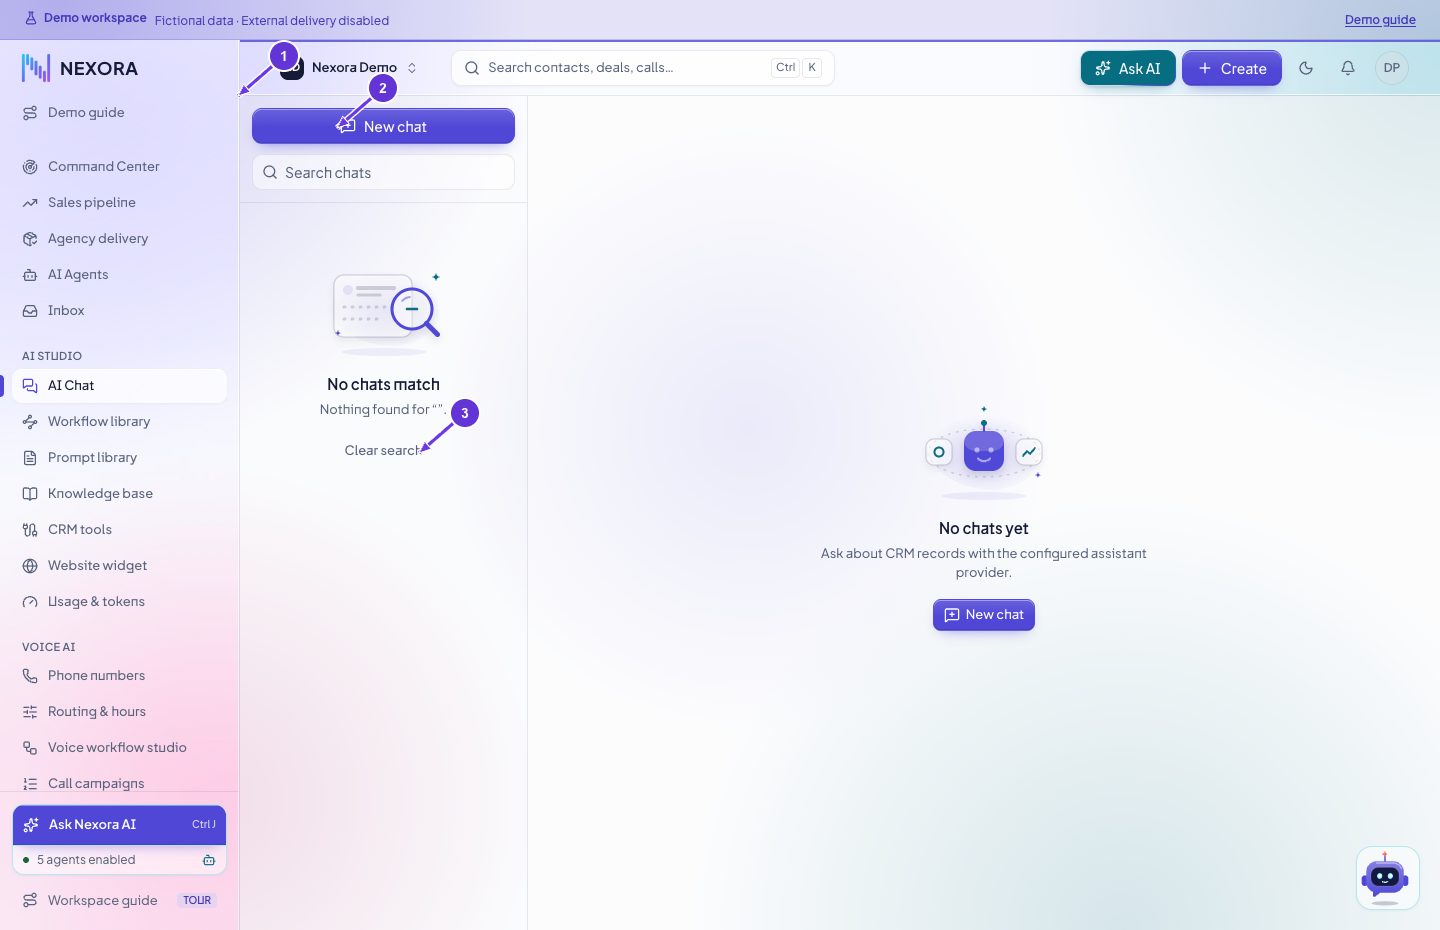
- AI Chat
- New chat
- Clear search
Prompt library
Open AI Studio → Prompt library, choose the prompt or create a draft, edit and save it, and reopen to check the version. Verify the specific agent or workflow configuration that consumes it before expecting a live behavior change.
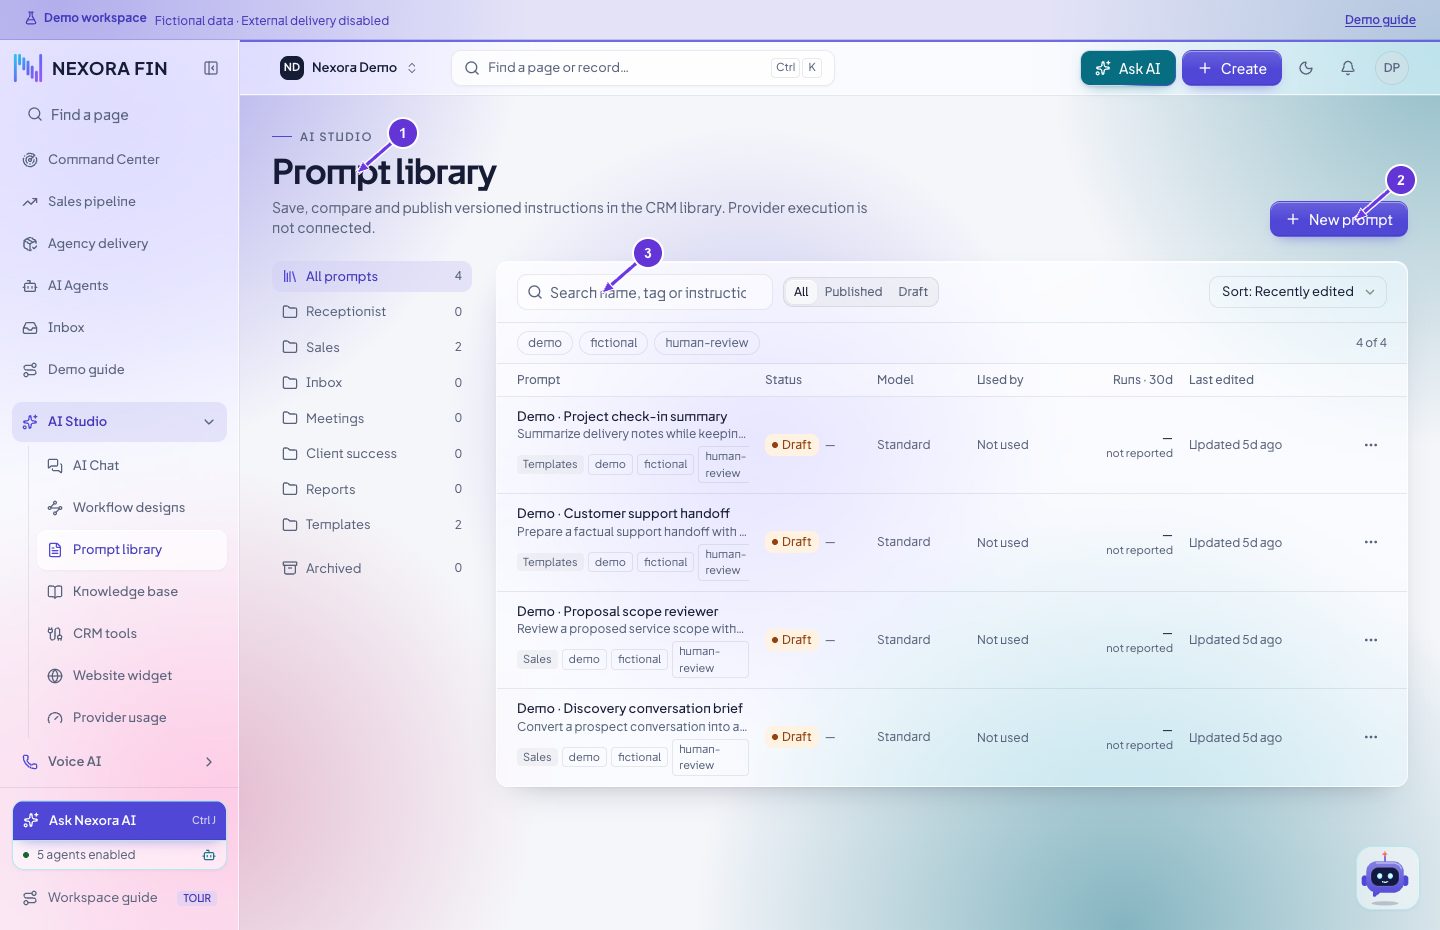
- Prompt library
- New prompt
- Search prompts
Knowledge base
Open AI Studio → Knowledge base. Add the approved document or supported text/URL, check its indexing state, then verify the intended agent has the document attached. Ask a known question in the agent’s test interface and compare its answer with the source.
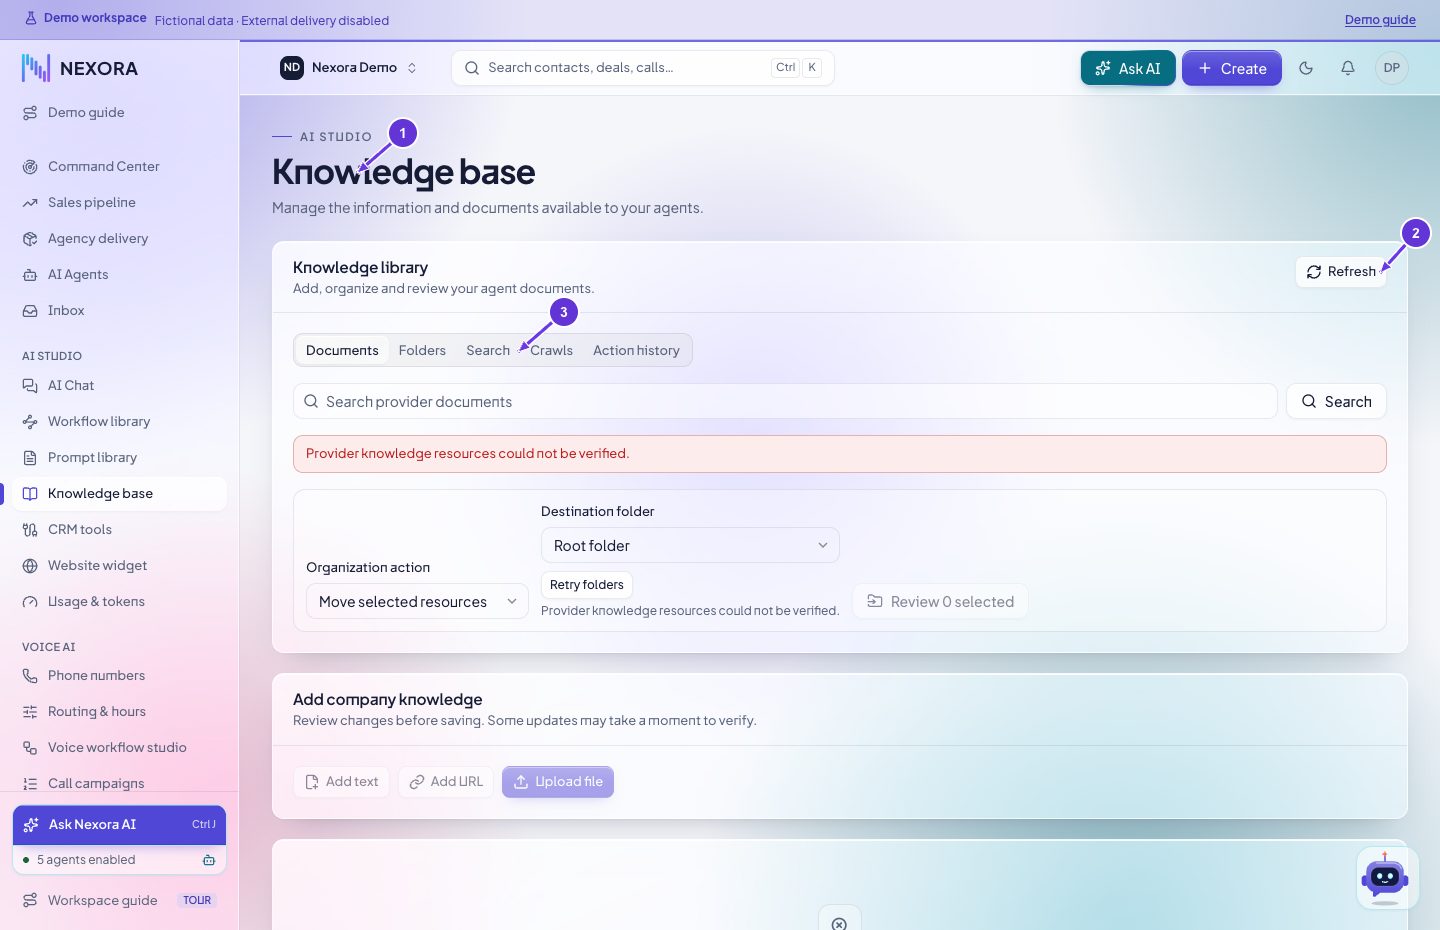
- Knowledge base
- Refresh
- Search
CRM tools
Open AI Studio → CRM tools. Select the permitted operation and inspect its required fields. Review the grant for the specific agent before saving. Test the exact allowed action with an authorized record and confirm its receipt.
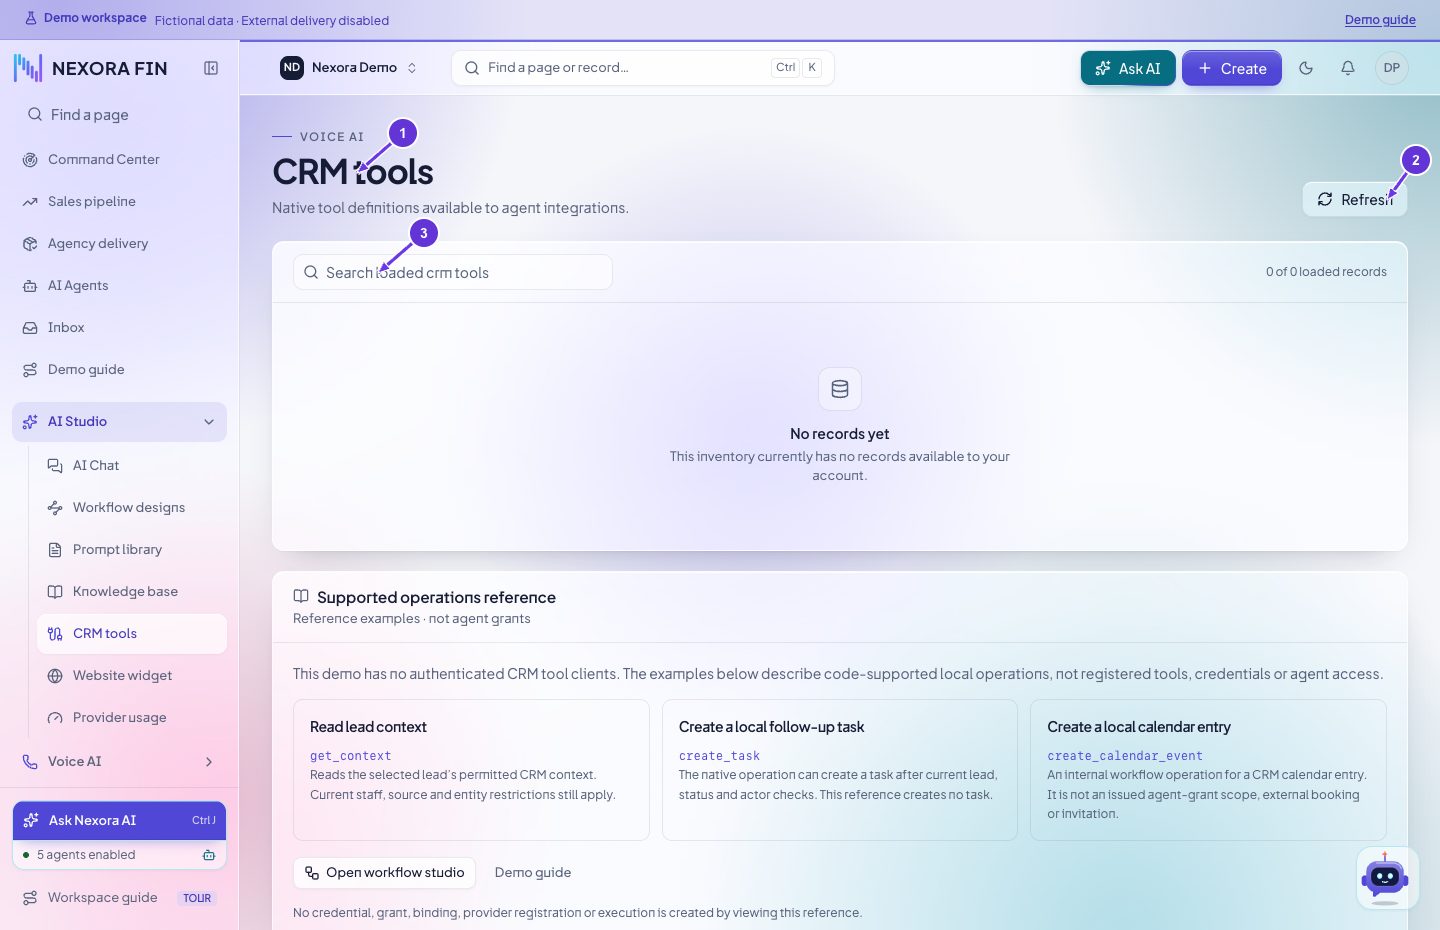
- CRM tools
- Refresh
- Search CRM tools
Website widget
Open AI Studio → Website widget. Select the intended agent, review allowed domains and widget settings, and save. Preview from the intended domain and check that the interaction reaches the CRM. Microphone access and provider callback delivery must work separately.
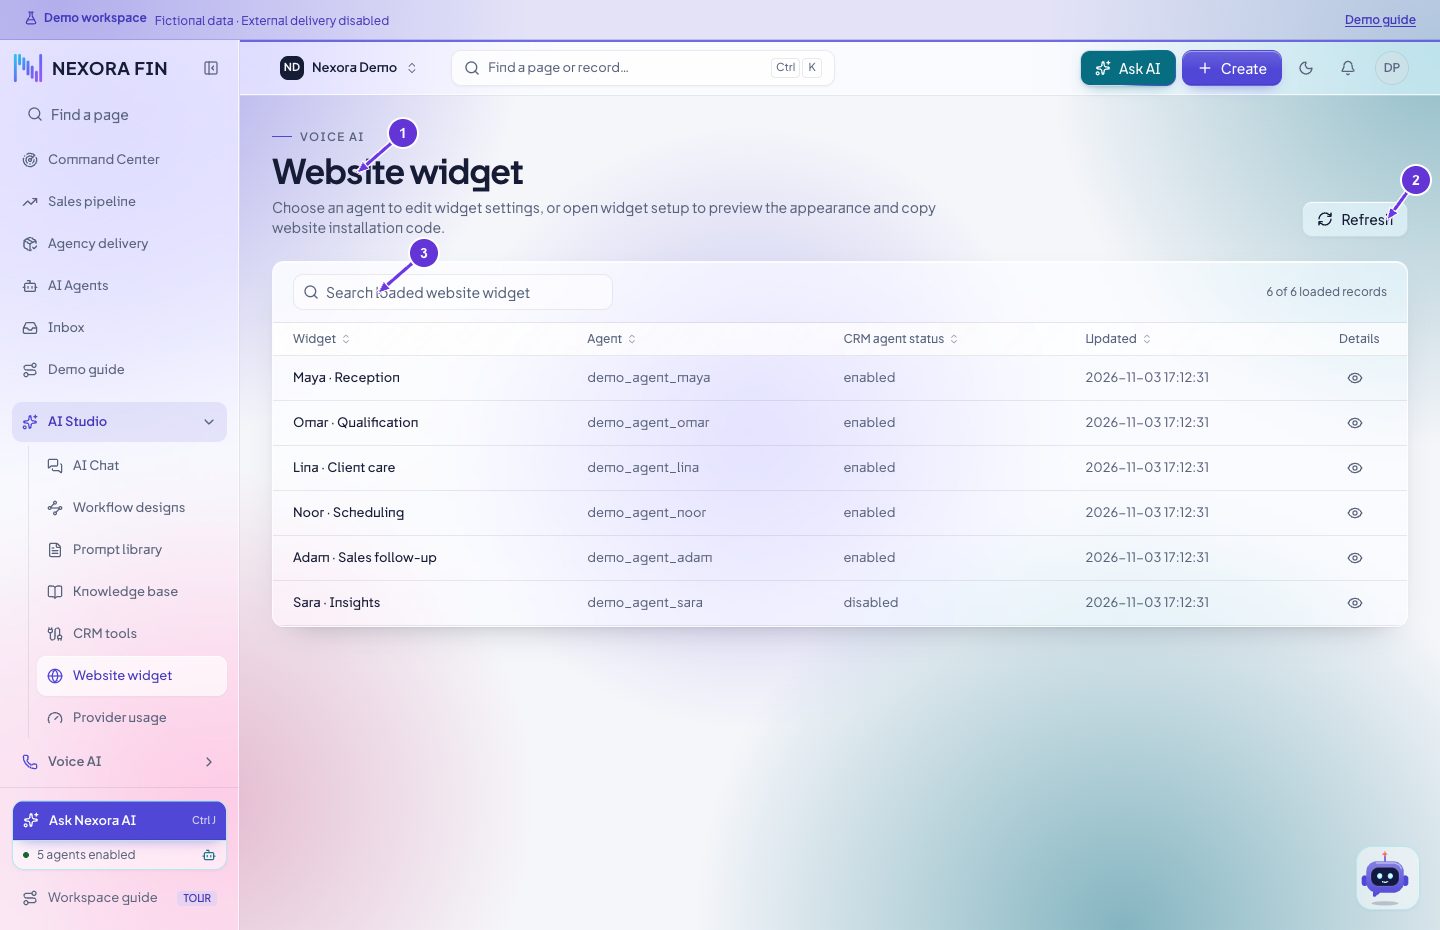
- Website widget
- Refresh
- Search Website widget
Workflow designs
Open AI Studio → Workflow designs to inspect the available designs. Use Voice workflows for the active voice trigger and its published definition. Check the bound version and run history before concluding that a design is active.
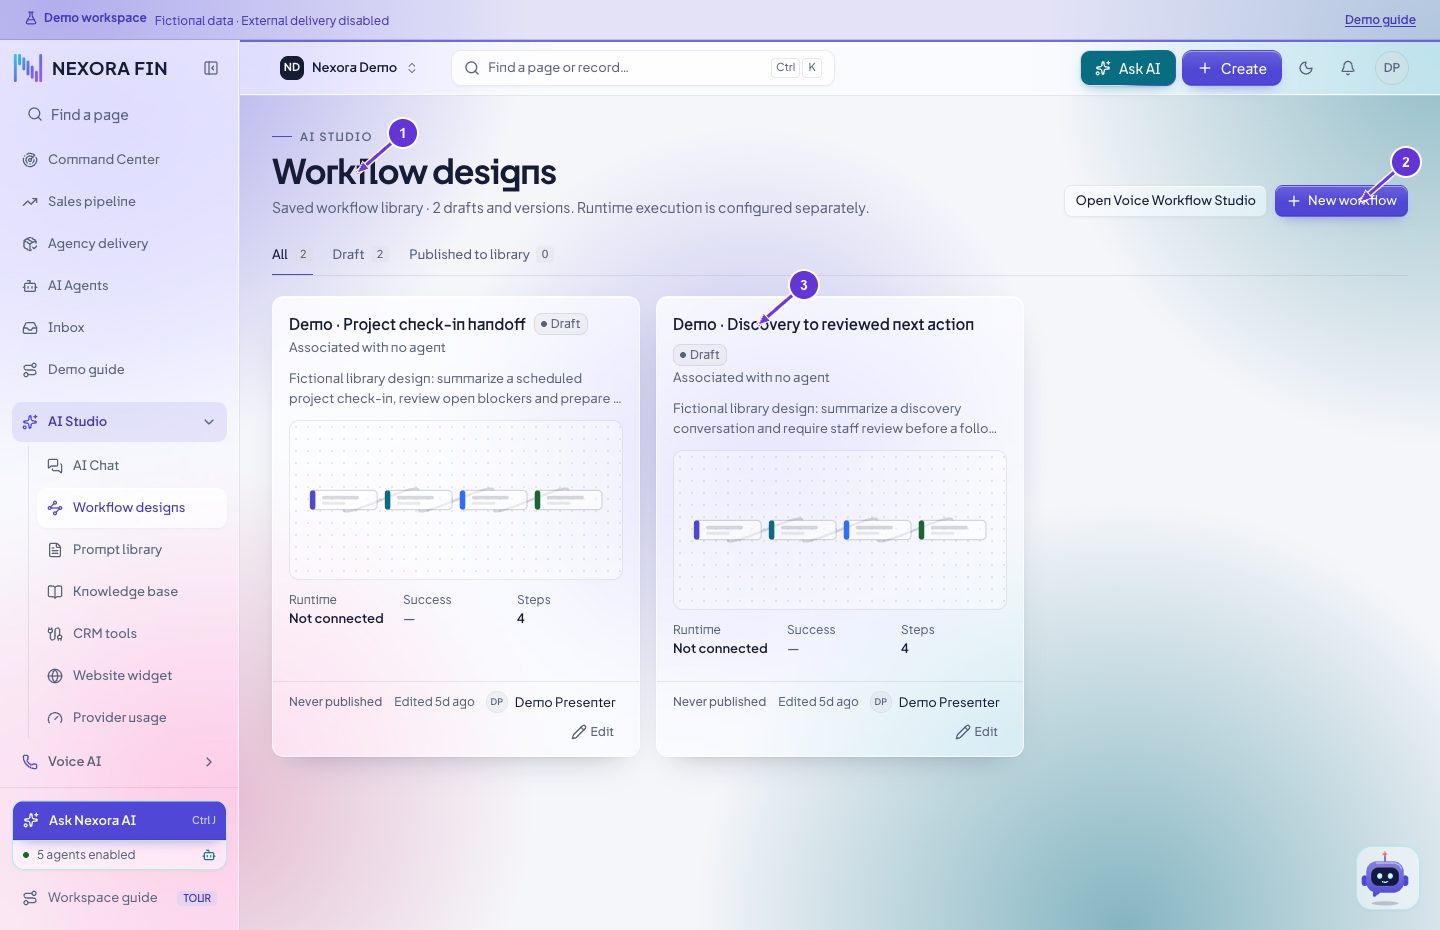
- Workflow designs
- New workflow
- Demo · Discovery to reviewed next action
AI configuration
Open Settings → AI configuration to review AI behavior options. Provider connection settings are under Integrations. Save the intended option and verify the configured provider before checking an actual response in AI Chat.
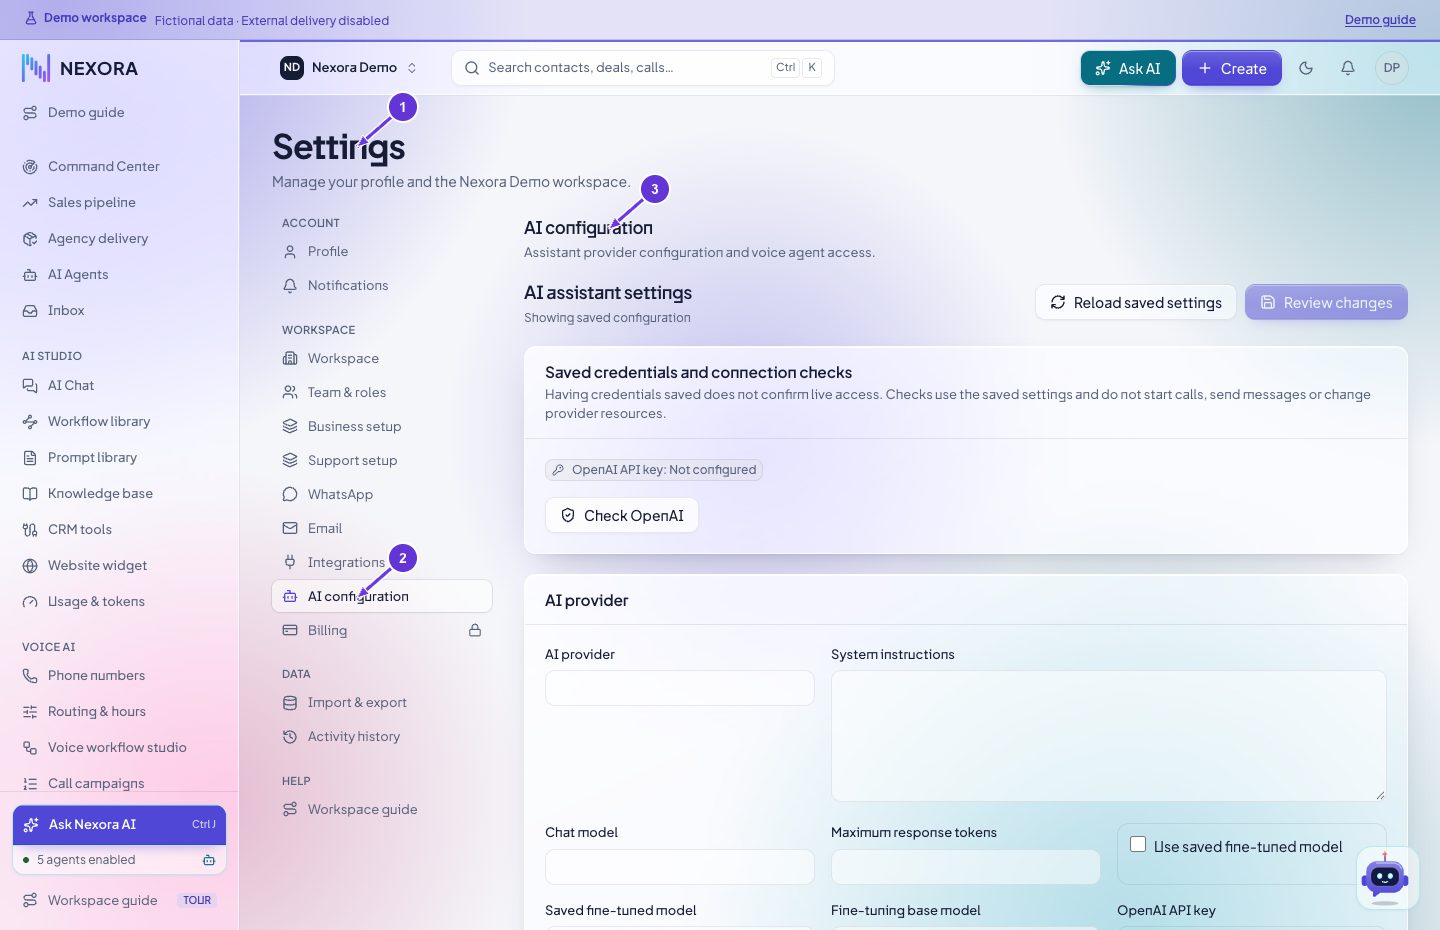
- Settings
- AI configuration
- AI configuration
Workflow approvals
Open Workflow approvals and select the waiting workflow. Inspect the exact run and step before approving or rejecting it. verify the subsequent run status.
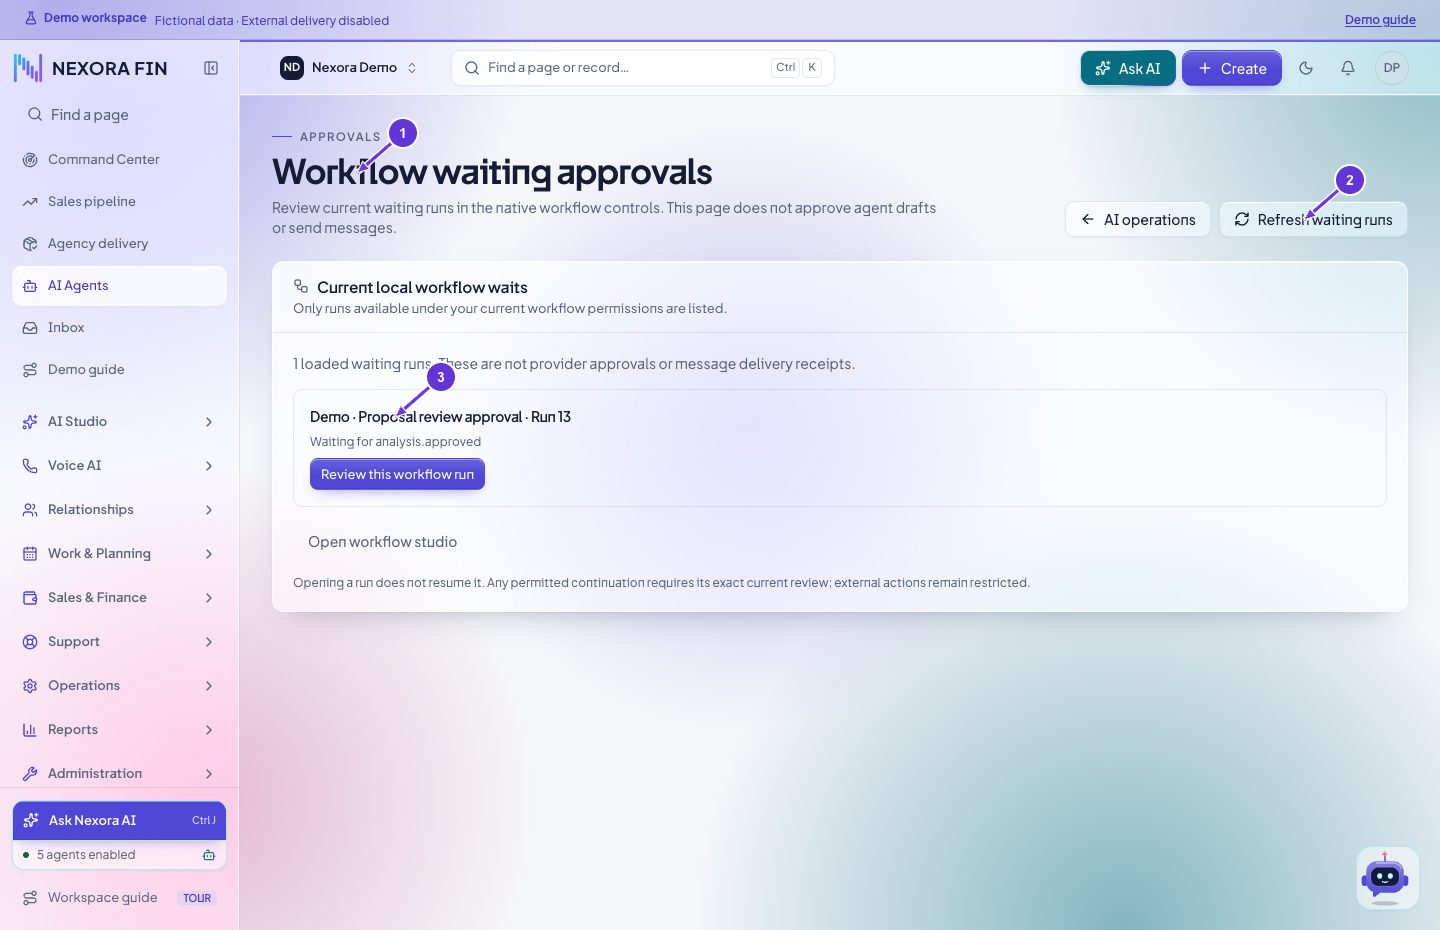
- Workflow waiting approvals
- Refresh waiting runs
- Demo · Proposal review approval · Run 13
Workflow review mode
Open Review mode to list workflows waiting for action. Open the exact run and inspect its current step and status before any permitted approval. Reload the run afterward to confirm its outcome.
Open in CRMAgent call flows
Select the agent and the available graph or version. Inspect nodes and connections, then open AI Agents → Configure to review settings that affect live behavior.
Open in CRMVoice workspace resources
Review provider variables, secrets and workspace resources for the selected connection. Open the exact resource to check its scope. keep secret values in their designated fields.
Open in CRMElevenLabs workspace
Open the provider workspace and review the configured connection, workspace settings and agent access. Use the available verify controls before relying on the connection.
Open in CRMWidget setup
Select the intended agent, preview the widget, and copy the installation code after verifying allowed domains. Confirm the published site can load and use the widget.
Open in CRMConnect external tools
Open the MCP tools page, review the connector and its authorized operations, then test one permitted operation and check the resulting receipt.
Open in CRMTest AI models
Open Test AI models, select the model or evaluation, and review inputs and evaluation results. Compare models on the same test cases.
Open in CRMElevenLabs overview
Review the linked workspace, agents and recent activity. Use AI Agents or Calls to inspect the corresponding CRM record.
Open in CRMOpenAI settings
Open OpenAI settings, review the selected model and masked configuration, save the intended change, then verify a response in AI Chat.
Open in CRMVoice AI and communications
Calls
Open Voice AI → Calls. Use direction, status or search filters and open the call. Review direction, duration, outcome, transcript, recording and workflow activity where each is available. A pending or missing recording may need the signed provider event to arrive.
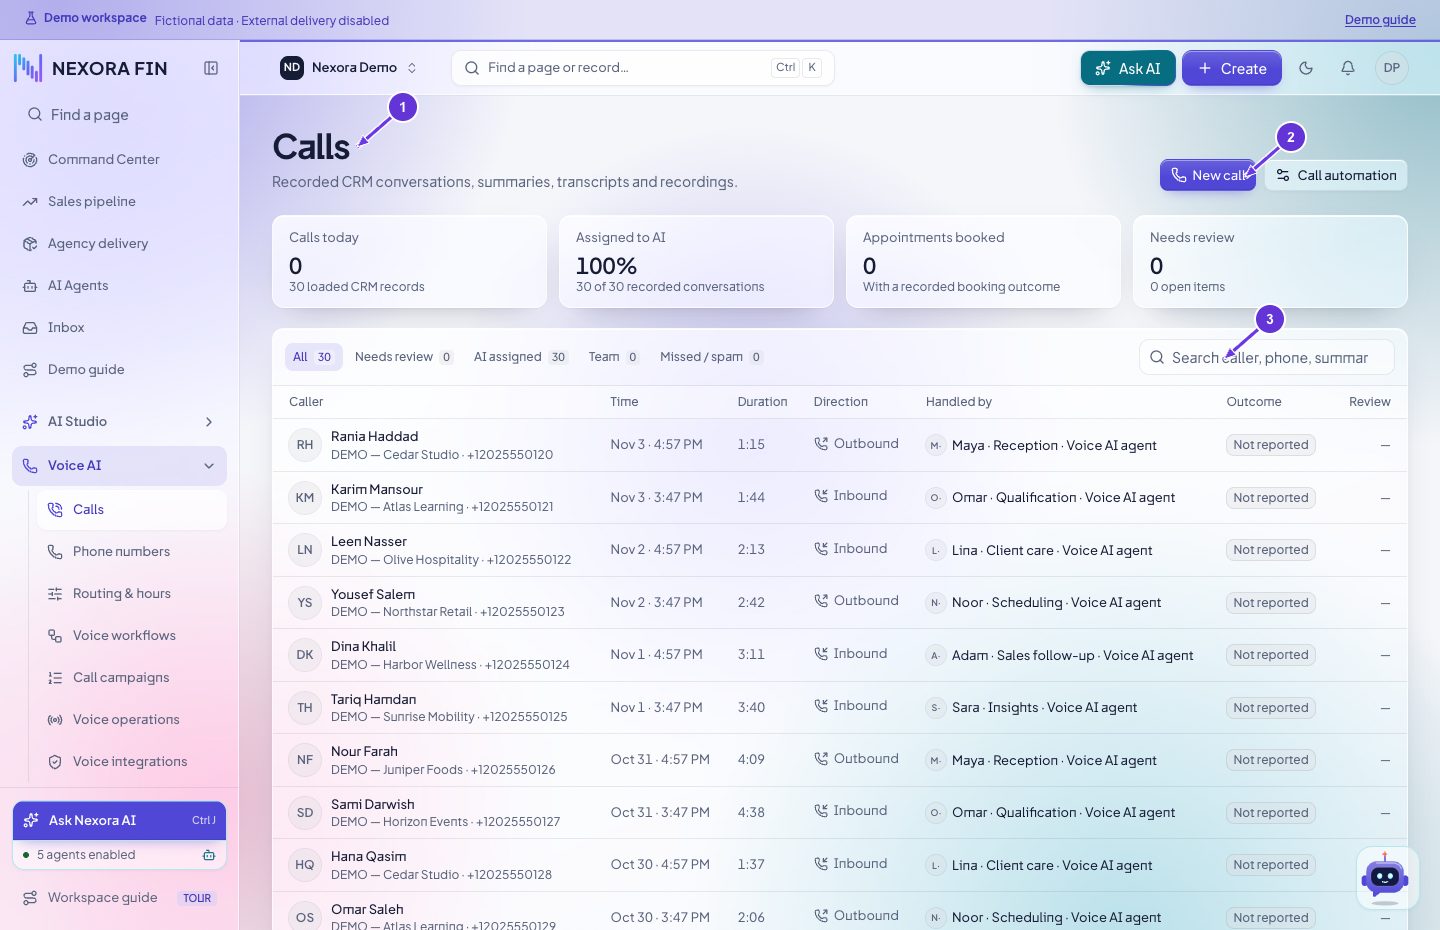
- Calls
- New call
- Search calls
Call details and recording
Open a row in Calls. Confirm direction, timestamps, duration, agent and the linked CRM record. Read the summary, review transcript turns and play the recording where available. Open workflow activity to verify any task, update or booking against its source record.
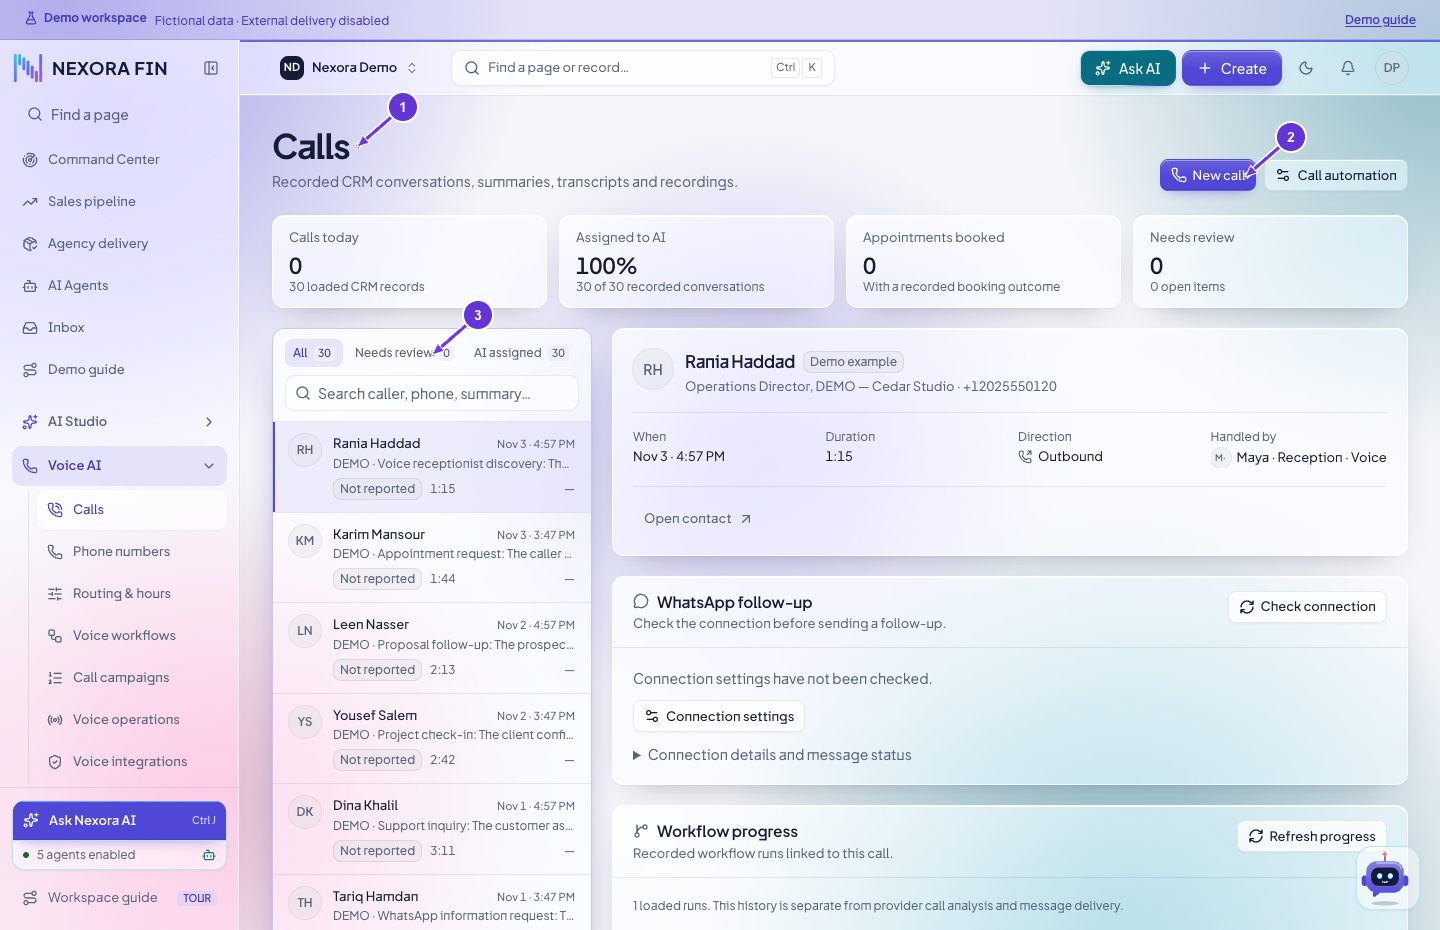
- Calls
- New call
- Needs review 0
Inbound call to CRM follow-up
Start with an inbound-capable number assigned to the intended agent. Verify its routing, time zone and outside-hours behavior. After an authorized test call, open Calls, find the inbound entry and check the linked lead, transcript and workflow. A captured demo request can generate a follow-up task. An appointment is confirmed when Calendar contains a saved booking.
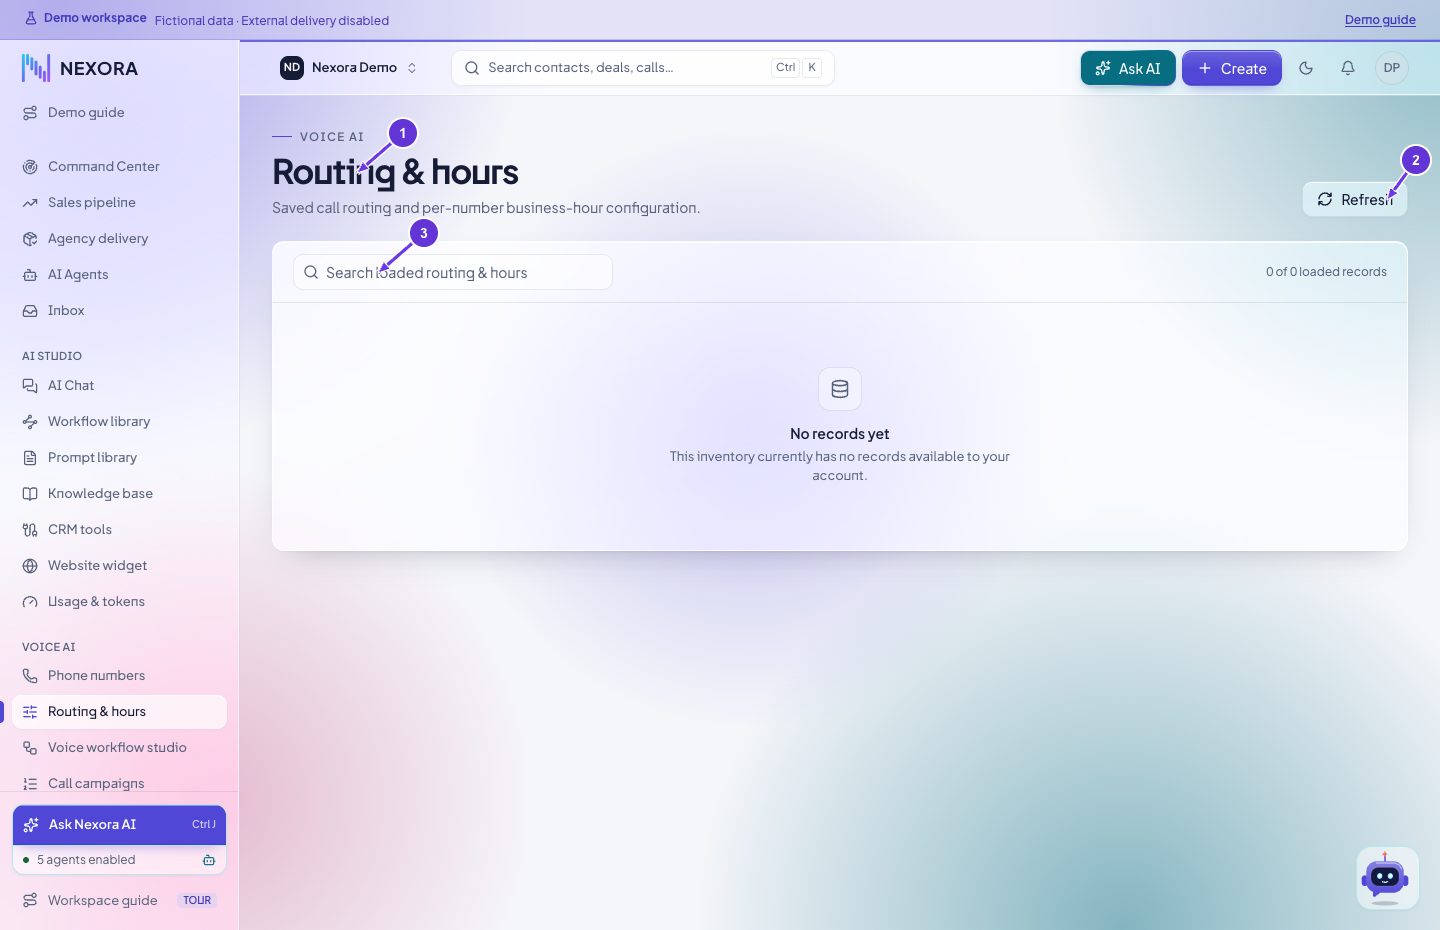
- Routing & hours
- Refresh
- Search Routing & hours
Outbound call from review to result
Choose a permitted lead or recipient, the eligible source number and the agent. Review Hold, consent, the selected identity and any allowed call settings. Submit the reviewed call once. Use the same attempt in Calls or Voice operations to track uncertain outcomes. Check the transcript and workflow after the provider reports completion.
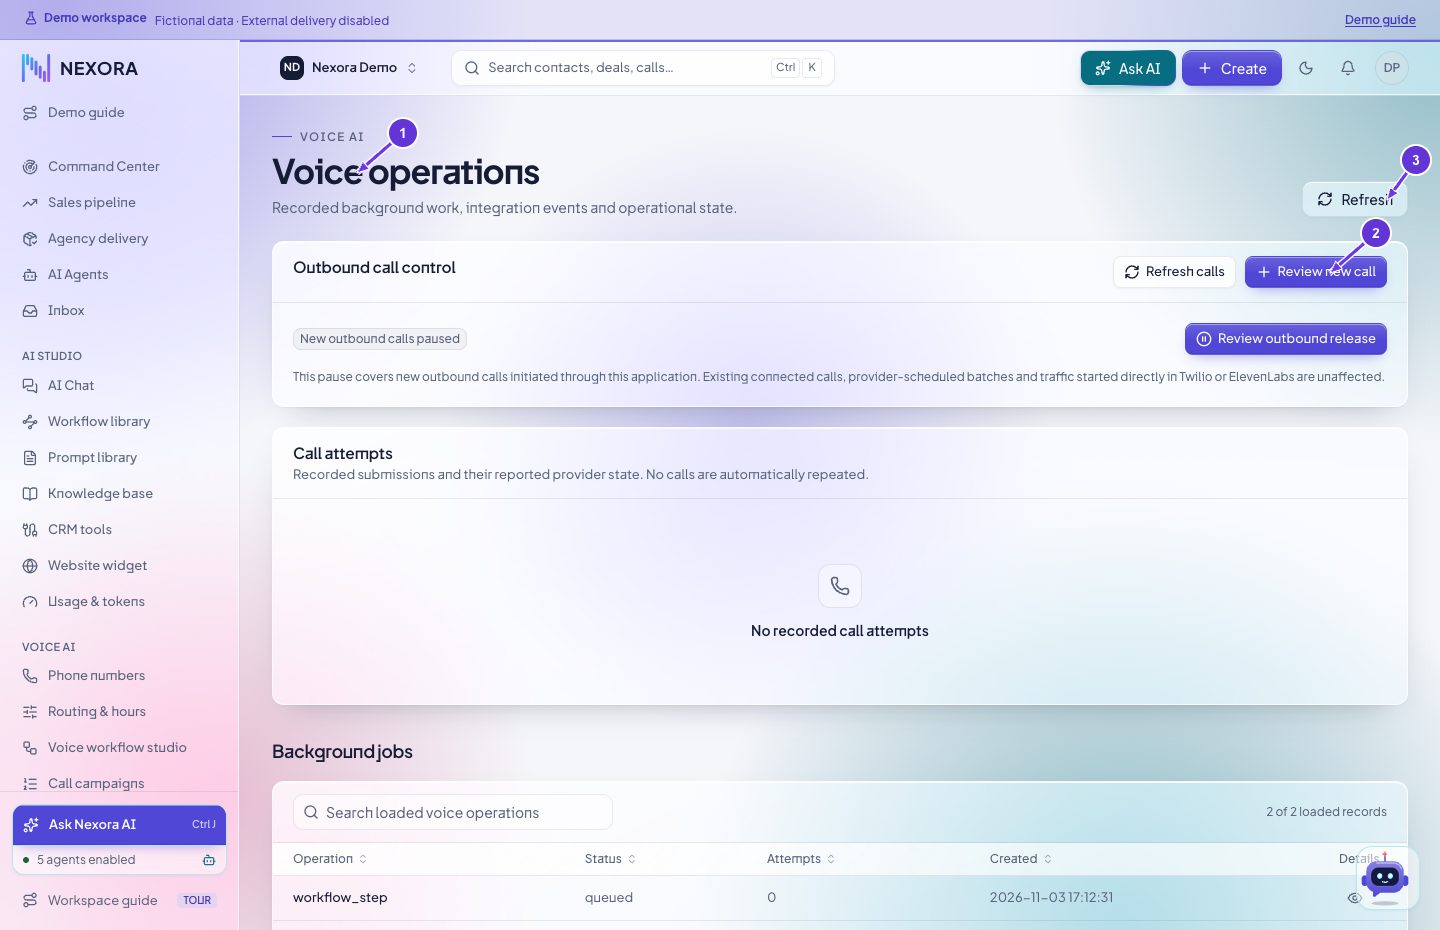
- Voice operations
- Review new call
- Refresh
Voice appointment booking
Verify the intended agent can check availability and confirm booking through its permitted CRM tools. Set the workflow and event binding that match the call scenario. The caller must agree to the exact available time. Verify a confirmed event in Calendar and review the run or call evidence. A requested time in a summary alone does not establish a confirmed reservation.
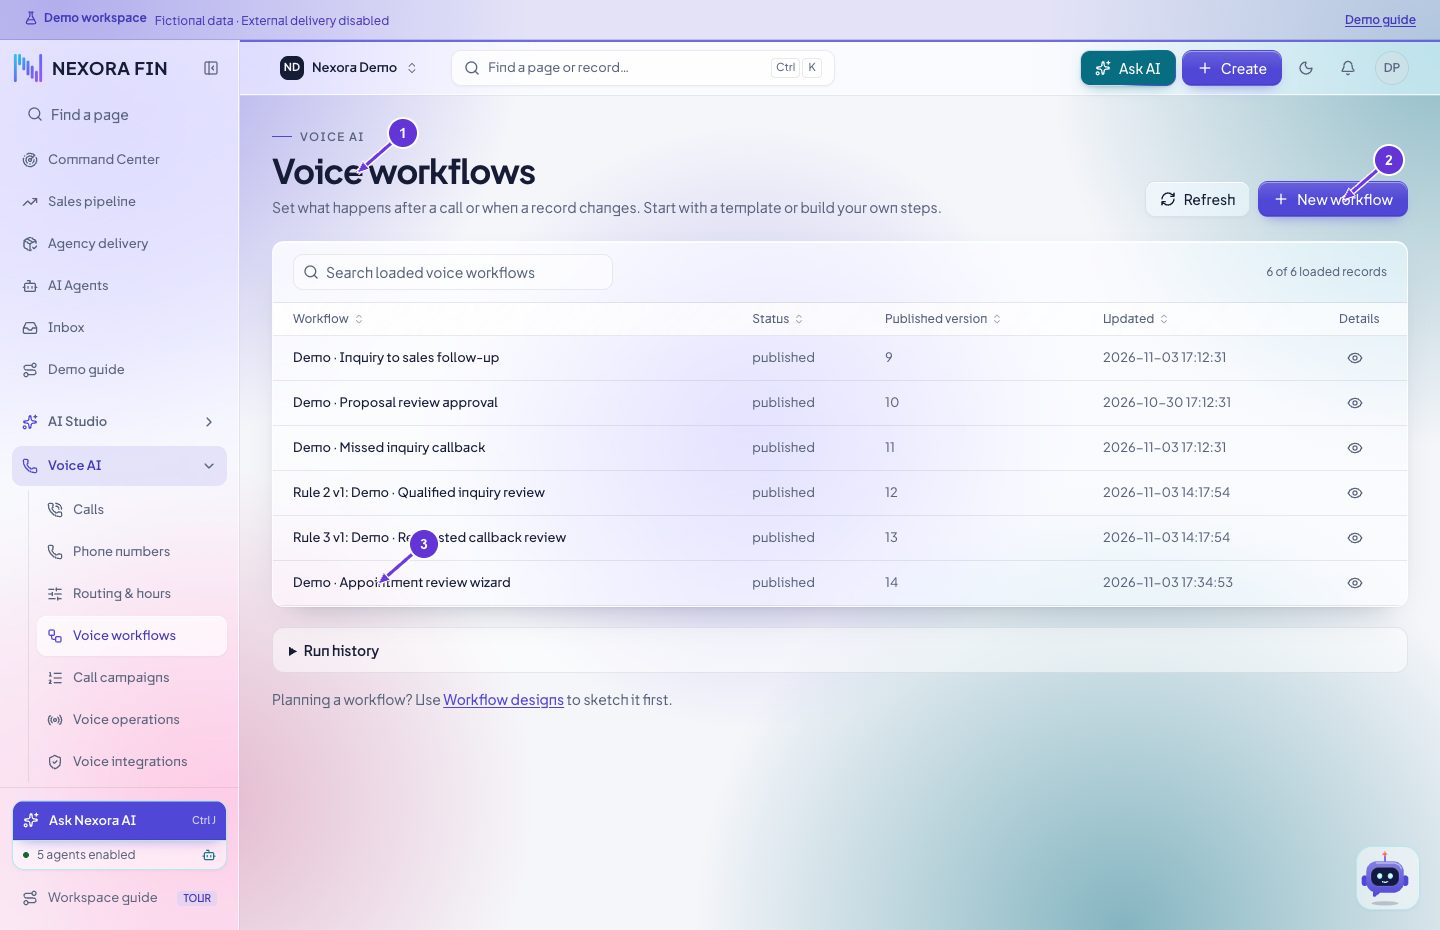
- Voice workflows
- New workflow
- Demo · Appointment review wizard
Voice workflows
Open Voice AI → Voice workflows and create or open a draft. In Wizard, select a supported scenario and set its agent, event and action options. Review Steps and Diagram, save the draft, validate and simulate where available, then publish. Use Set when it runs to bind the published version to the matching event. Verify the resulting run after a permitted real call.
- Voice workflows
- New workflow
- Demo · Appointment review wizard
Build and publish a voice workflow
Create a draft and choose Wizard. Select the scenario, scope it to the agent and event, and choose the actions. Review Steps and Diagram. Save the draft, validate and simulate where supported, publish a version, then bind that version with Set when it runs. Use Run history to verify the trigger and actual effect.
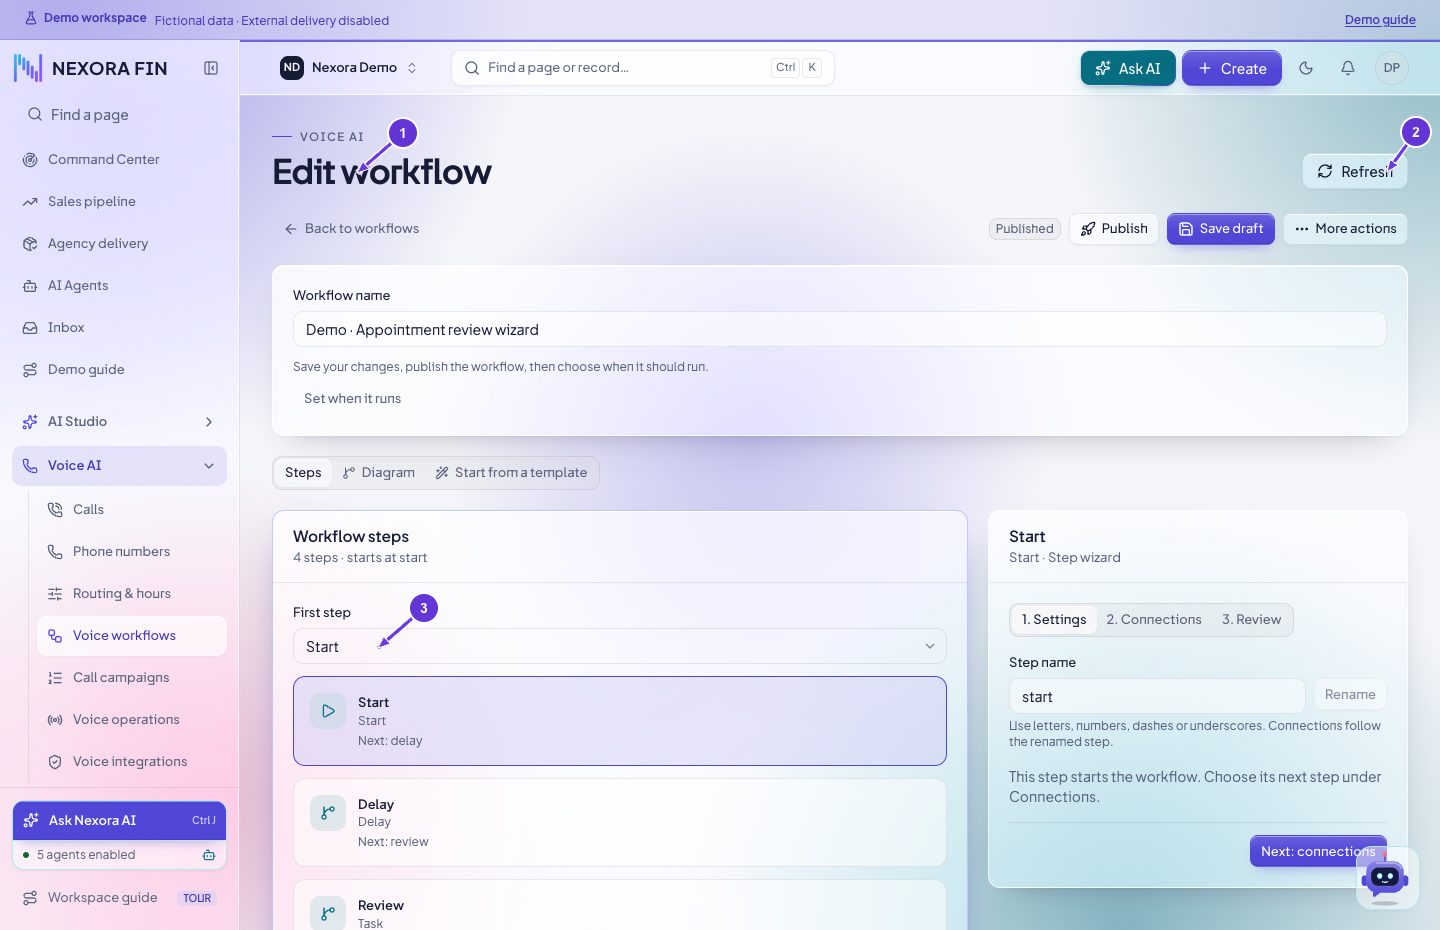
- Edit workflow
- Refresh
- Start Delay Review End
Voice workflow event binding
Open the published workflow and choose Set when it runs. Review the event, version, filters and enabled state, save the binding and verify a matching run in Run history.
- Voice workflows
- New workflow
- Demo · Appointment review wizard
Voice workflow Run history
Open Voice AI → Voice workflows and select the workflow. Open Run history, find the run by time or originating event, and inspect version, status and individual steps. Compare the run with the matching call.
- Voice workflows
- New workflow
- Demo · Appointment review wizard
Phone numbers
Open Voice AI → Phone numbers. Read the provider inventory and select the intended number. Review its transport and available capabilities. Use the assignment control to select the intended inbound agent and verify the provider readback. Verify separate outbound eligibility before placing a call.
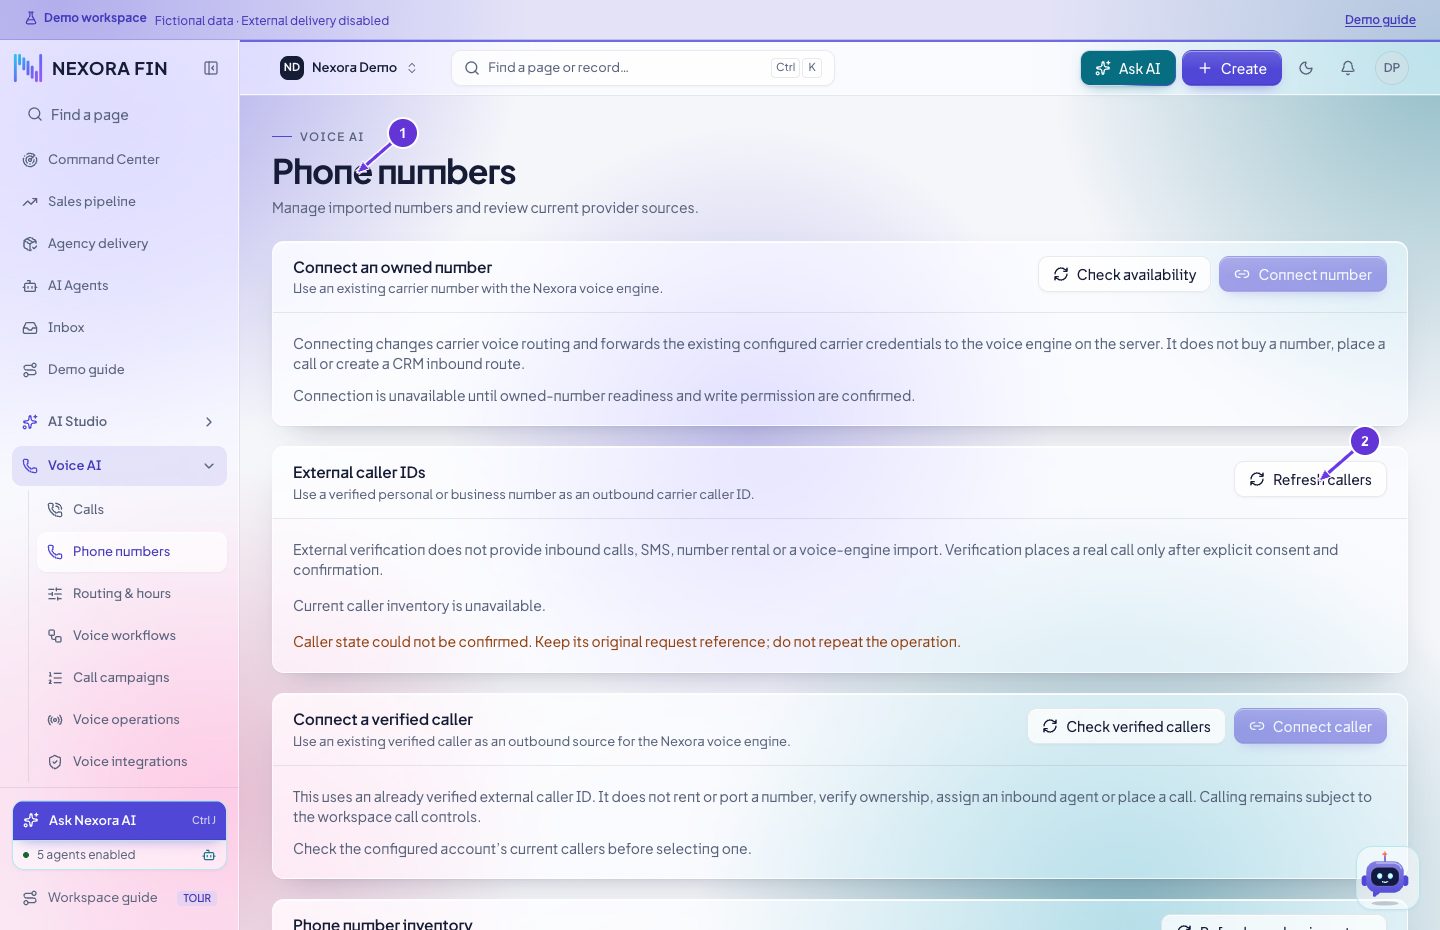
- Phone numbers
- Refresh callers
Routing and hours
Open Voice AI → Routing & hours. Review the applicable number, office schedule, time zone and fallback. Save the intended rule and verify its priority and active state. Check the inbound call record after a permitted call.
- Routing & hours
- Refresh
- Search Routing & hours
Voice operations
Open Voice AI → Voice operations. Check application outbound Hold, destination consent, an eligible caller ID and the intended agent. Review the call before submitting it. Read provider status and workflow evidence afterward.
- Voice operations
- Review new call
- Refresh
Inbox
Open Inbox and select the relevant conversation or message. Check the channel and recipient before composing a reply. Use the enabled send control and verify the provider outcome. An accepted message is still awaiting final delivery evidence.
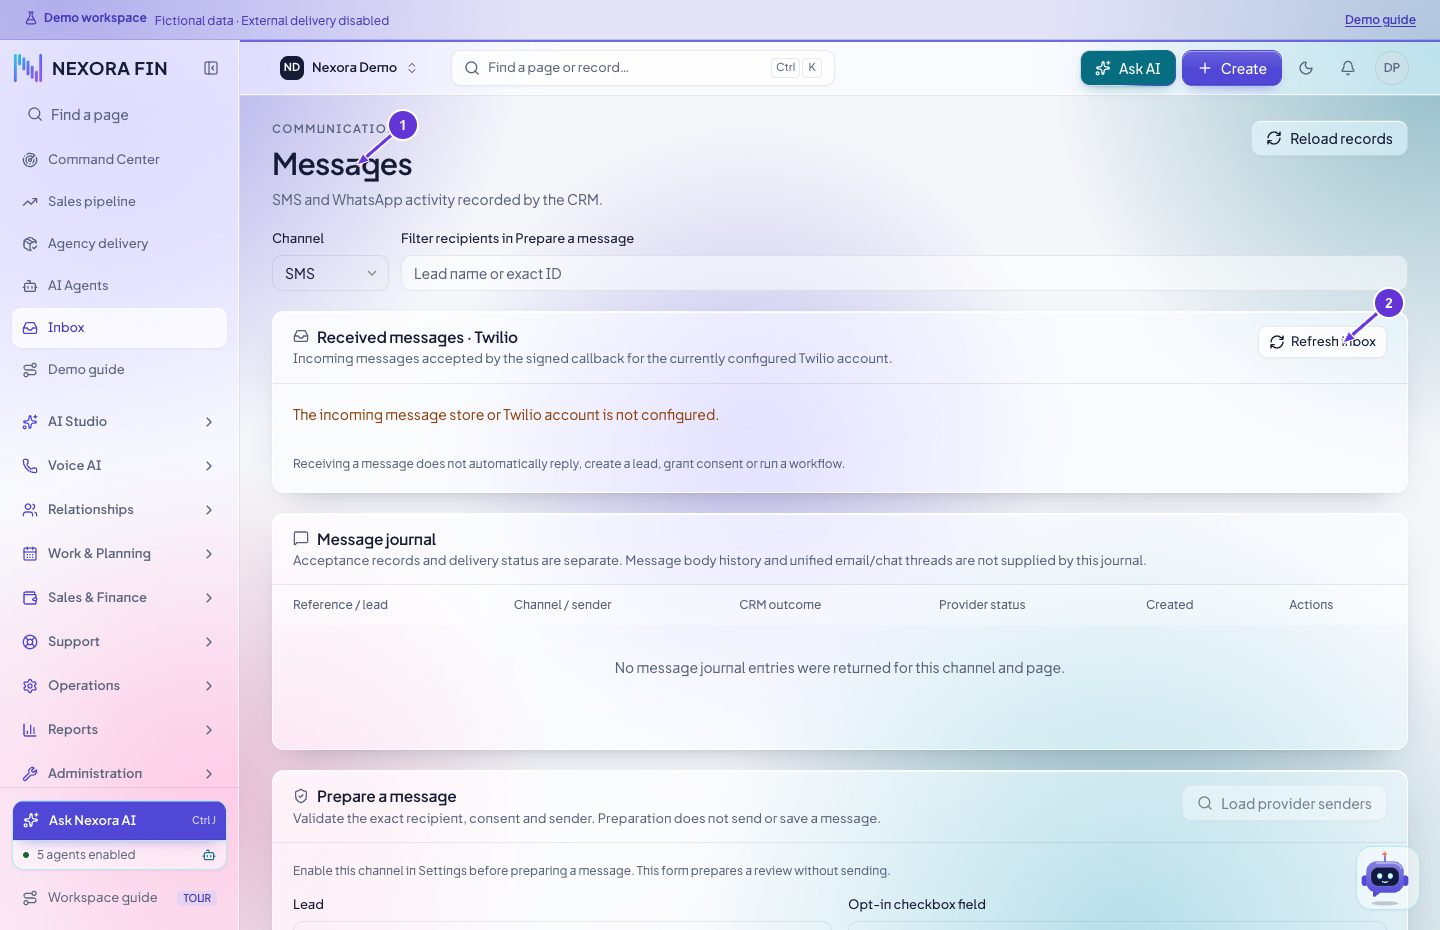
- Messages
- Refresh inbox
Call campaigns
Open Voice AI → Call campaigns. Prepare an audience with the appropriate consent, choose the agent and number, and review schedule and recipient validation before submission. Check Hold and provider readiness. Review outcomes per recipient in the campaign history.
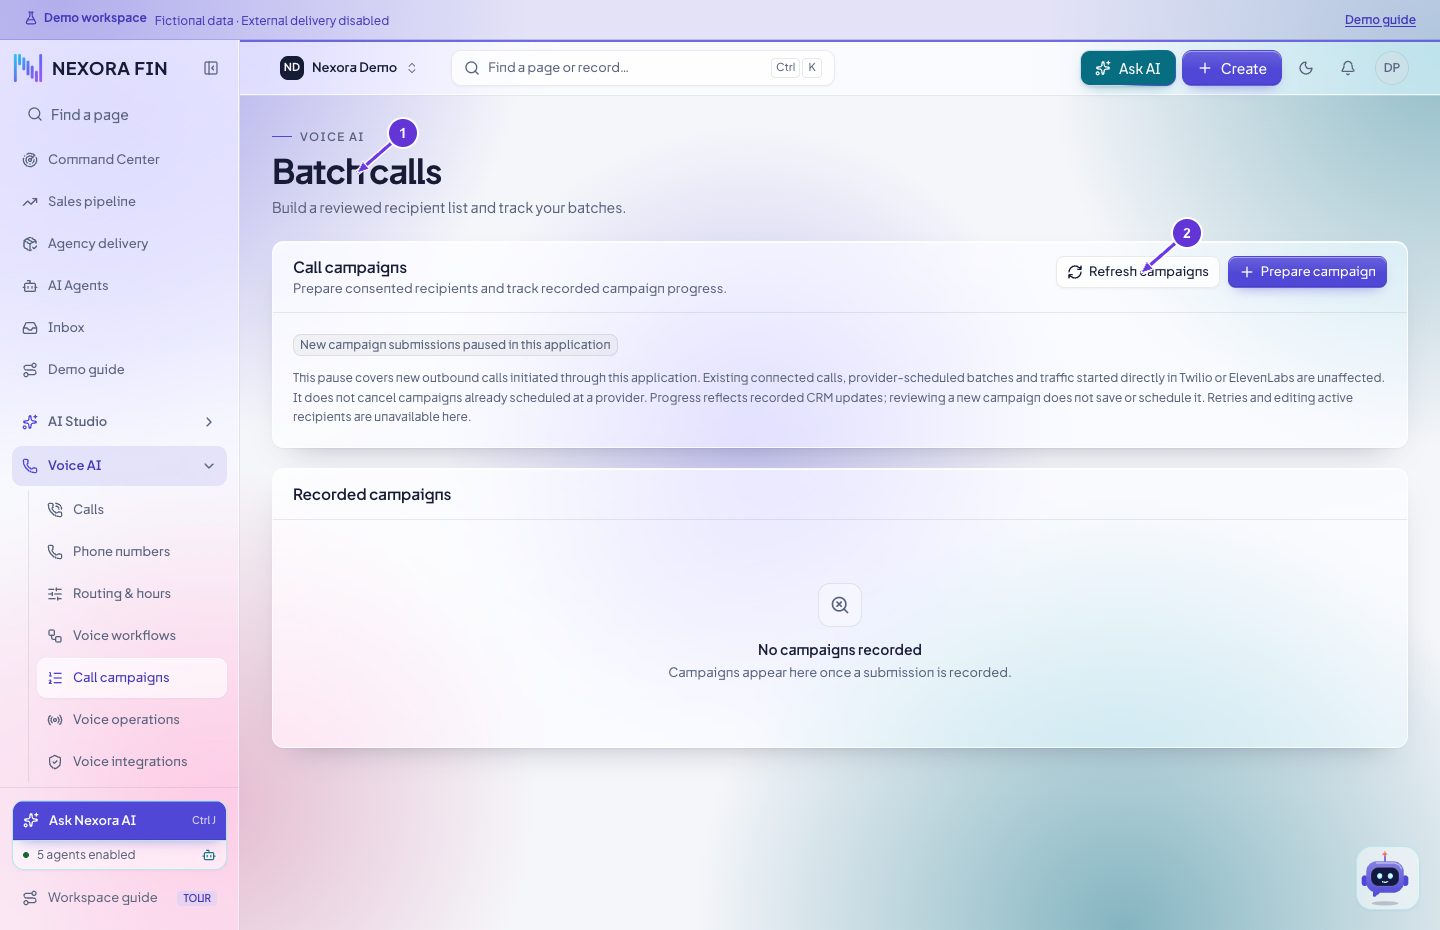
- Batch calls
- Refresh campaigns
Voice integrations
Open Voice AI → Voice integrations. Choose Twilio or ElevenLabs, review the existing configuration and use the available connection check. Check inventory and callback configuration separately. Successful read access establishes account access. actual calls and callback delivery are separate checks.
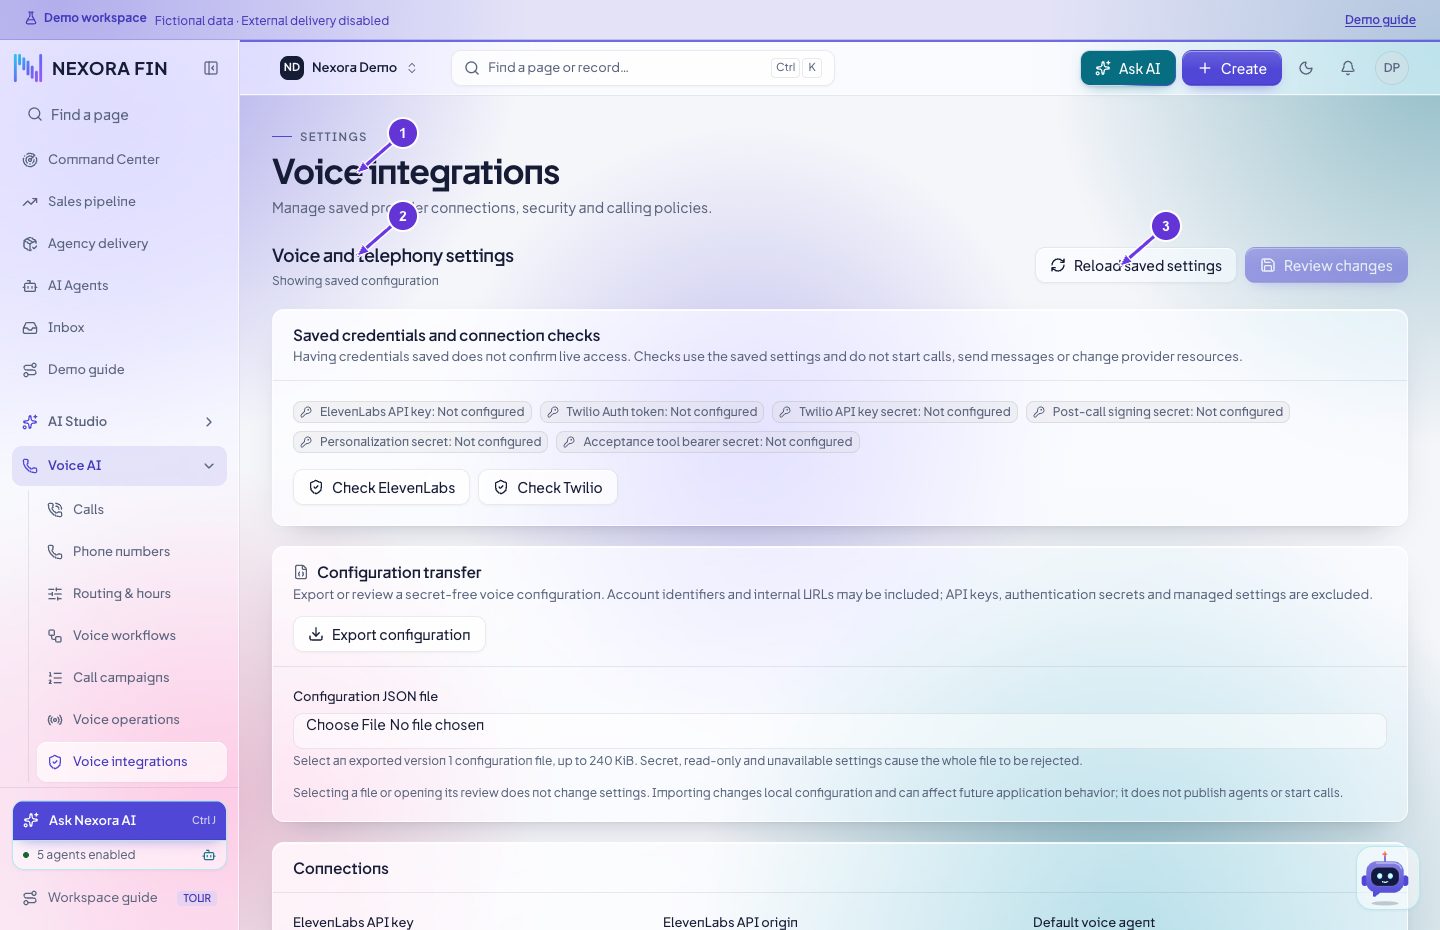
- Voice integrations
- Voice and telephony settings
- Reload saved settings
Automations
Open Operations → Automations and choose the recipe or workflow you want to inspect. Review its trigger, conditions and enabled state. For live voice events, use Voice workflows and the event binding. Verify execution in the relevant run history.
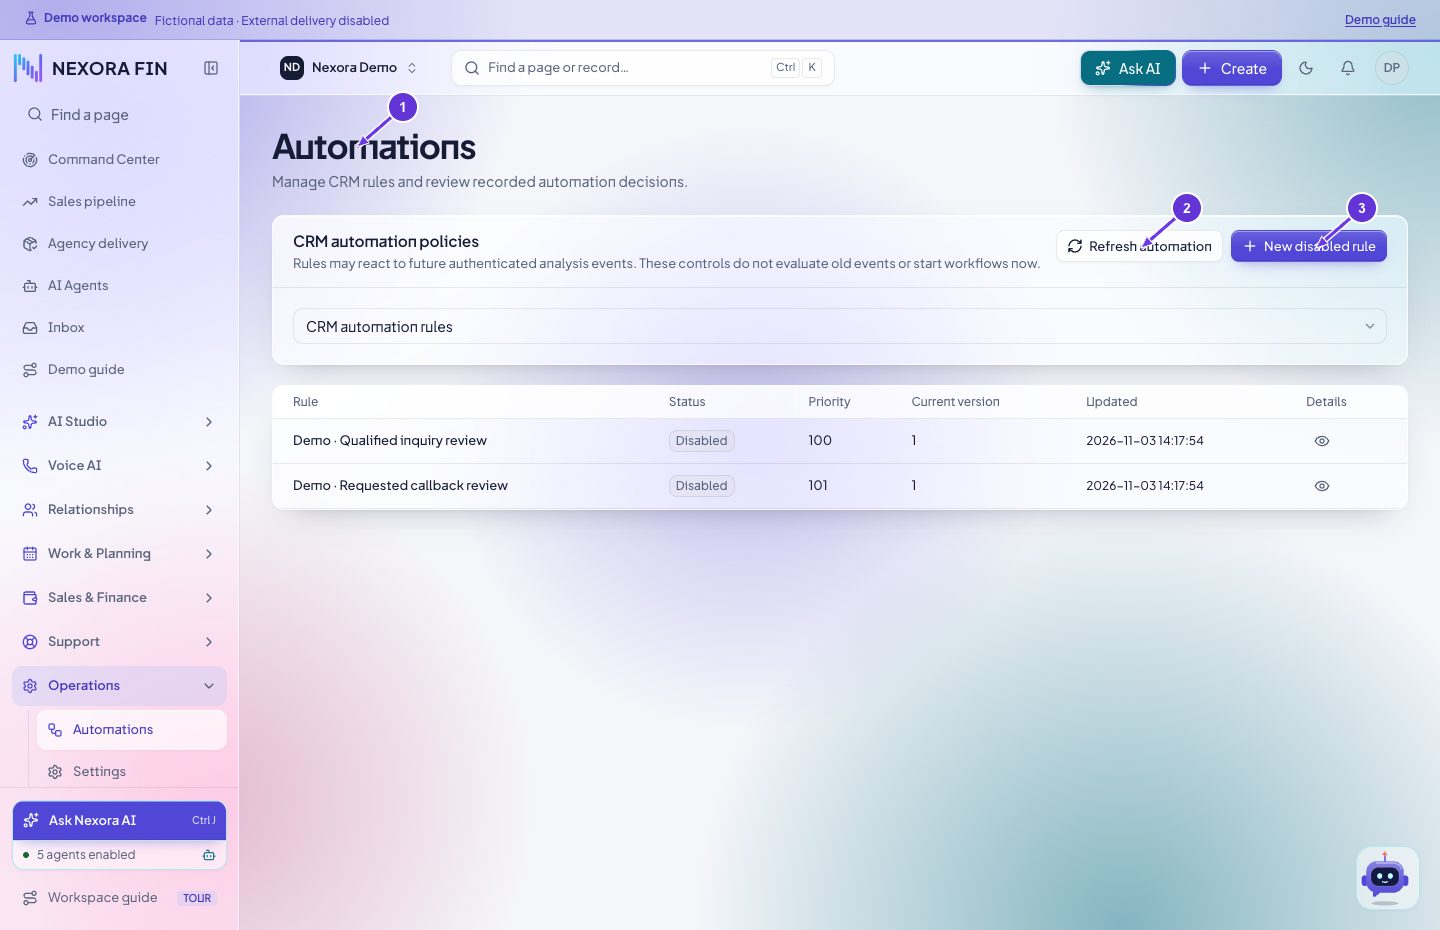
- Automations
- Refresh automation
- New disabled rule
Saved campaigns
Open saved campaigns to inspect status and recorded progress. Review the matching batch or individual call for outcomes.
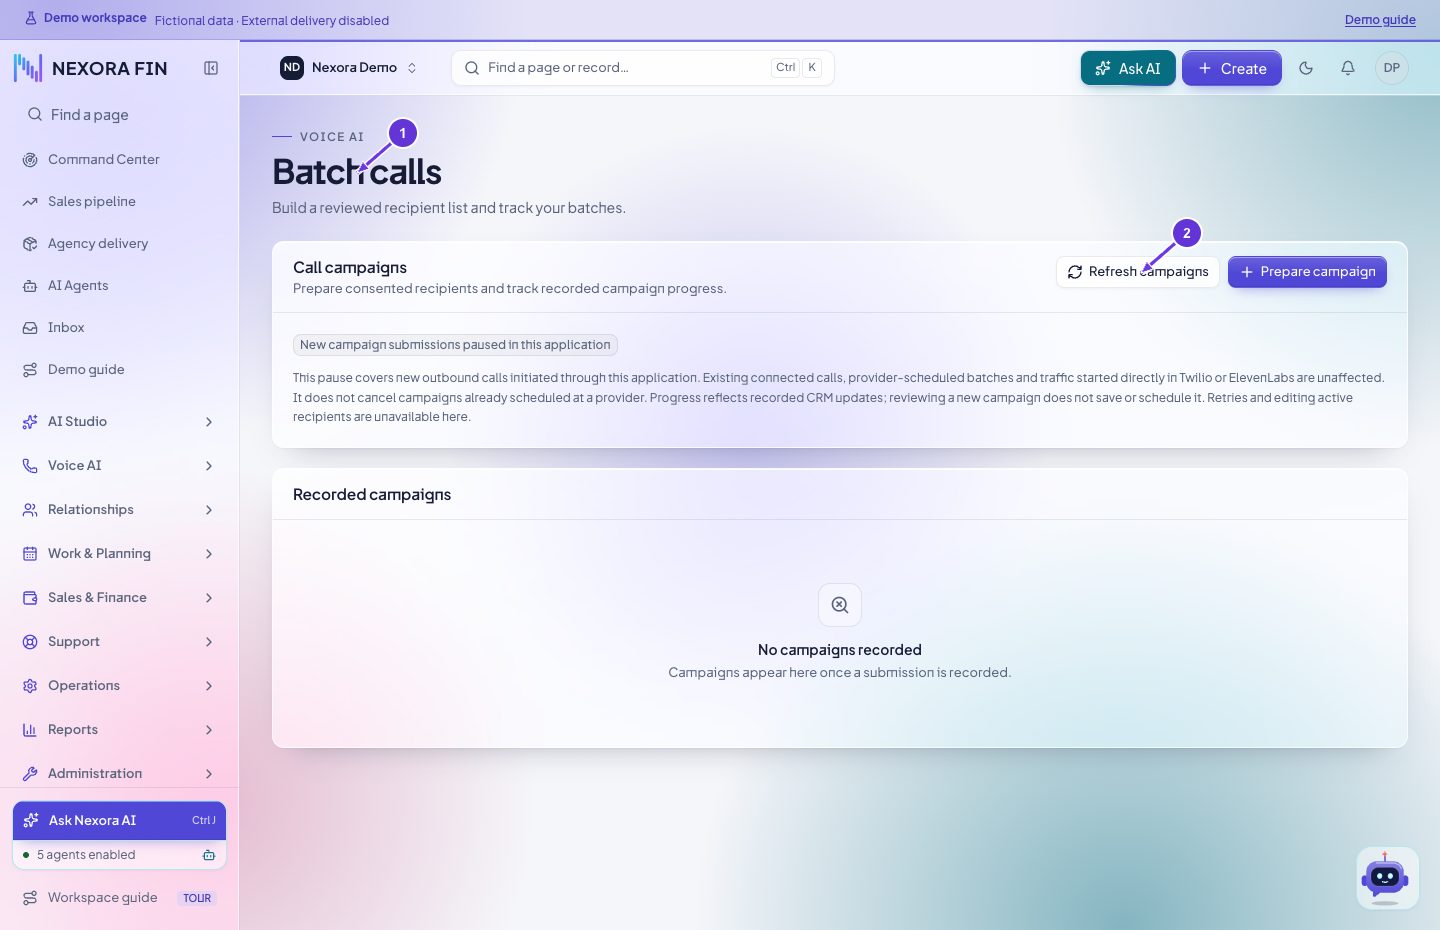
- Batch calls
- Refresh campaigns
Voice connection health
Open Voice connection health. Review provider, worker and callback states and the latest recorded checks. compare timestamps before deciding which dependency needs attention.
Open in CRMTroubleshoot voice calls
Start with the direction, number, agent and time of the failed call. Compare provider status and signed events, then open Calls or Fix missing call records for the affected record.
Open in CRMVoice products
Review the provider product, its available features, and applicable account restrictions. Verify number eligibility and pricing with the provider before use.
Open in CRMVoice setup checklist
Work through connection checks, agent and number assignment, routing, and test calls. Read back each result and investigate any item without evidence.
Open in CRMSigned call events
Review the managed callback URL and configured events. Verify the signing setup and confirm an authorized provider event arrives in Call event delivery.
Open in CRMCall event delivery
Filter by event, delivery status or conversation ID. Inspect the timestamp and verification result. compare with the corresponding call.
Open in CRMElevenLabs Twilio dialer
Check the selected agent, caller number, destination consent and application Hold. Review the exact call before submission and confirm the provider outcome.
Open in CRMInbound calls
Filter by number, status or time and open the incoming call. Compare the assigned agent, routing decision and resulting call record.
Open in CRMSMS and WhatsApp messaging
Choose the channel and review the sender, recipient, consent and content. Use the reviewed send flow if enabled and check the recorded delivery outcome.
Open in CRMWorkflow triggers
Select the event and published workflow version, review agent or number filters, then save the binding. Confirm its enabled state and check Run history after a matching event.
Open in CRMFix missing call records
Look up the exact conversation reference, compare provider and CRM records, and review the reconciliation details before confirming the offered action.
Open in CRMVoice settings
Review provider connections and calling policies, then open the relevant configuration and verify its connection and number assignment.
Open in CRMVoice number management
Find the number and review its provider, agent assignment and routing. Verify the number identity before changing the binding.
Open in CRMElevenLabs phone numbers
Select an imported number, verify its identifier and agent assignment, and confirm the provider readback after any authorized change.
Open in CRMTelephony numbers
Review the provider numbers and supported call or message capabilities. Check assignment and ownership before using a number.
Open in CRMCaller IDs
Review eligible and verified caller IDs. Select the intended identity and confirm its verification and outbound eligibility.
Open in CRMTelephony billing
Review the available account and usage figures for the selected period. Confirm actual charges in the carrier billing view.
Open in CRMElevenLabs settings
Open Voice settings and select ElevenLabs. Review the account and masked credentials, save any intended change, then verify the connection.
Open in CRMTelephony settings
Open Voice settings and select telephony. Review carrier credentials and calling policies, save any intended change, then verify the connection.
Open in CRMInbound call settings
Open Voice settings, review the incoming-call connection and routing, then verify an authorized test call reaches the intended agent.
Open in CRMSales documents and finance
From sales draft to settlement
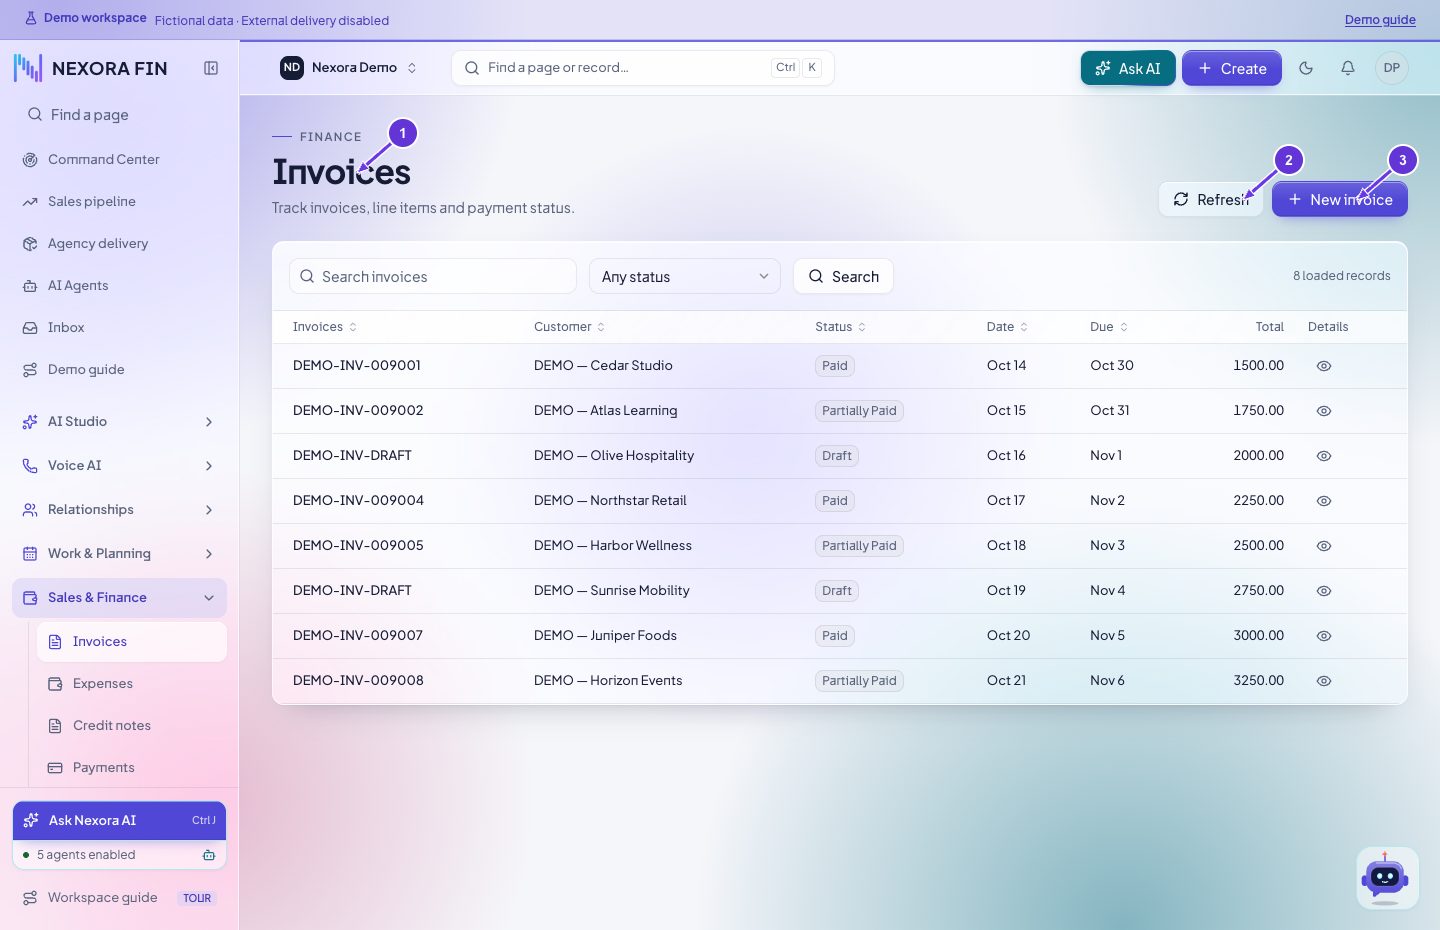
Prepare a proposal or estimate, then use the available conversion action where approved. Verify the invoice and its totals before sending. Record the payment against the exact invoice. Review credits or refunds against their source records and verify the remaining balance.
- Invoices
- Refresh
- New invoice
Invoices
Open Sales & Finance → Invoices. Select the customer, add line items, and review currency, taxes and due date before saving. Open the invoice to verify its totals and status. Review the recipient and delivery configuration separately before sending.
- Invoices
- Refresh
- New invoice
Payments
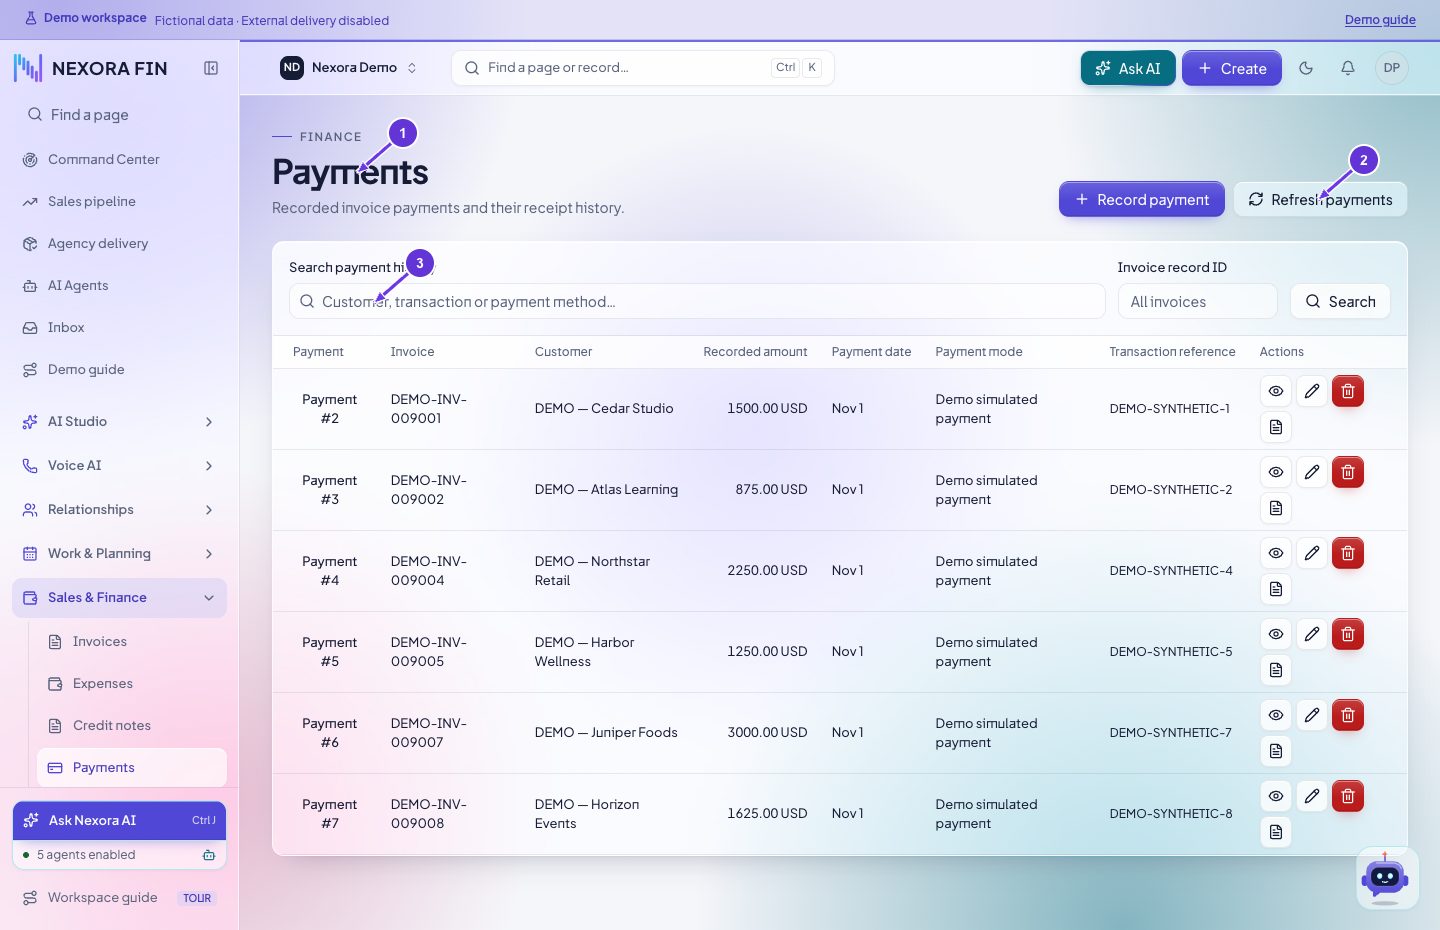
Open Sales & Finance → Payments. Identify the related invoice and check amount, currency, date and payment mode. Review before recording a payment. Confirm the saved entry and invoice balance before repeating an uncertain operation.
- Payments
- Refresh payments
- Search payment history
Expenses
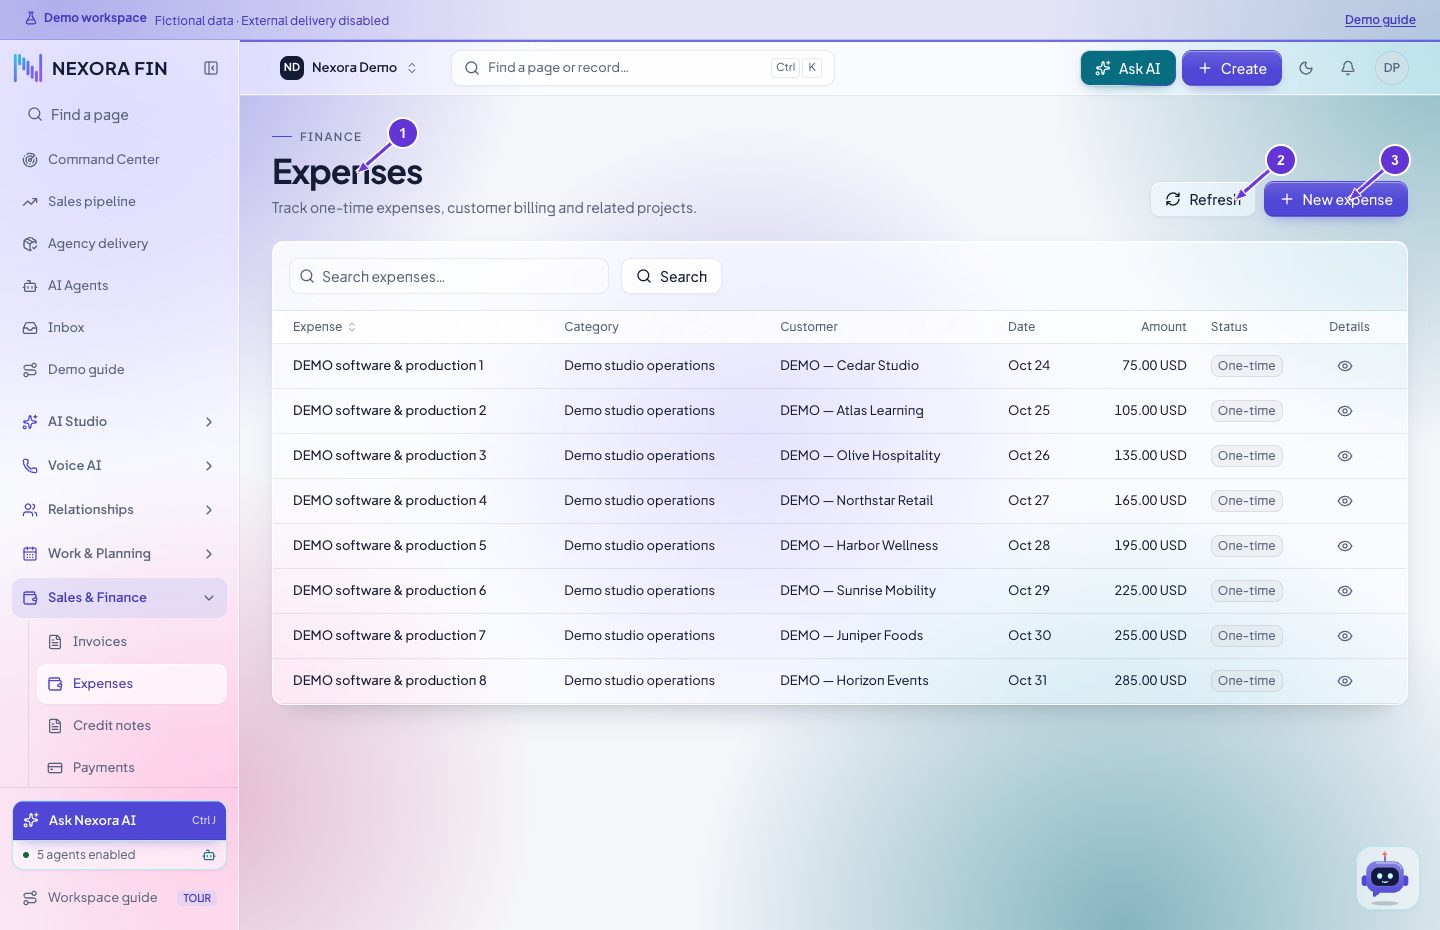
Open Sales & Finance → Expenses. Select a category, complete the date, amount and currency, and link a customer if applicable. Save and reopen the expense. Check the billable setting before adding it to an invoice.
- Expenses
- Refresh
- New expense
Estimates
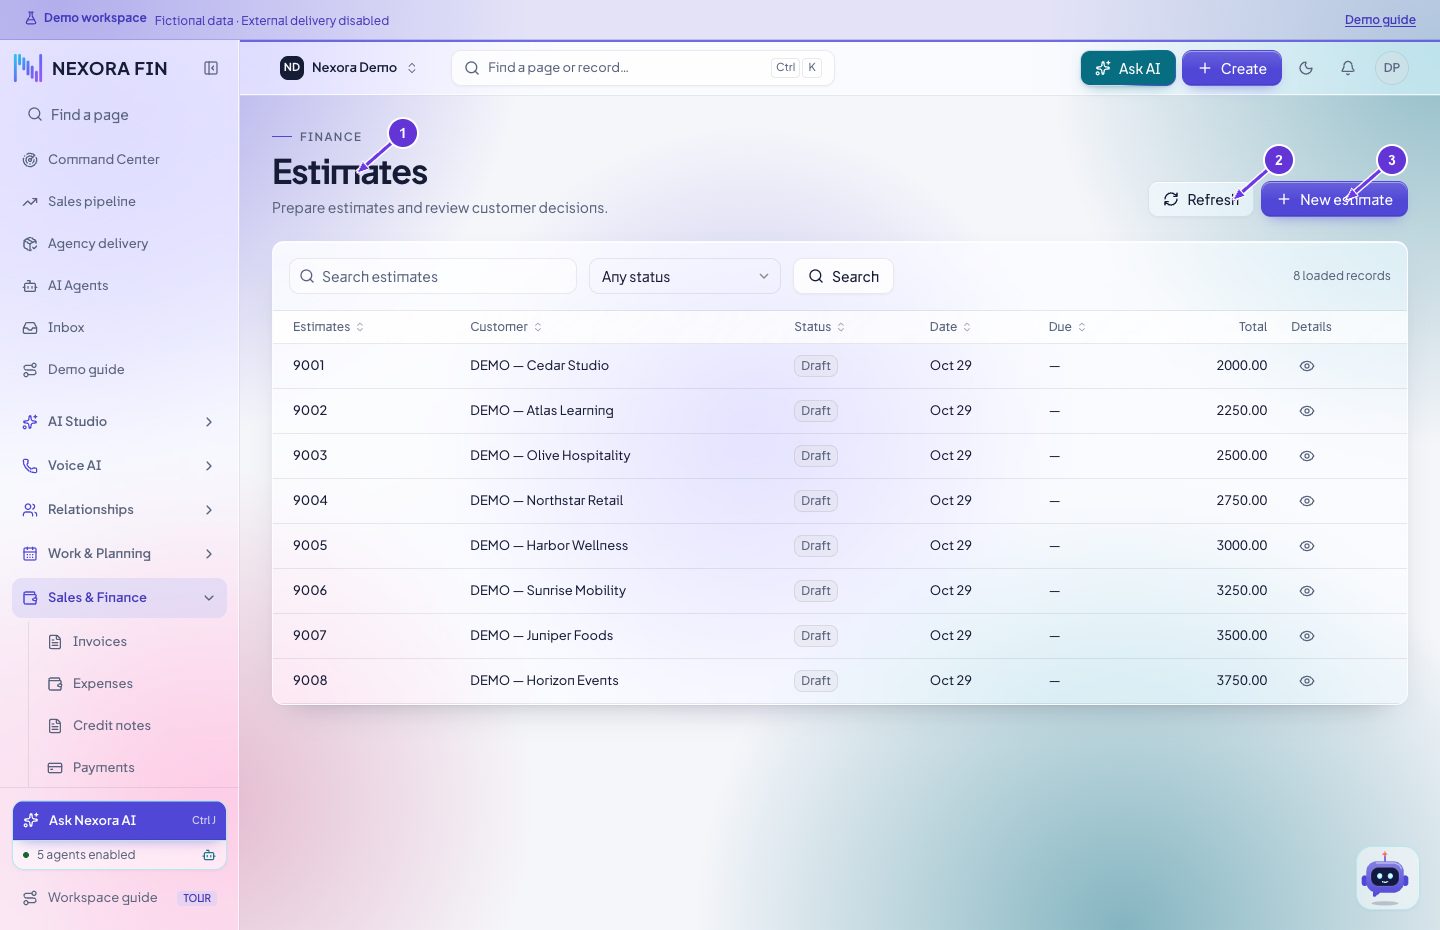
Open Sales & Finance → Estimates. Choose a customer, set dates and line items, save and inspect the preview. Check the saved total and status before using any separate send or conversion action.
- Estimates
- Refresh
- New estimate
Proposals
Open Sales & Finance → Proposals. Link the available lead or customer, add subject, dates and items, then save. Open the preview and verify the content before any send action.
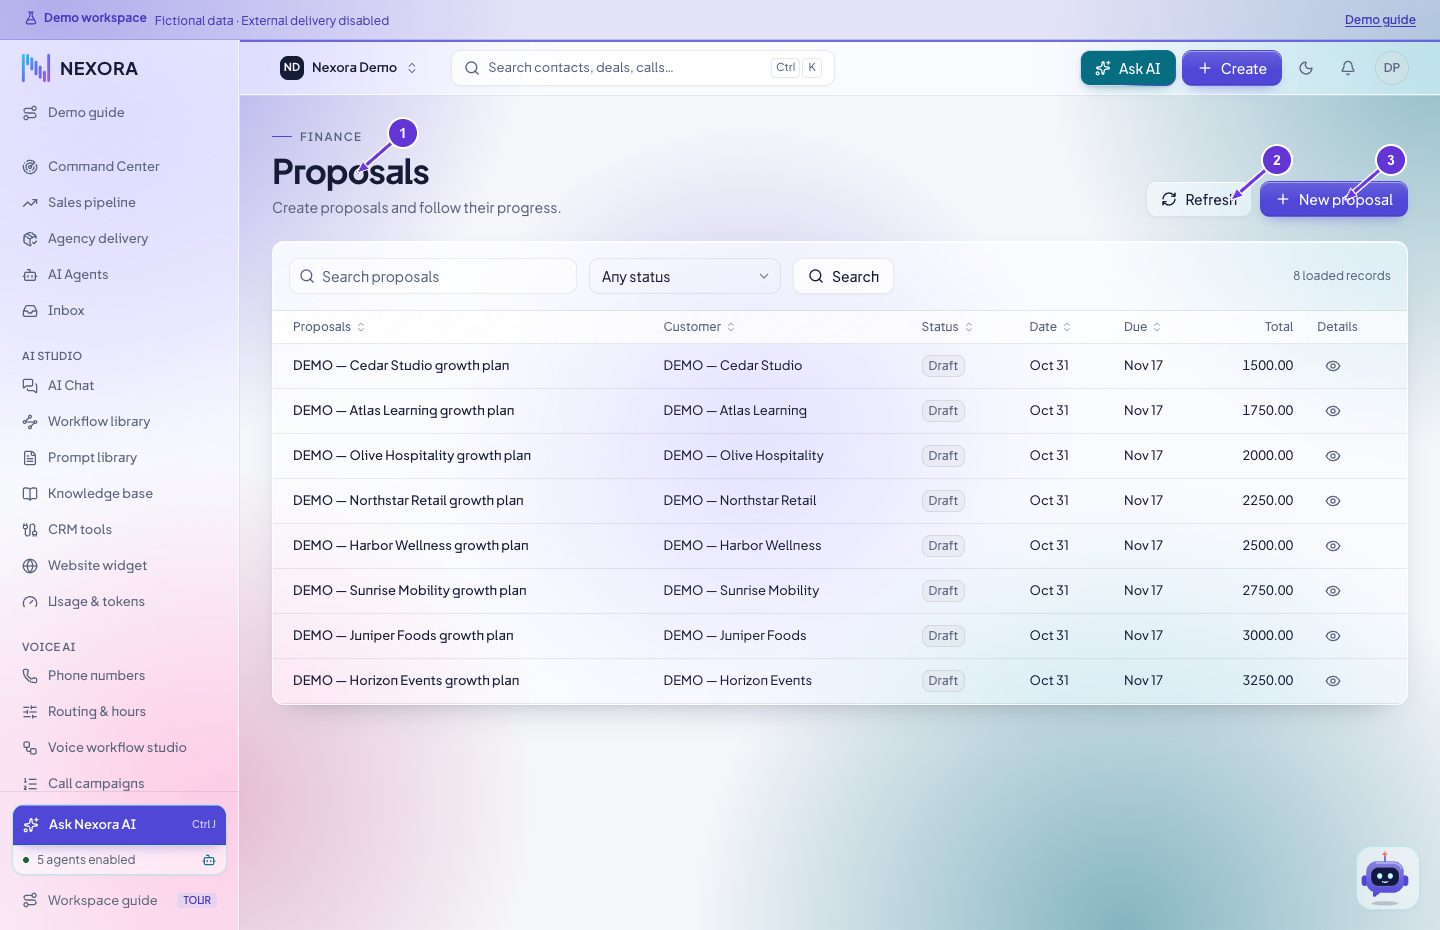
- Proposals
- Refresh
- New proposal
Contracts
Open Sales & Finance → Contracts. Choose the customer and contract type, enter the subject and dates, save and reopen the record. Review the actual signing status in its details.
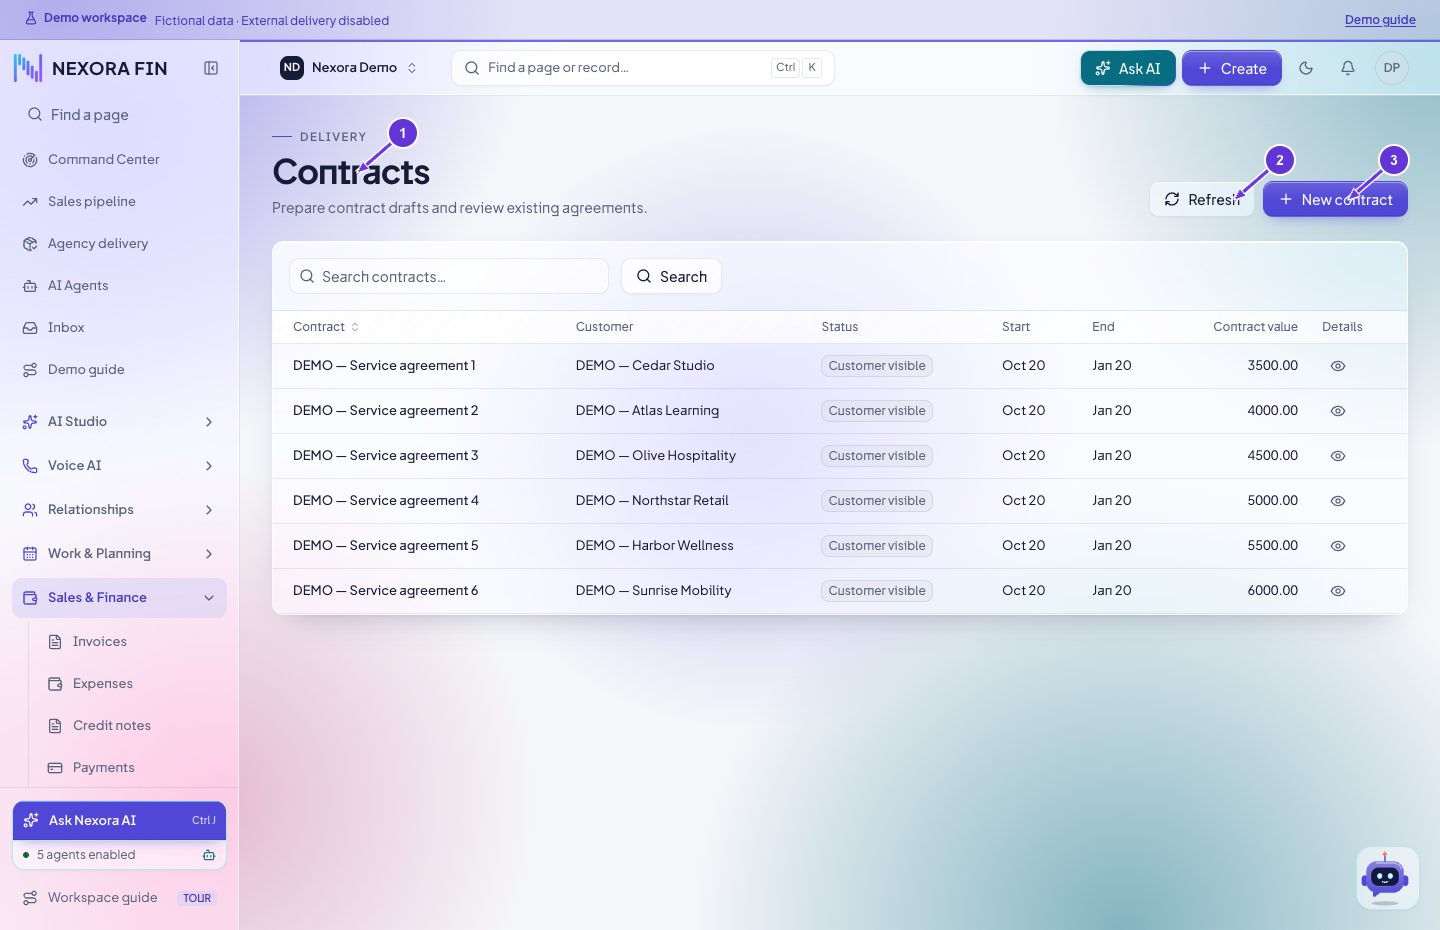
- Contracts
- Refresh
- New contract
Credit notes
Open Sales & Finance → Credit notes. Select the customer, verify the lines and currency and save. Open the credit note to check its balance and available apply or refund actions. Verify the accounting entry after using either action.
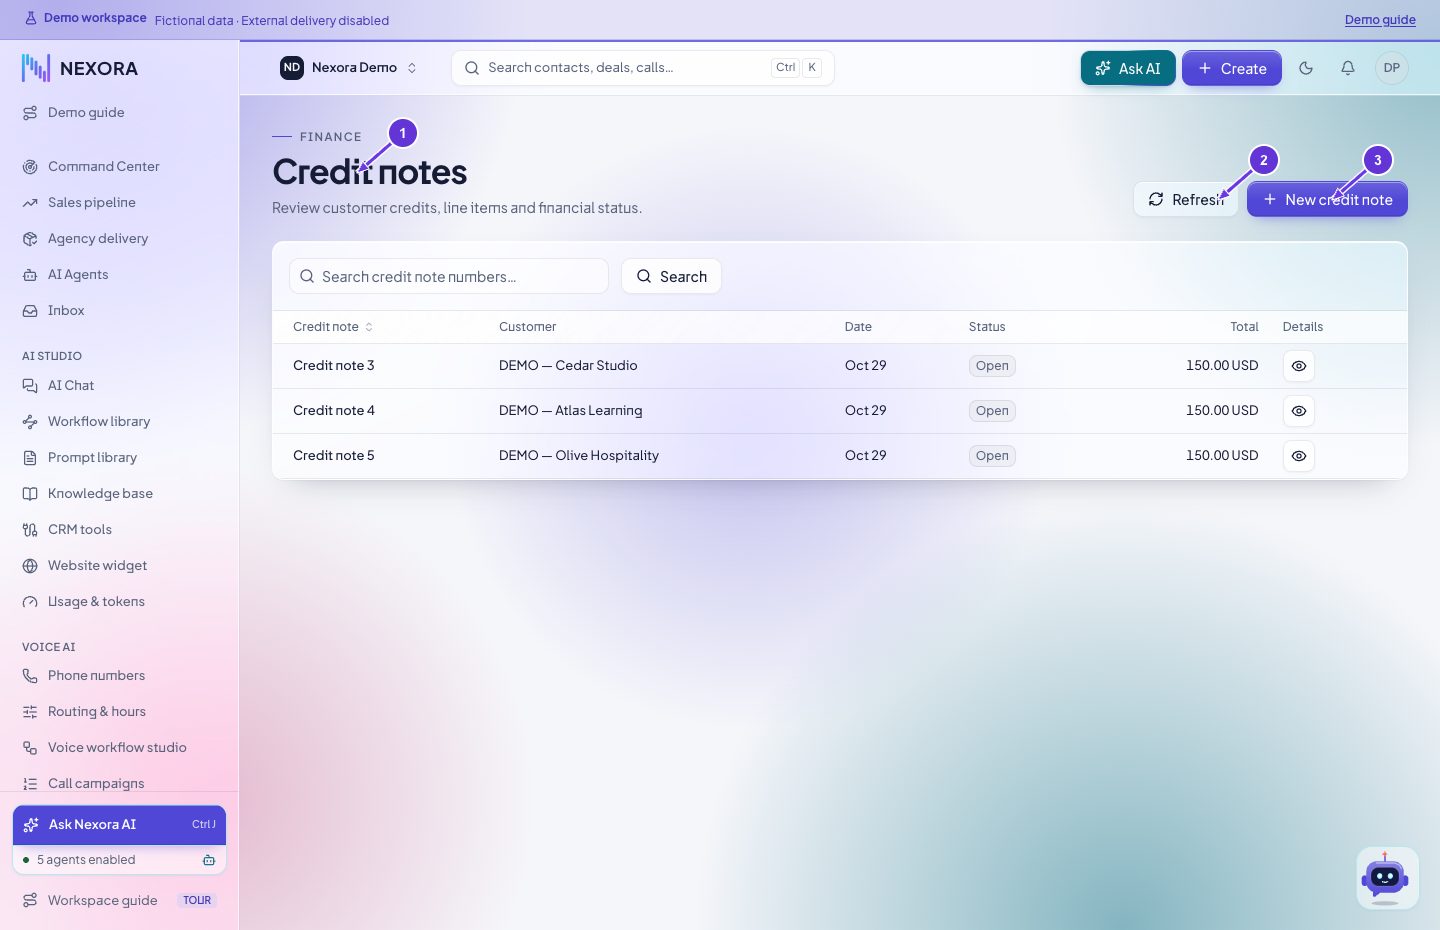
- Credit notes
- Refresh
- New credit note
Payment recovery
Look up the exact invoice and payment attempt. Compare the recorded provider reference and settlement state before following the available recovery action.
Open in CRMInvoice items
Find the existing item first, then create or edit the item name, unit, rate and tax as permitted. Verify the item before reusing it on an invoice.
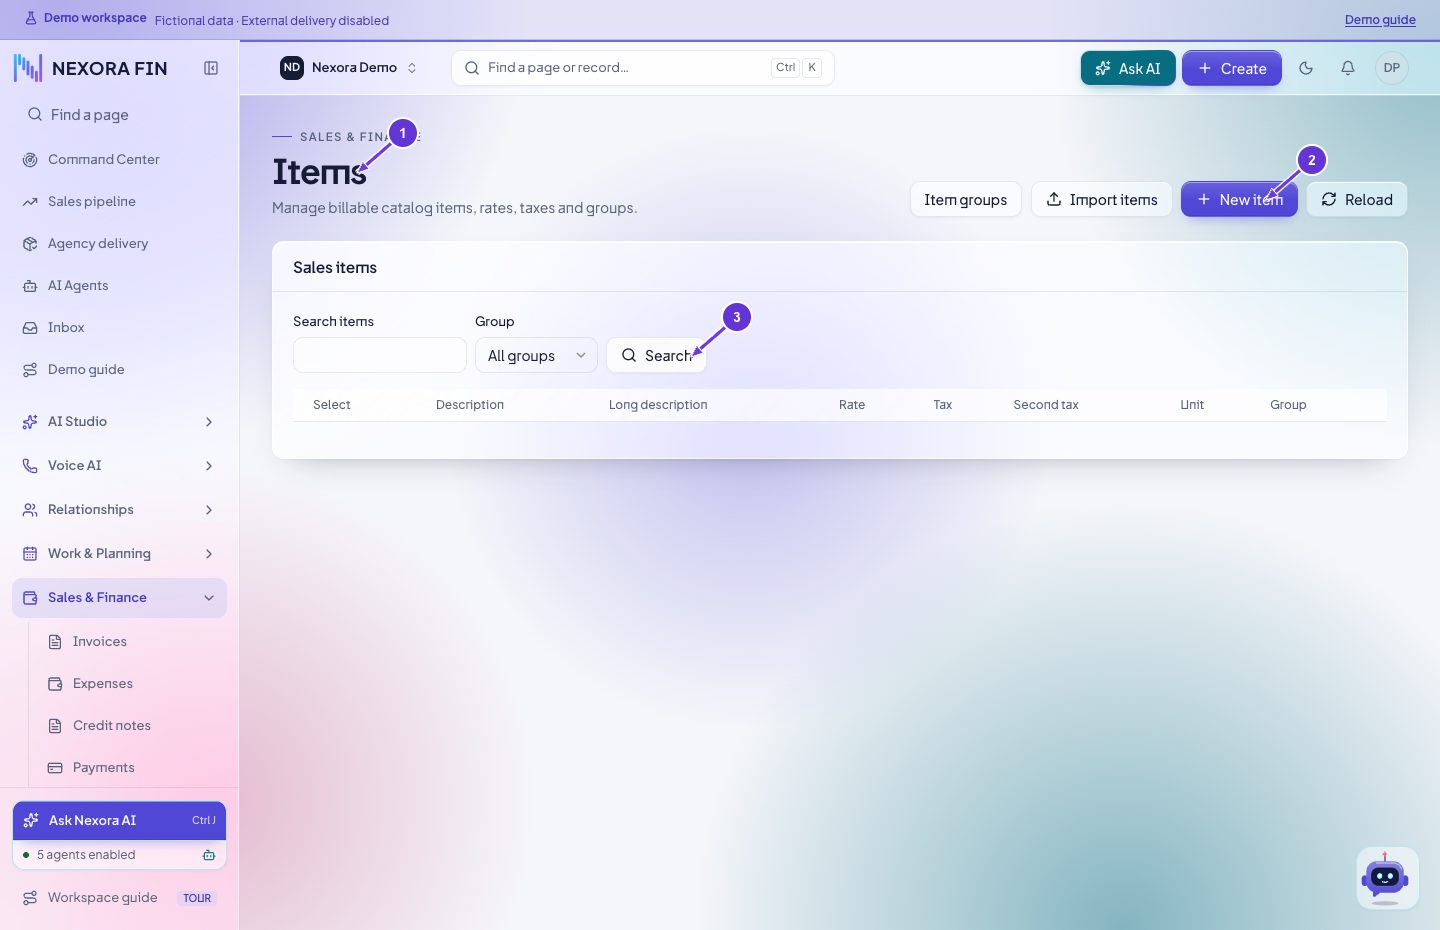
- Items
- New item
- Search
Subscriptions
Open the subscription to review the customer, amount, interval and recorded status. Check the billing provider before assuming that future payments are active.
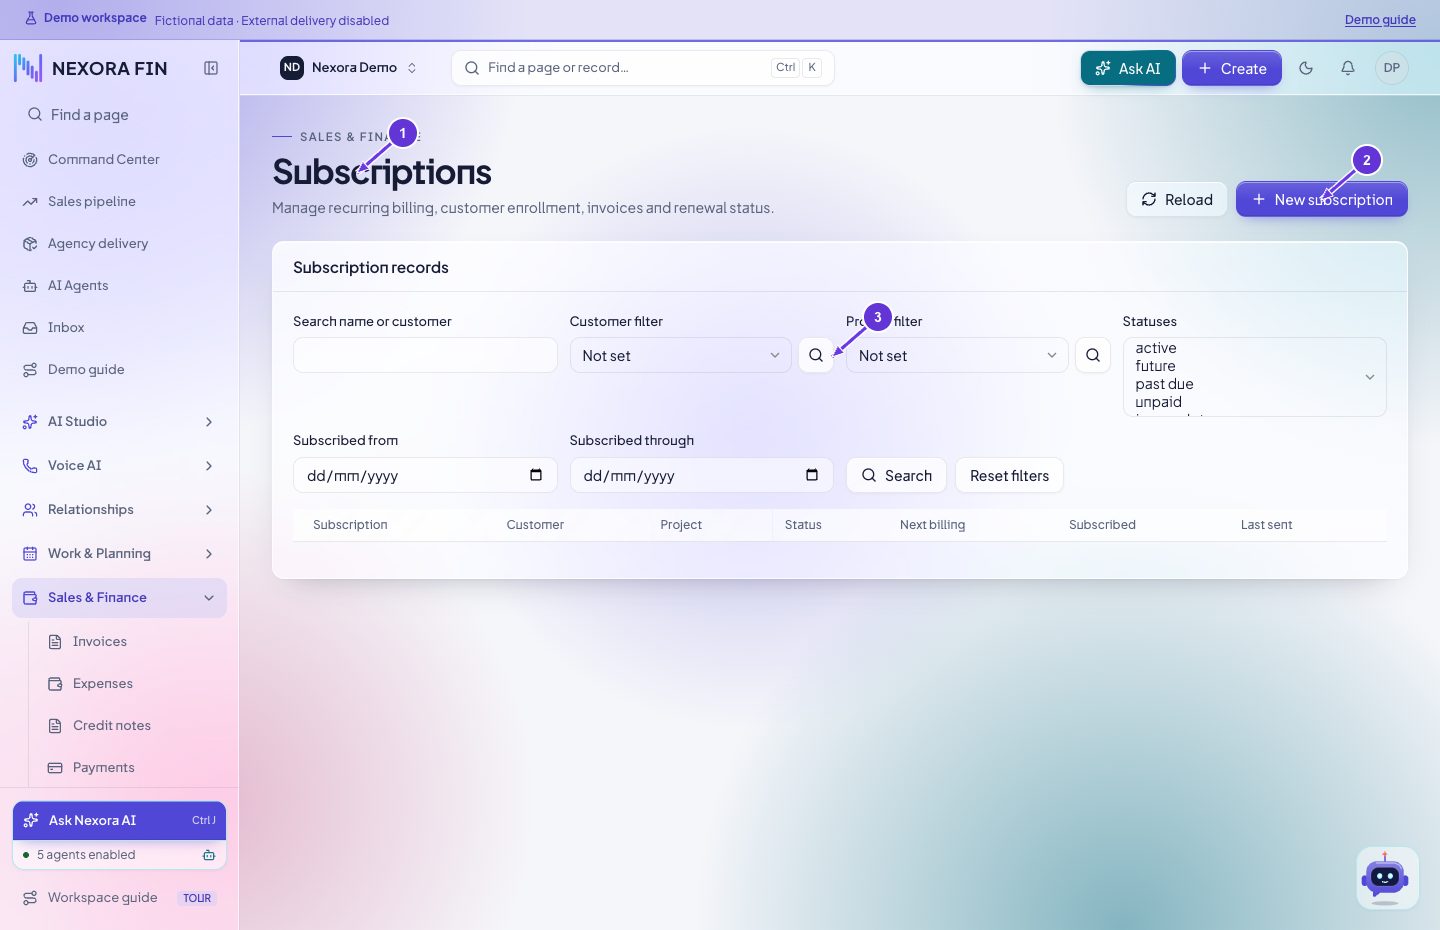
- Subscriptions
- New subscription
- Search Customer filter
Estimate requests
Find the submitted request, inspect its details and current status, then follow the available review or conversion action.
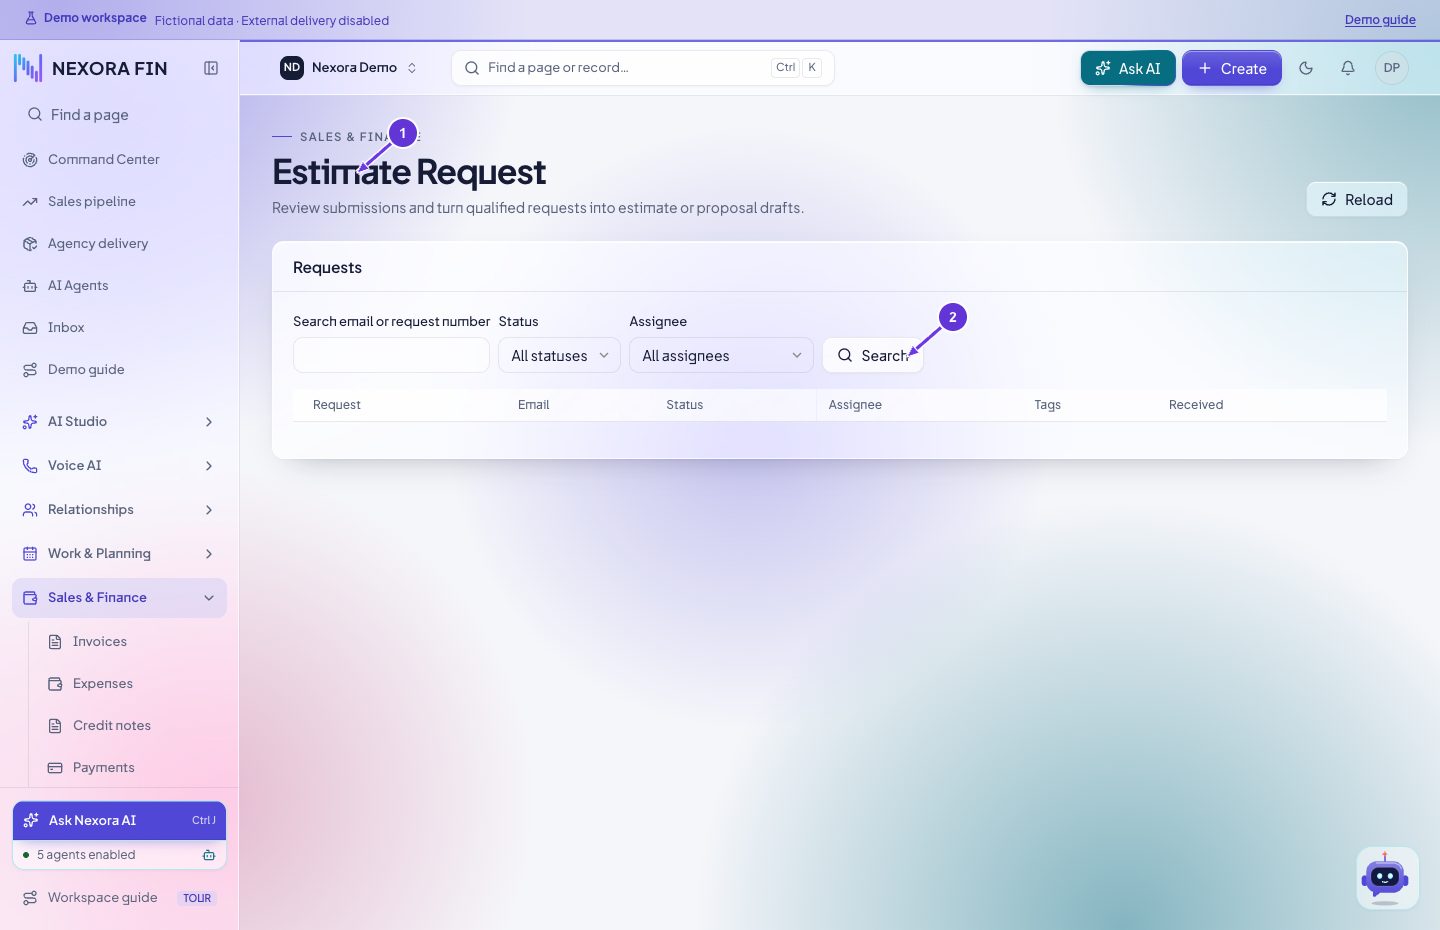
- Estimate Request
- Search
Estimate request forms
Select or create the form, review its fields and assignment, save, and test a controlled submission against Estimate requests.
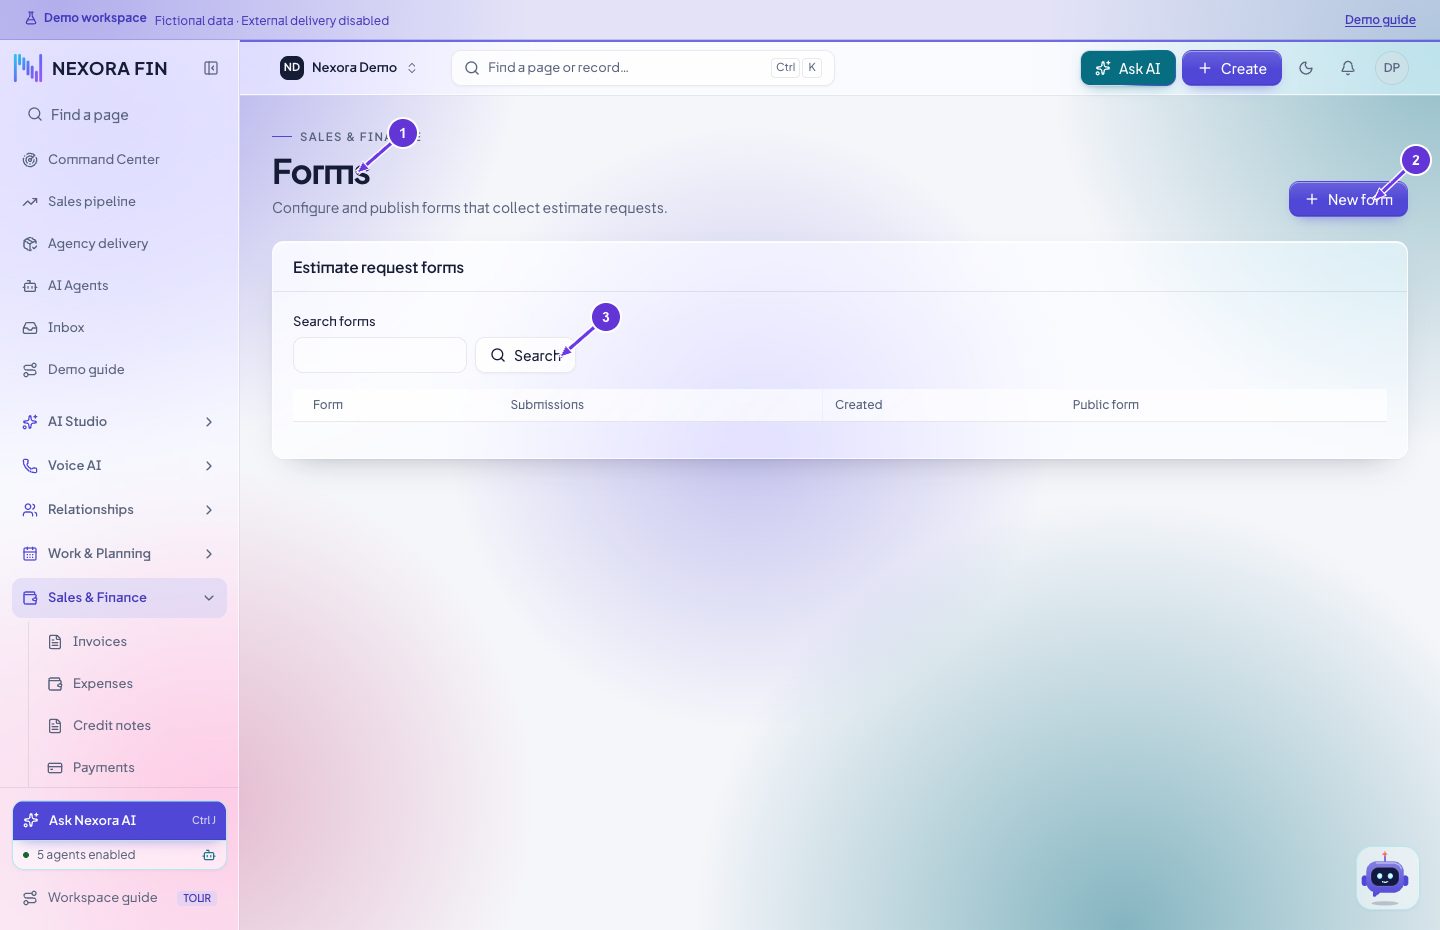
- Forms
- New form
- Search
Estimate request statuses
Create or edit the status name and order, save, and check it appears on an estimate request.
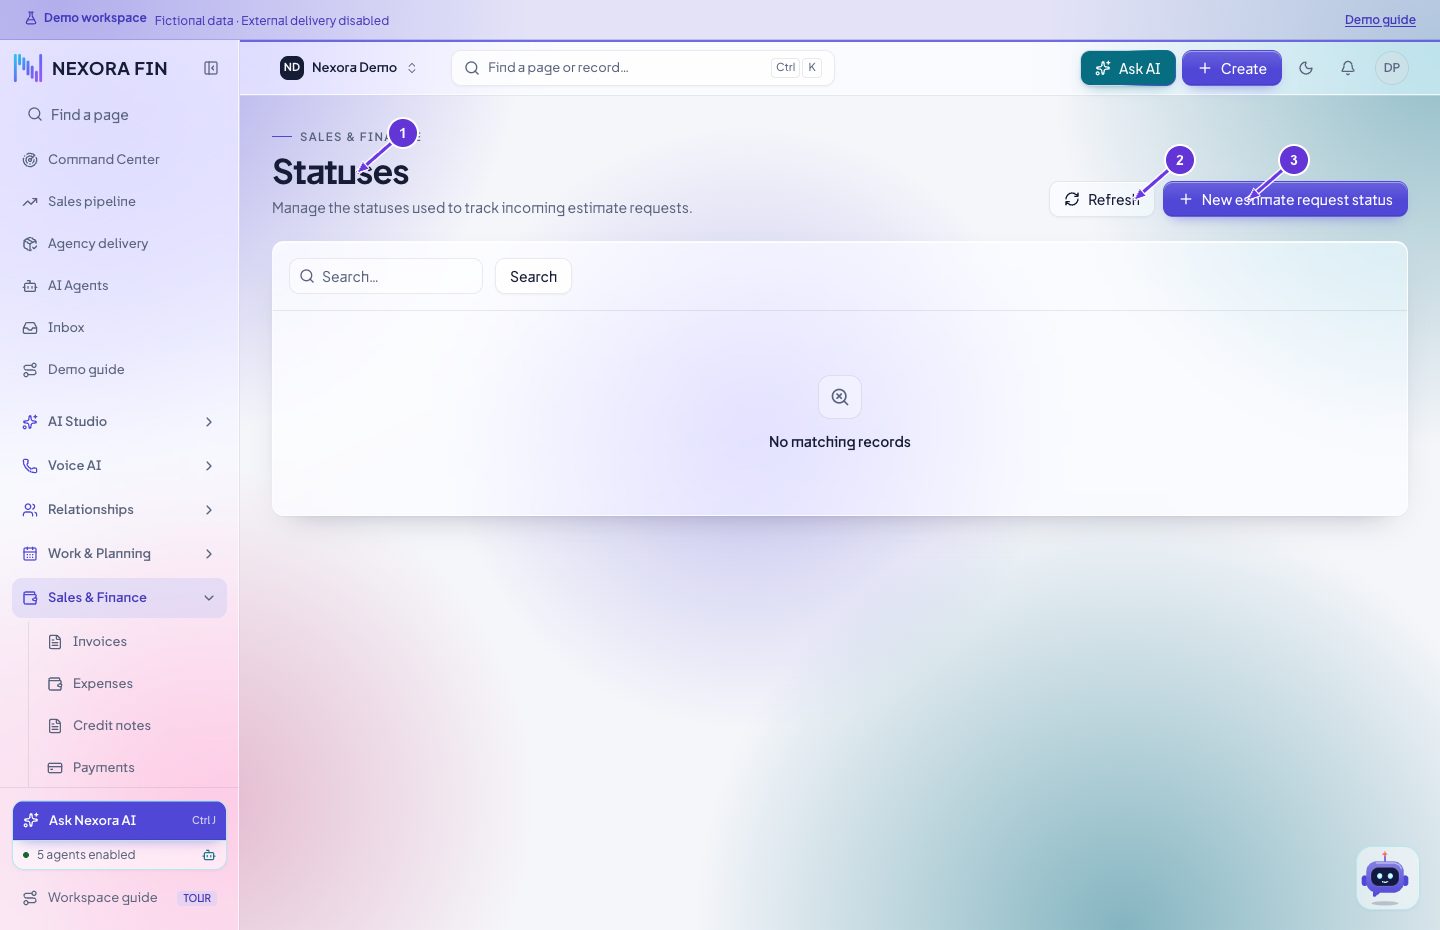
- Statuses
- Refresh
- New estimate request status
Customer support
Support tickets
Open Support → Support tickets. Search by subject or filter by status, then open a ticket within your assigned scope to inspect its status and activity. Reply or create a ticket only if the corresponding control is available to your account.
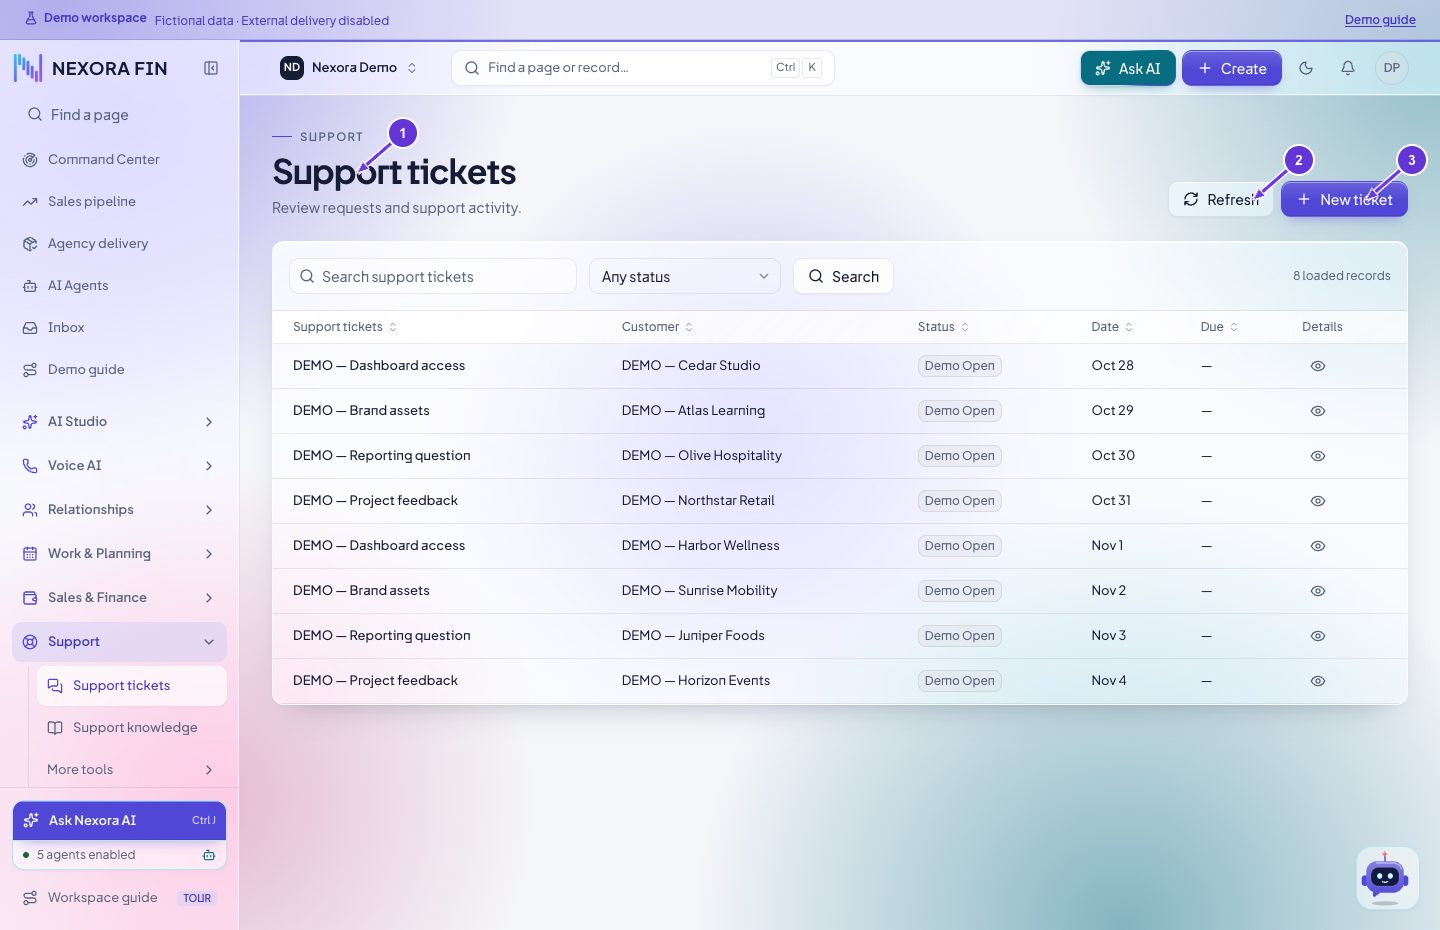
- Support tickets
- Refresh
- New ticket
Support knowledge
Open Support → Support knowledge. Select the article and verify its category and visibility. Preview the published result for the intended audience.
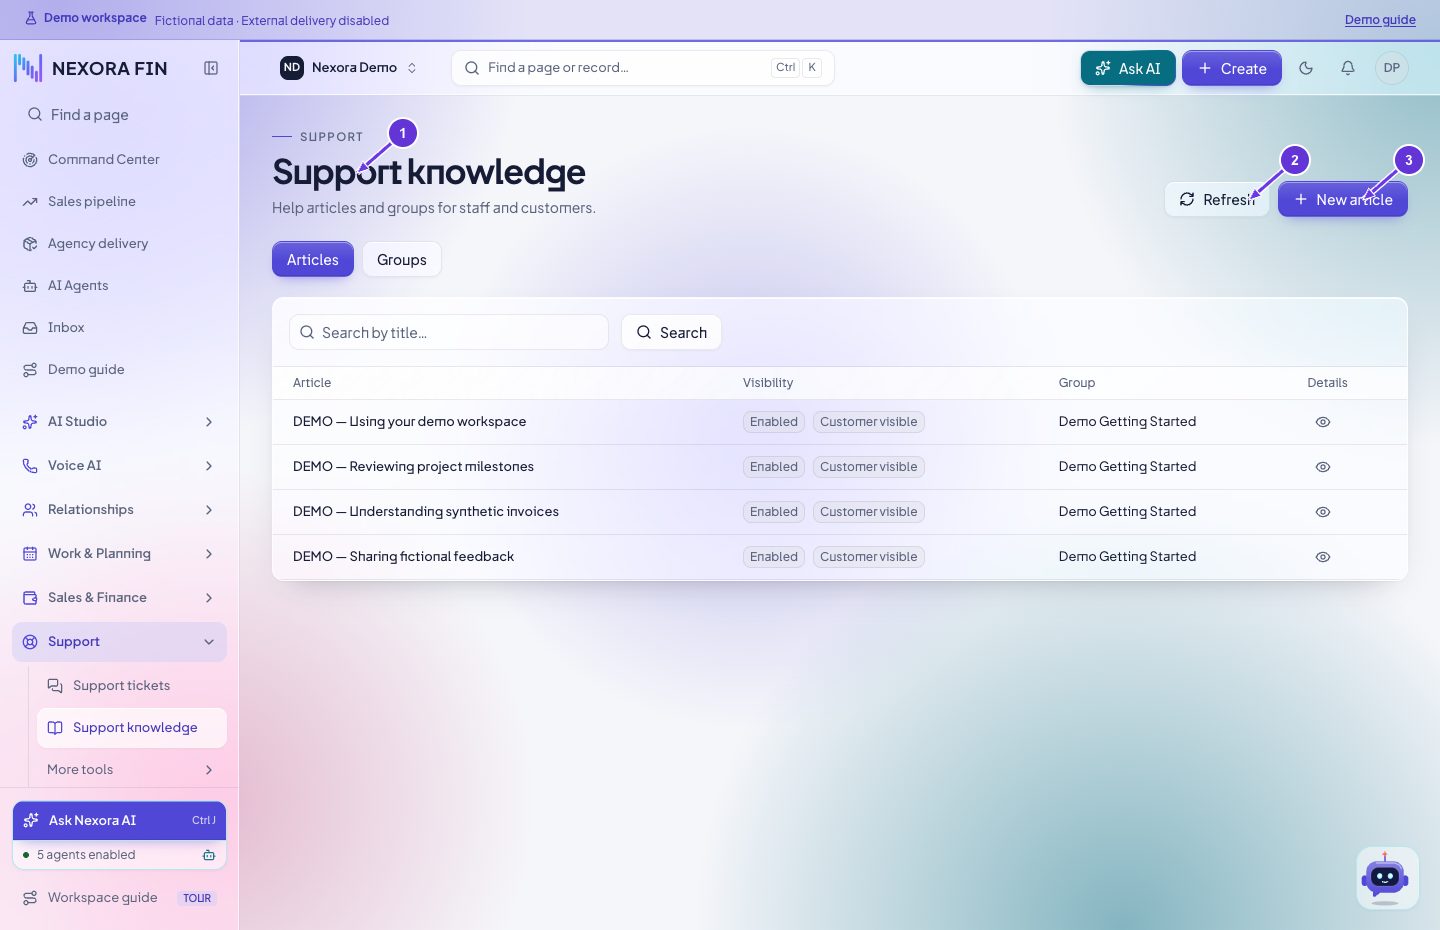
- Support knowledge
- Refresh
- New article
Incoming support email log
Find the incoming email by subject or time and inspect the processing outcome. Compare it with the ticket and department inbox configuration.
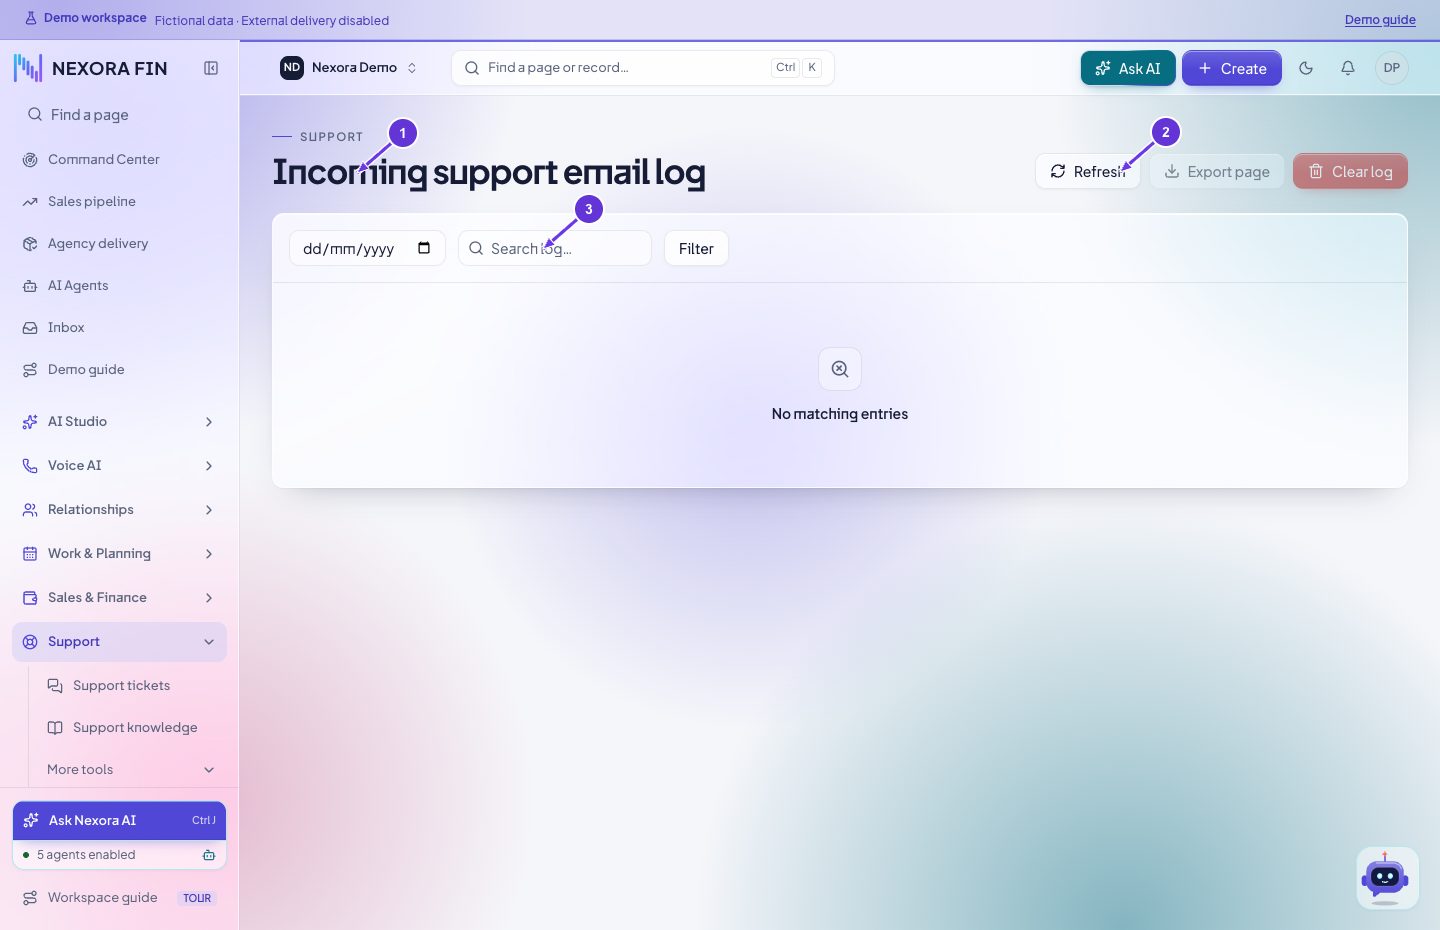
- Incoming support email log
- Refresh
- Search log
Predefined ticket replies
Review or create a reusable reply and save it. Open a ticket and verify the template appears in the reply controls before sending anything.
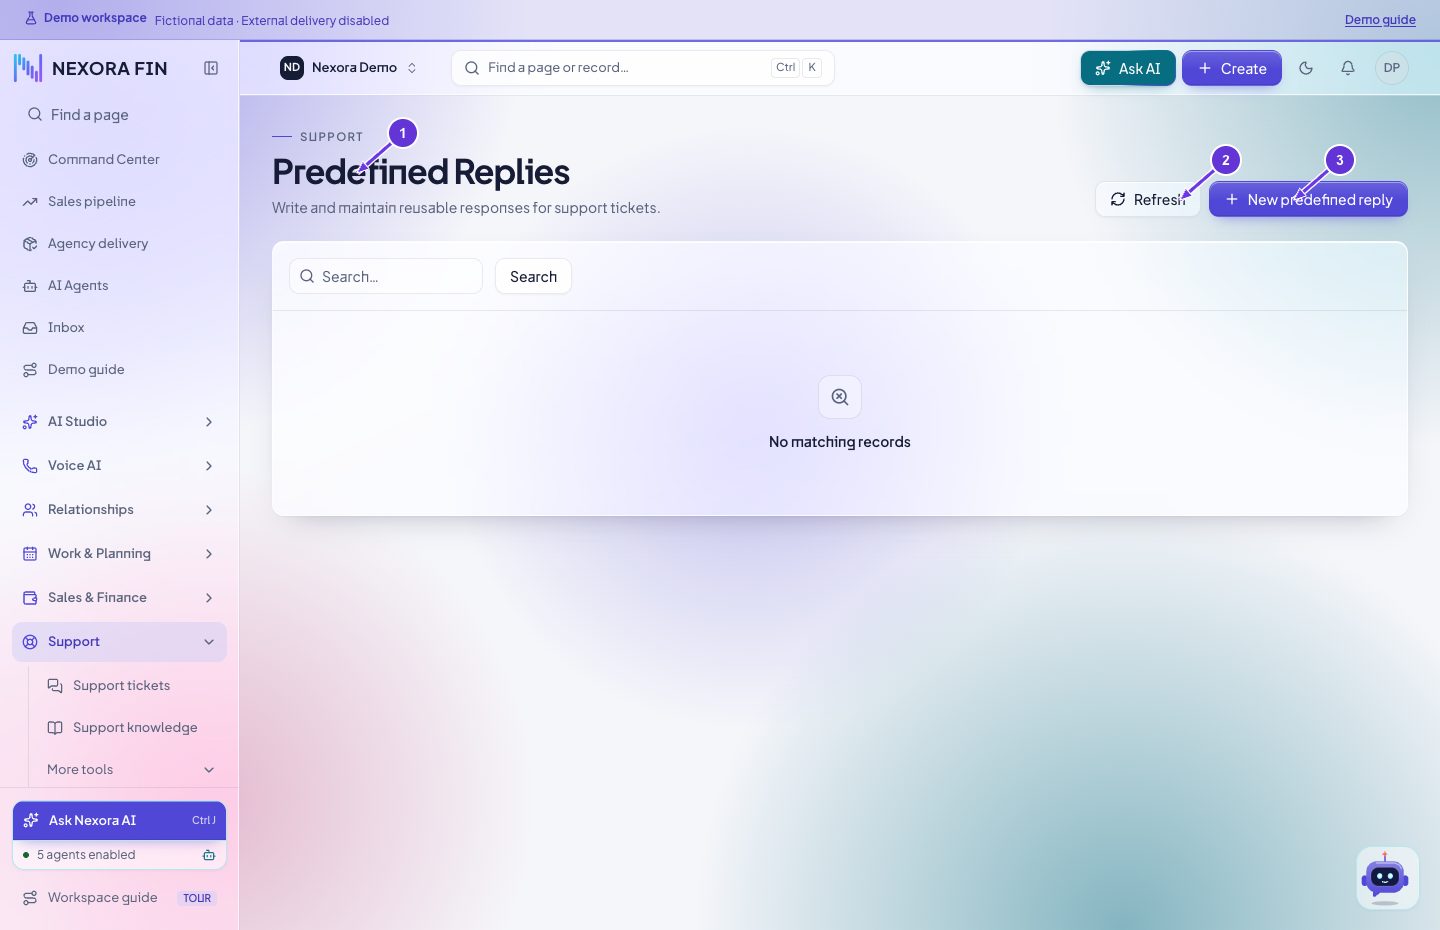
- Predefined Replies
- Refresh
- New predefined reply
Ticket statuses
Create or edit the status and ordering, save and verify it appears on the ticket. Check existing tickets before removing a status.
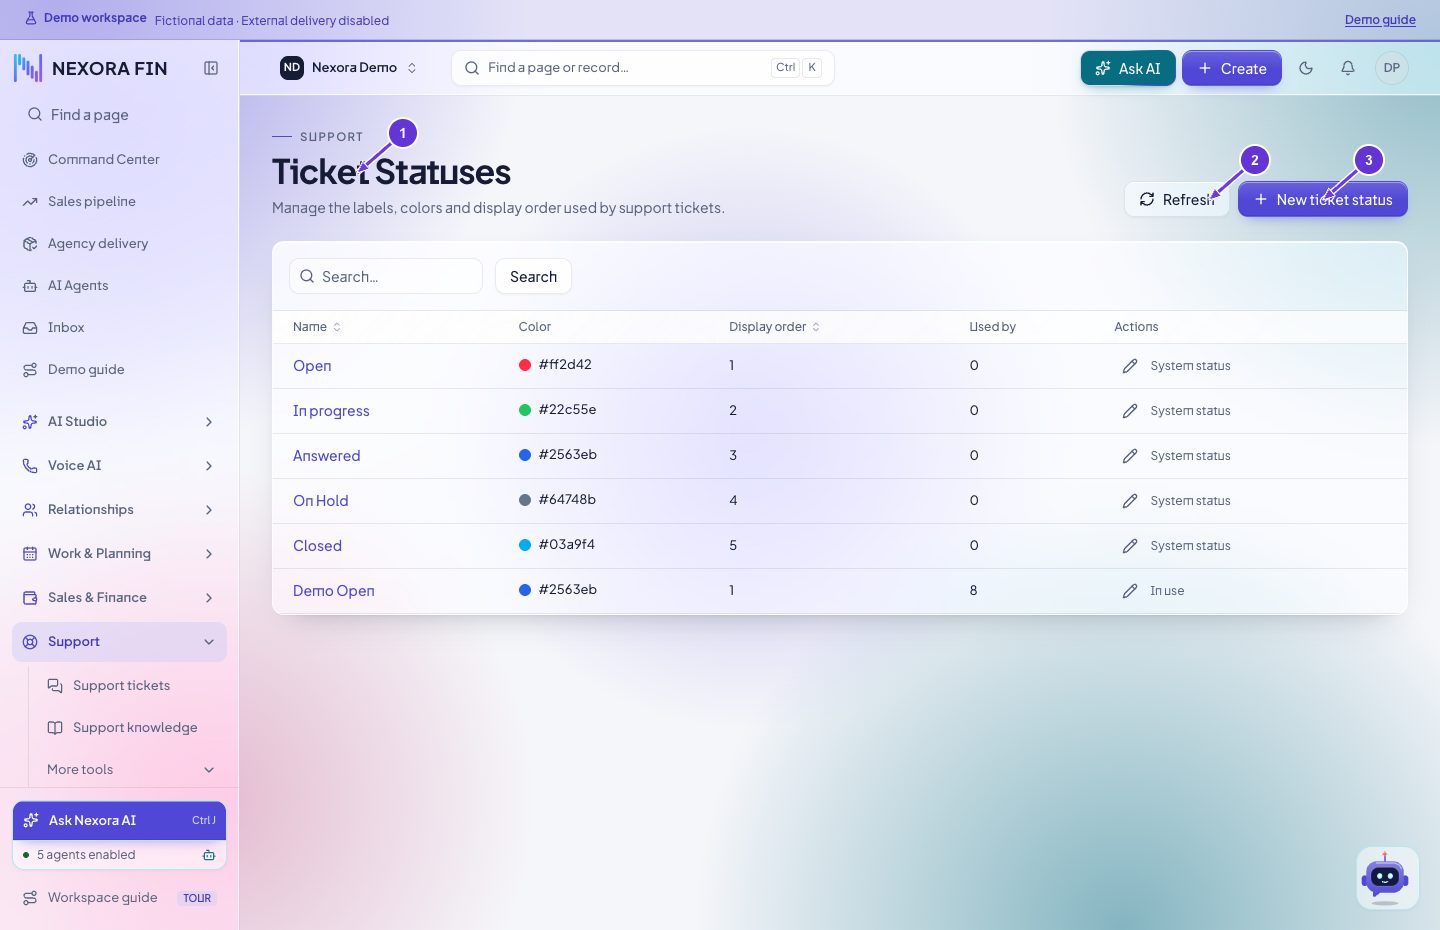
- Ticket Statuses
- Refresh
- New ticket status
Ticket spam filters
Review the existing rules, choose the correct match target and save the rule. Check incoming support email results to confirm the rule behaves as intended.
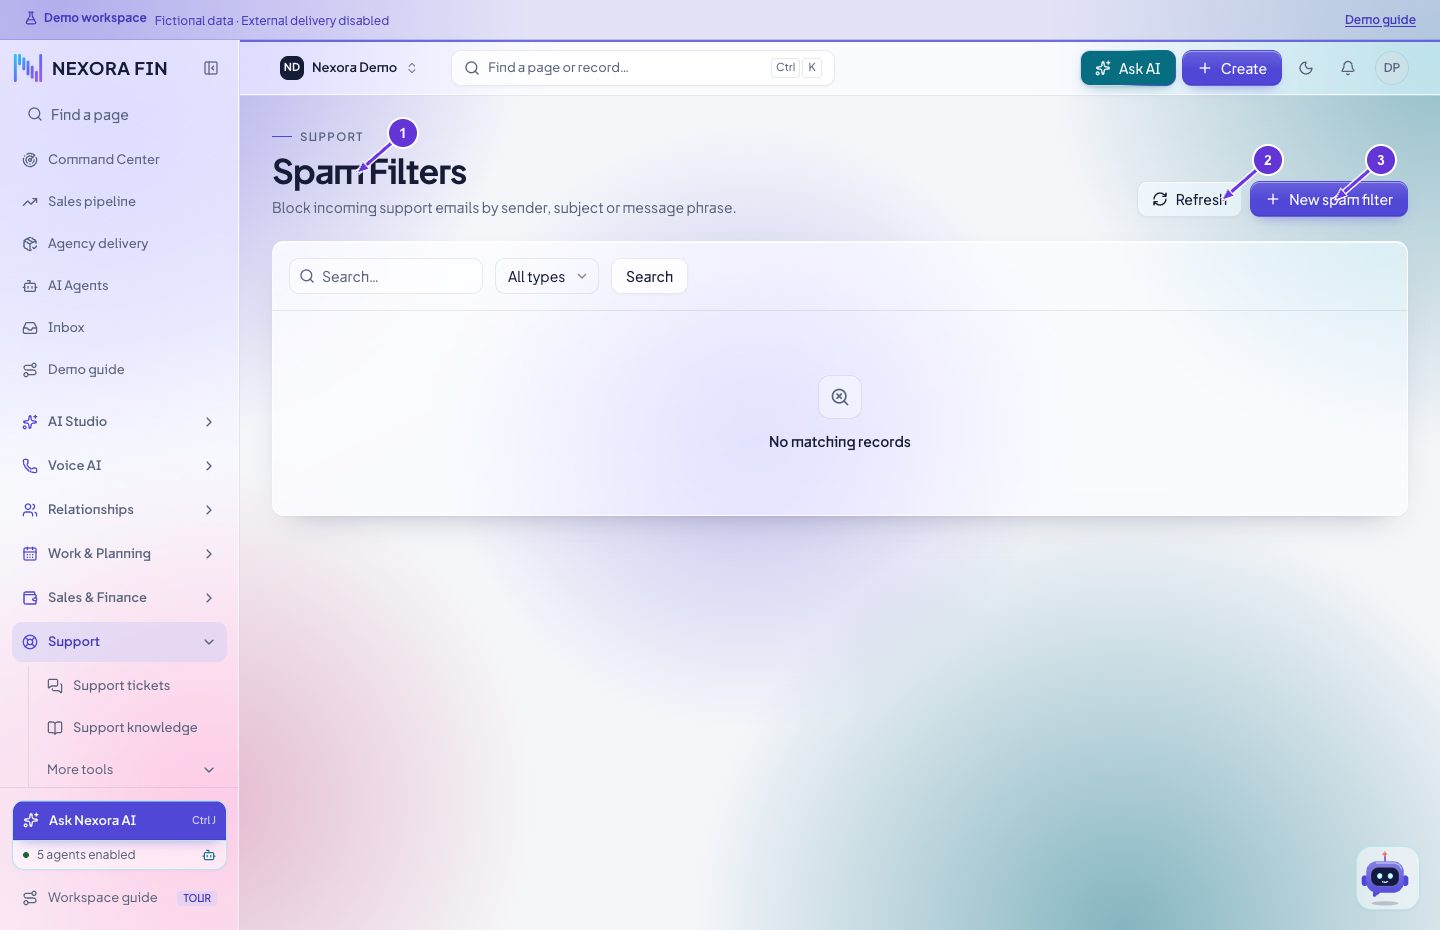
- Spam Filters
- Refresh
- New spam filter
Create and resolve a support ticket
Choose the new ticket action, select the contact or customer and department, and enter the subject, message and priority. Use the ticket thread to reply or add an internal note where offered. Check the recipient and visibility. When resolved, update status and verify the last action in the thread.
- Support tickets
- Refresh
- New ticket
Reports and analytics
All reports
Open Reports → All reports. Choose a report, set the date range and relevant filters, and run it. Use the export formats offered by that report. For a schedule, save the report filter, configure its recurrence and recipients, then check delivery history. Scheduling requires configured SMTP.
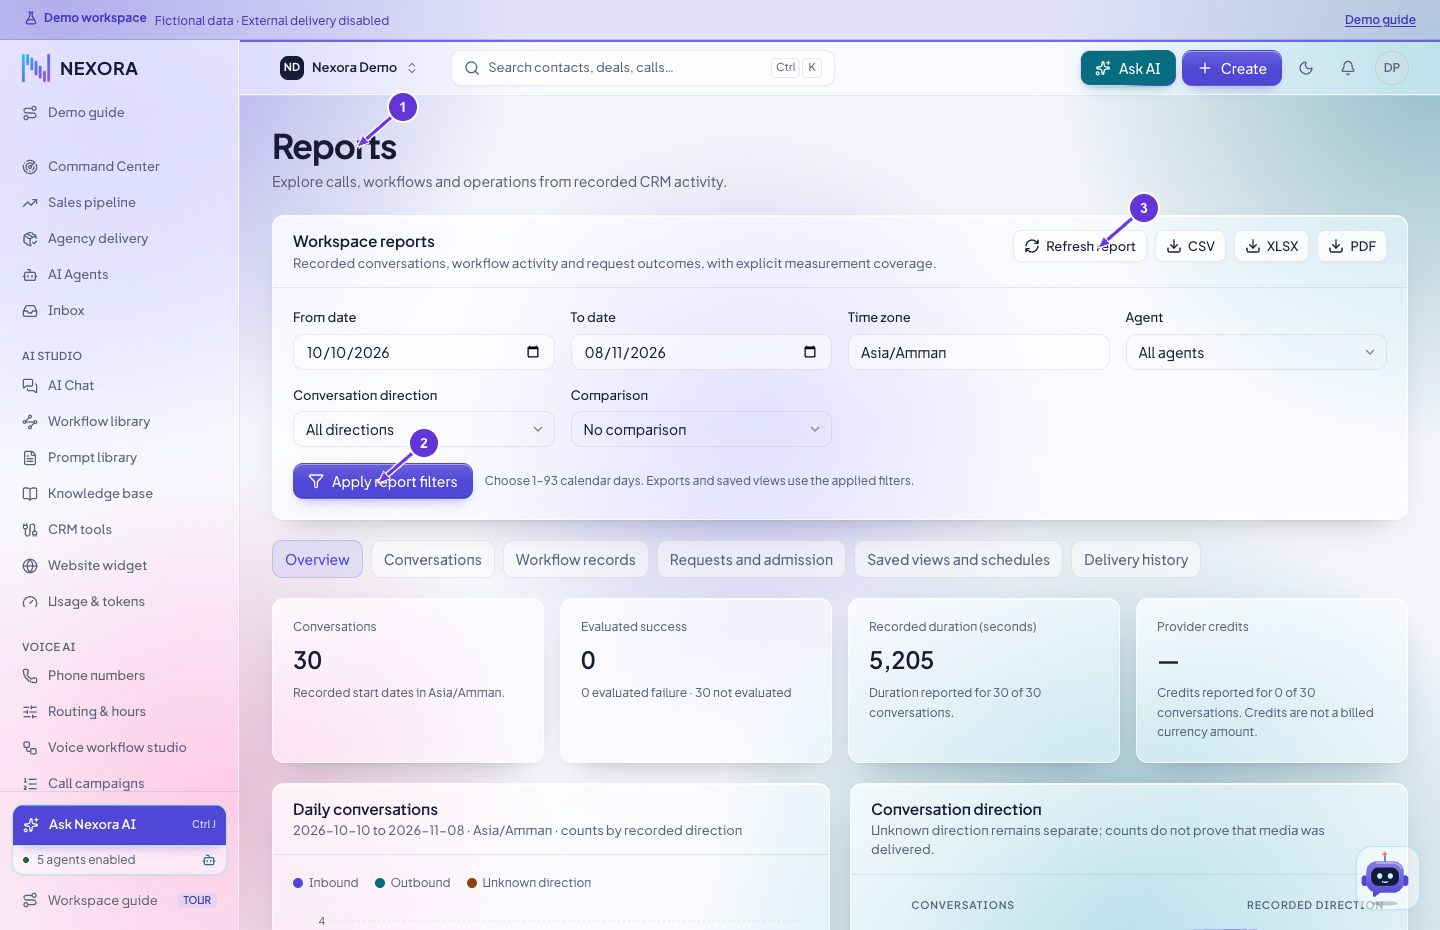
- Reports
- Apply report filters
- Refresh report
Provider usage
Open AI Studio → Provider usage. Select the date range, review available provider totals and compare them against the provider account for the same interval.
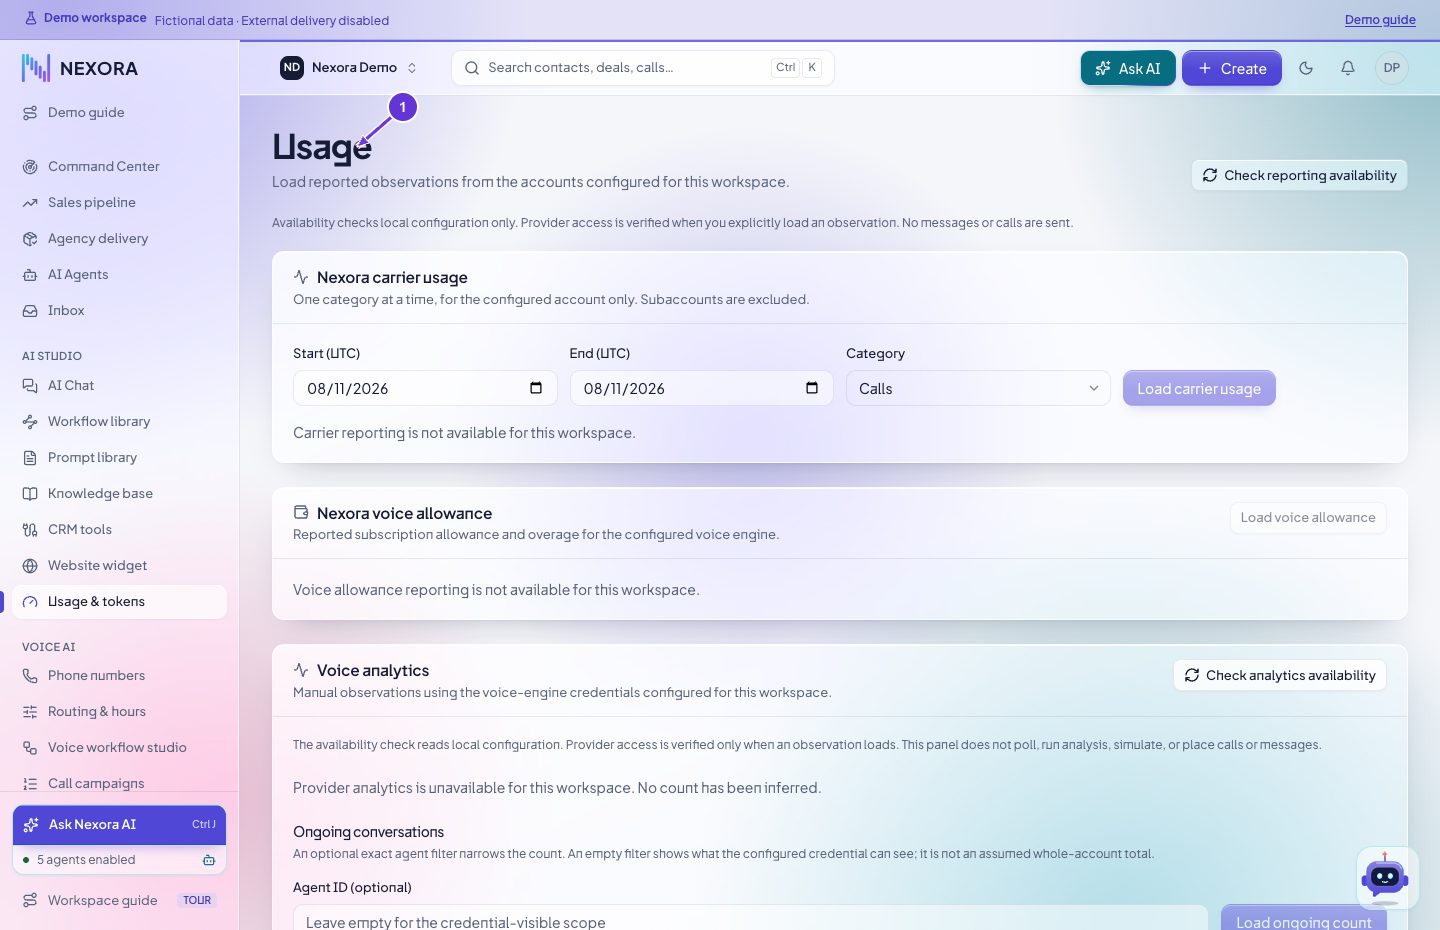
- Usage
Carrier usage
Select a date range and filter by the available number or direction. Compare the recorded usage with carrier billing for the same period.
Open in CRMCampaign quality
Select the campaign and period, then review outcome distribution, failed calls and follow-ups. Open the individual call before attributing a cause.
Open in CRMBulk PDF exporter
Choose the document type and filters, check the records included, and start the export. Open the downloaded archive or PDF to verify the selected scope.
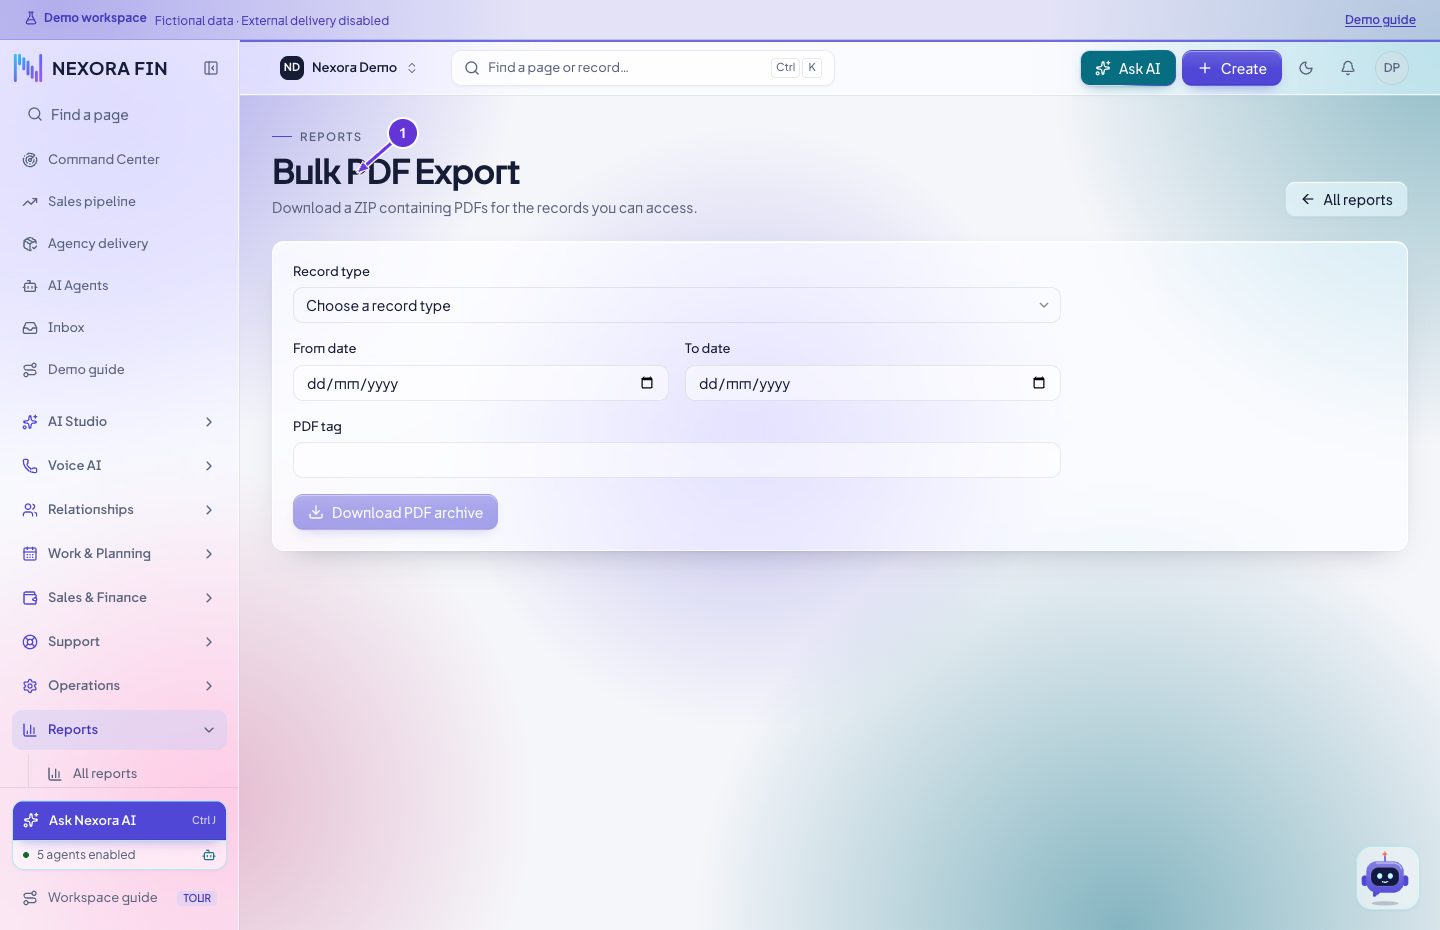
- Bulk PDF Export
Sales reports
Choose the report and set a date range and any available customer or status filters. Compare totals with the underlying invoices or payments before exporting.
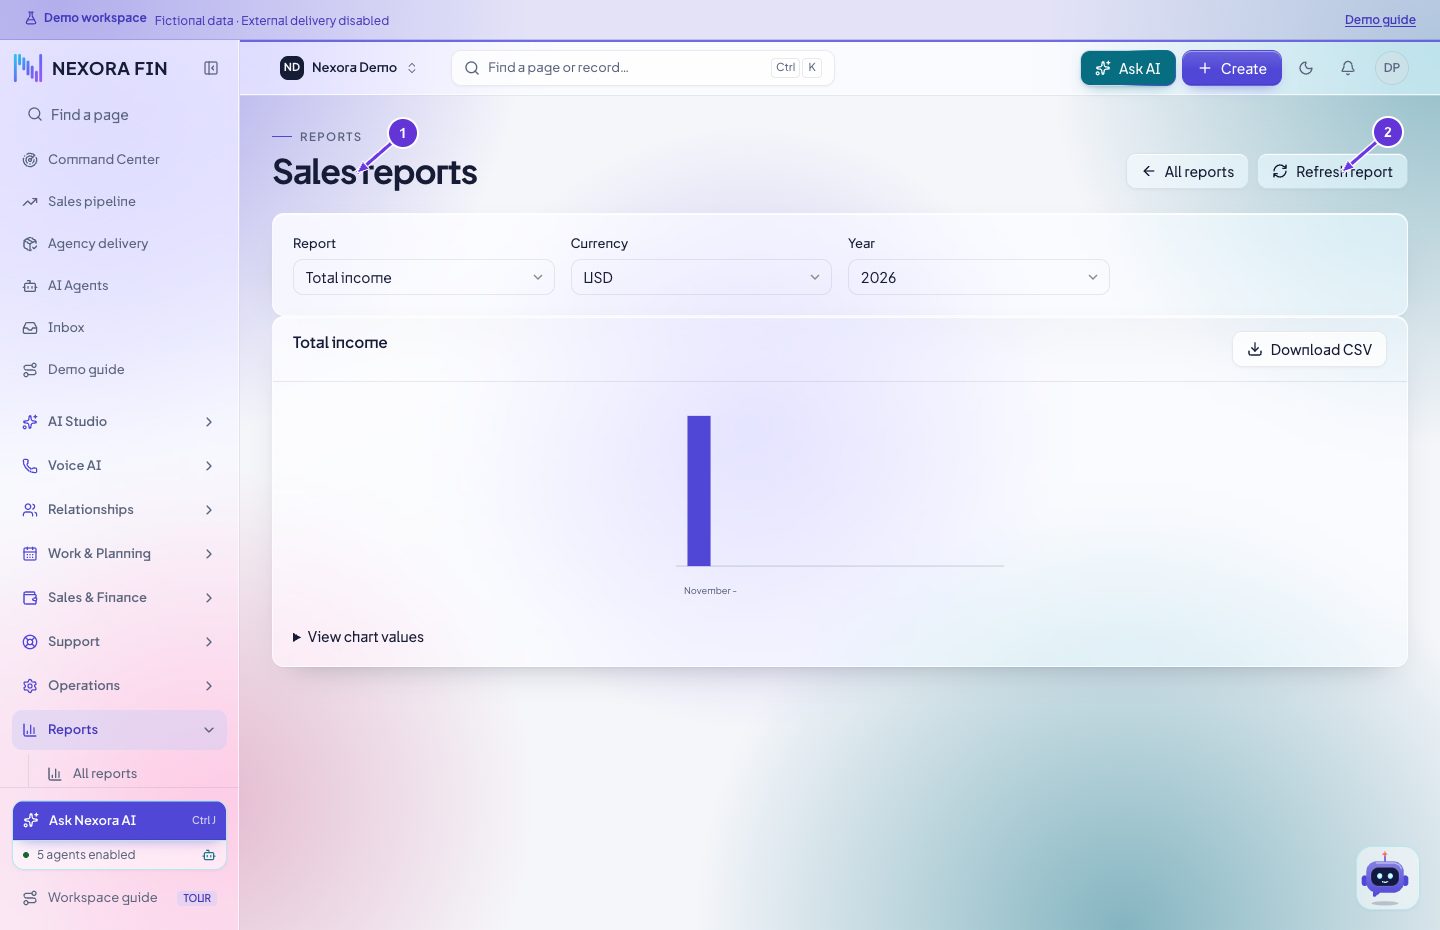
- Sales reports
- Refresh report
Expense reports
Set the period and category or customer filters. Verify totals against expense records and export the filtered result where available.
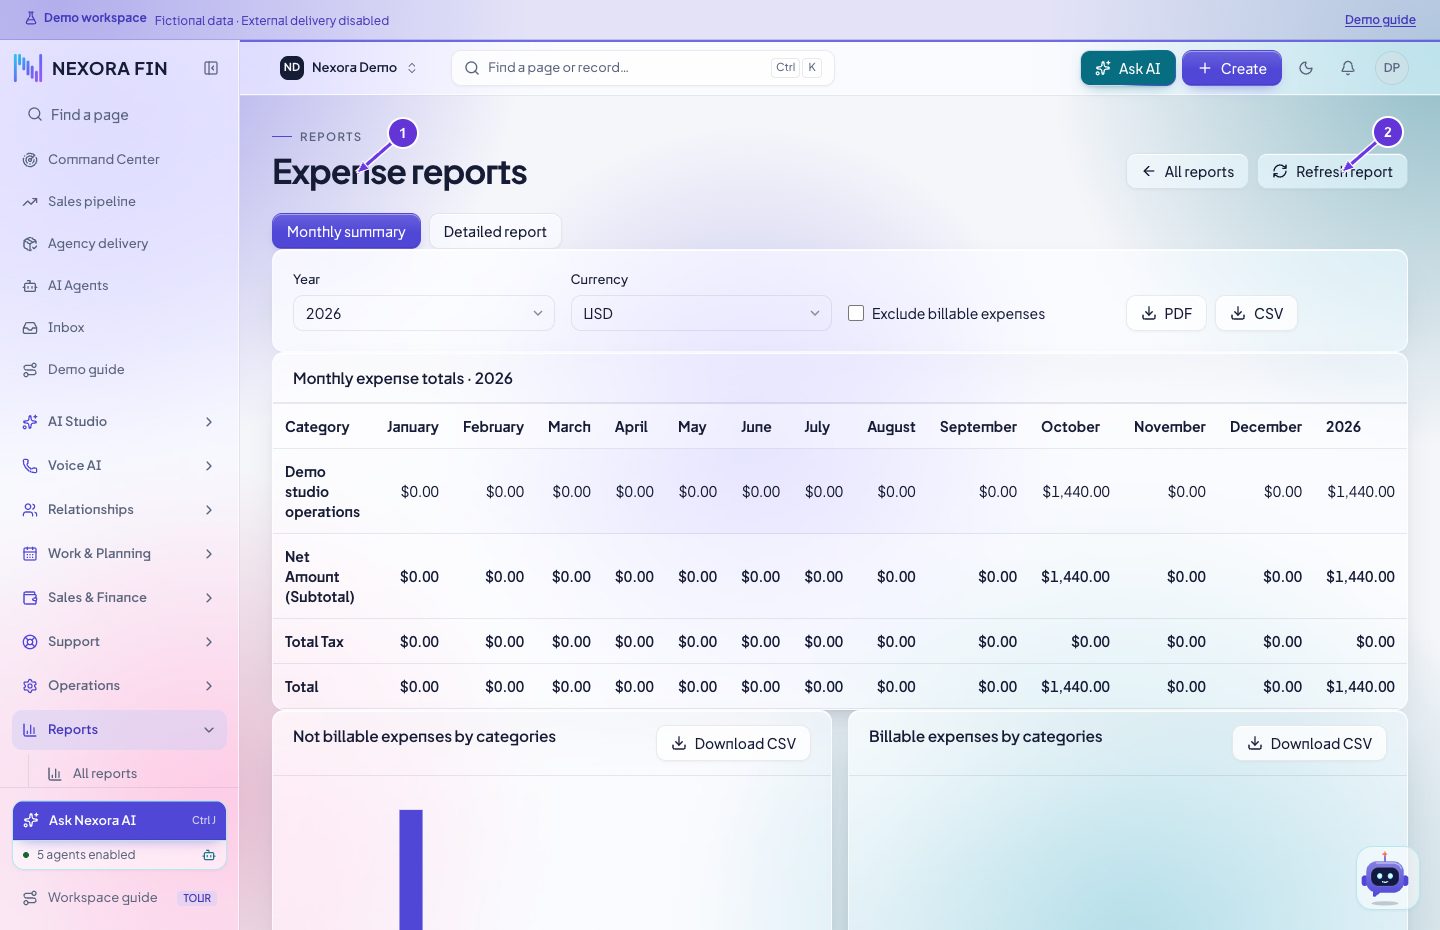
- Expense reports
- Refresh report
Income vs Expenses
Choose the report year and compare the income and expense series. Inspect the underlying records if a monthly total differs from expectations.
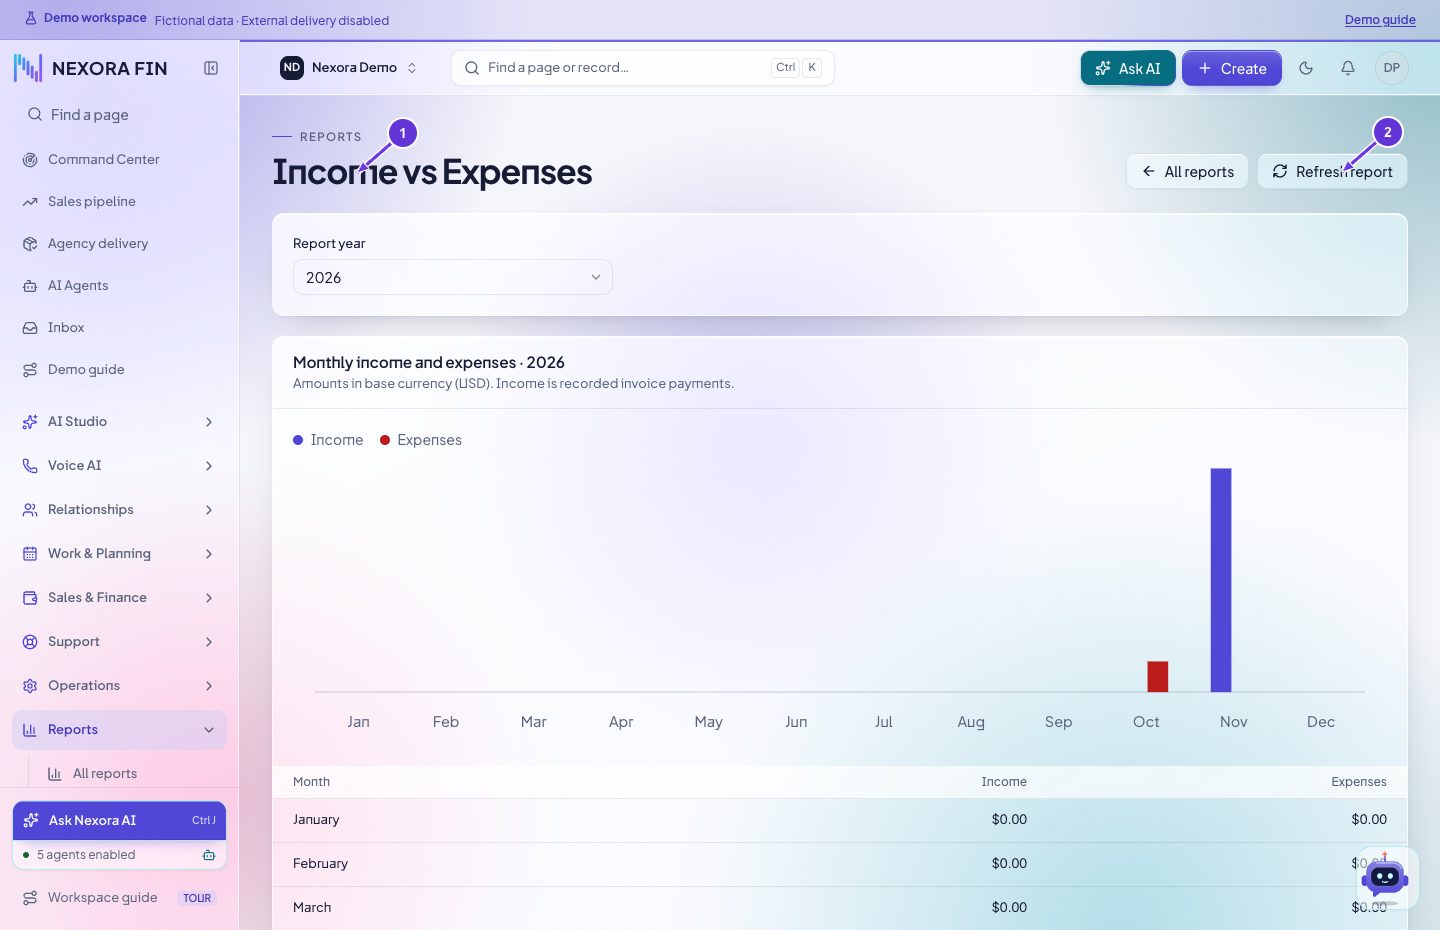
- Income vs Expenses
- Refresh report
Leads reports
Select the lead report filters, compare source and status counts, and verify the underlying lead records before downloading the report.
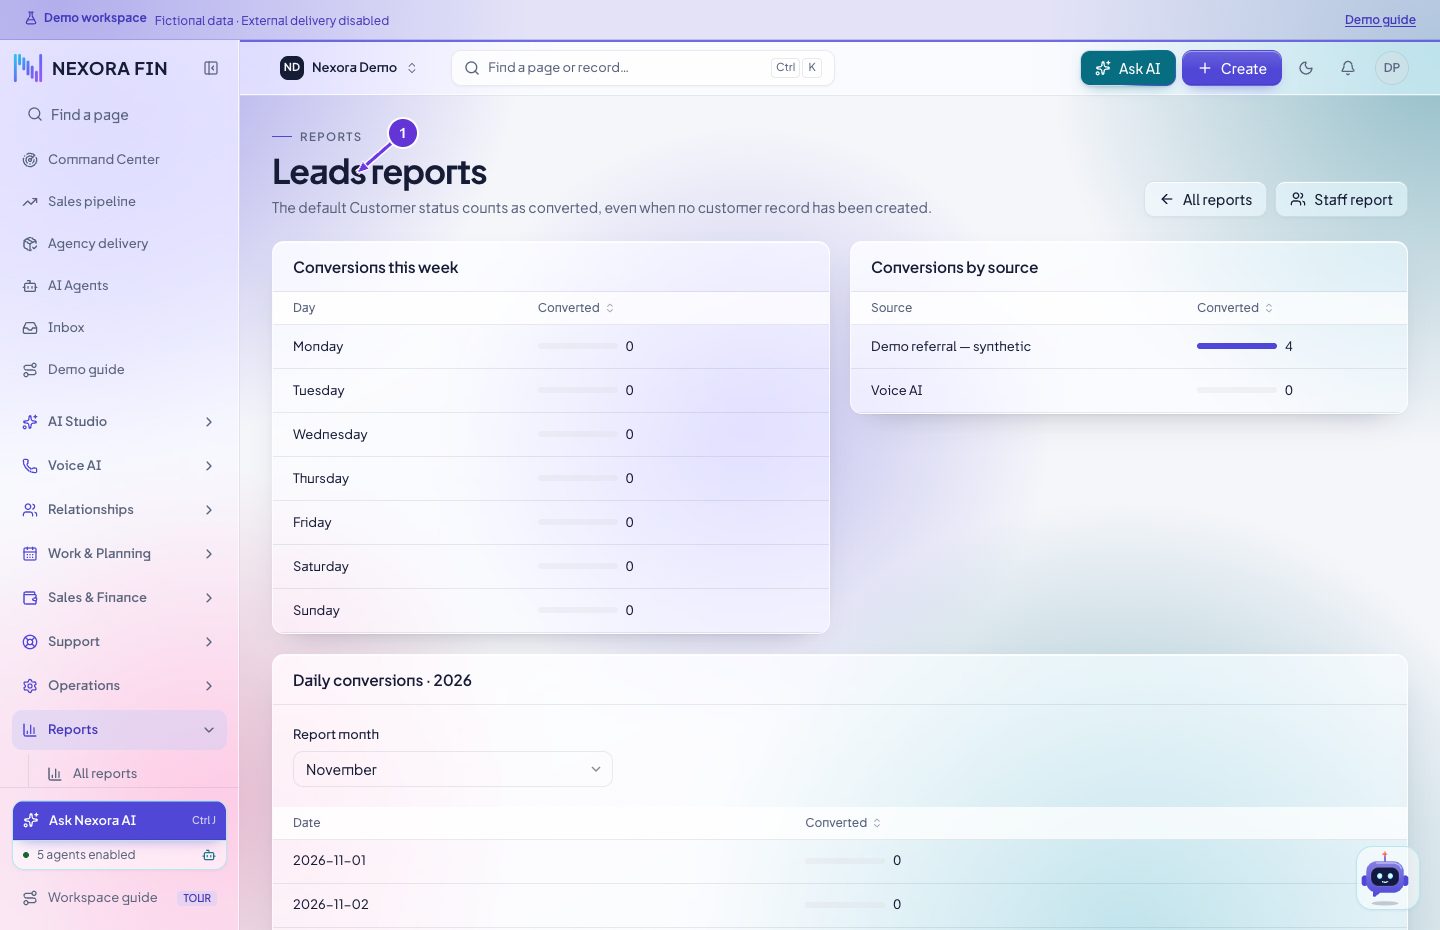
- Leads reports
Knowledge base feedback
Choose the available article or period filter. Review votes and feedback alongside the published article.
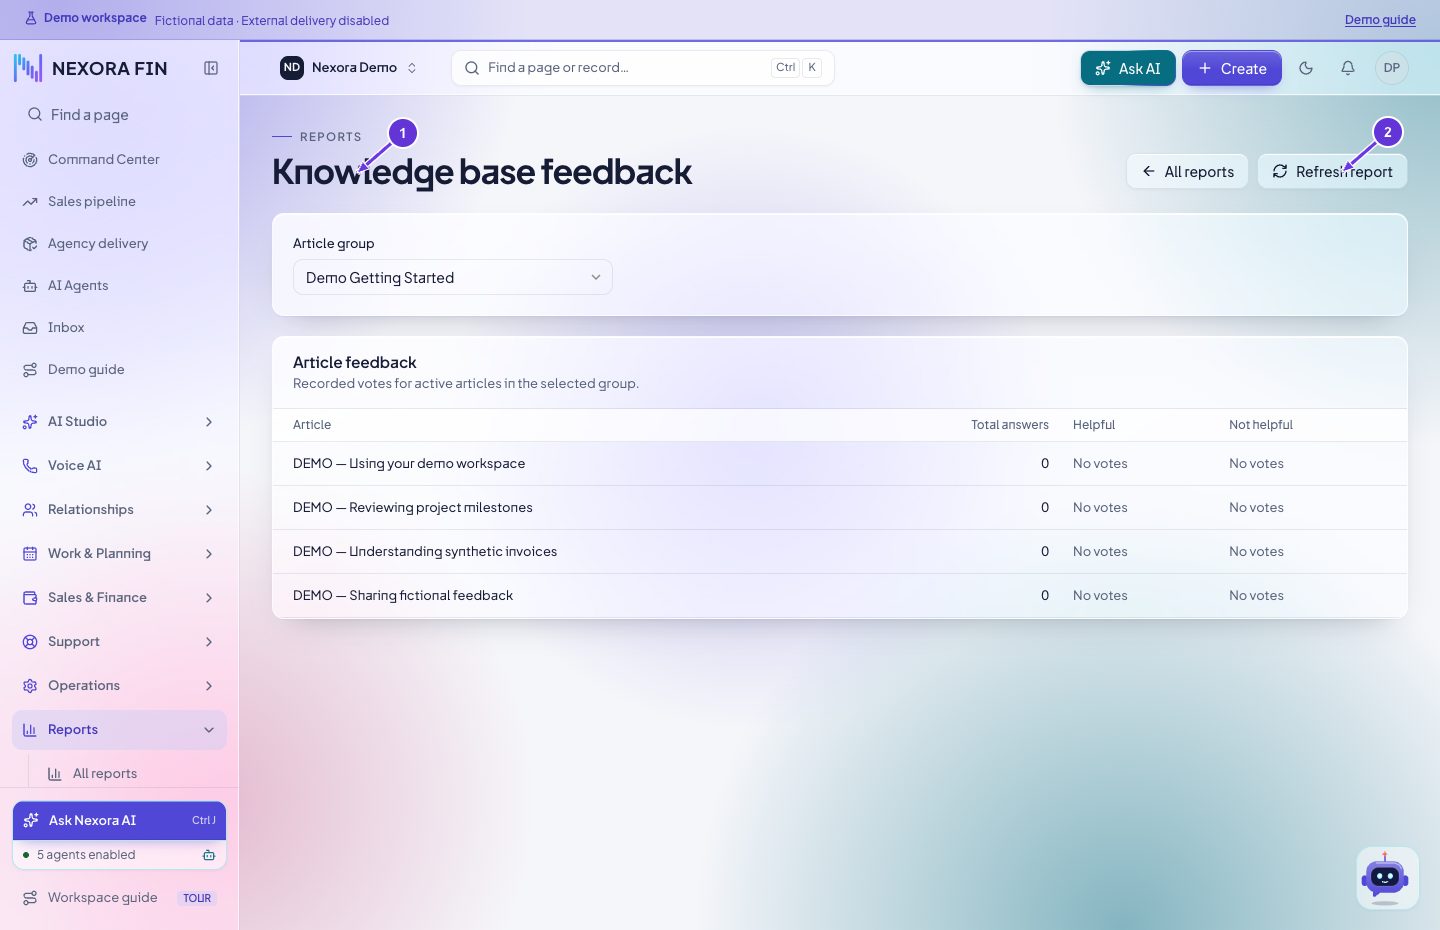
- Knowledge base feedback
- Refresh report
Timesheets
Set the staff member and time range, then review recorded time and the linked tasks before using the report.
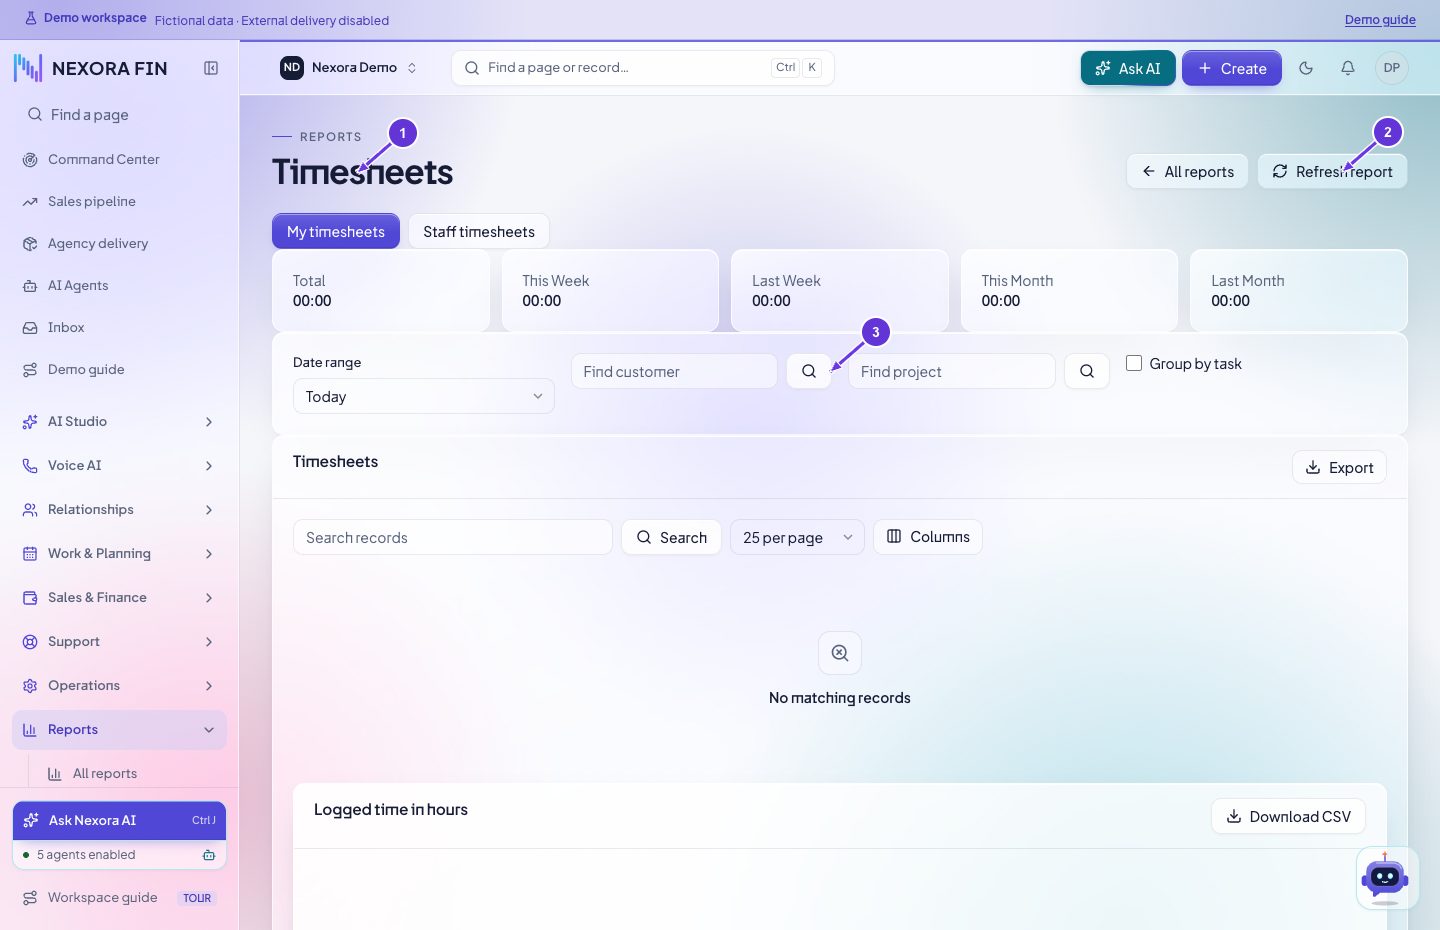
- Timesheets
- Refresh report
- Search customer
Scheduled reports
Create a schedule from a saved report, set its cadence and recipient, save and check delivery history. Confirm SMTP is configured before expecting delivery.
Open in CRMVoice and Workflows reports
Select the voice or workflow report, set a date range and any agent or event filter, and verify the source records before export.
Open in CRMCSV export
Open Settings → Import & export. Select the available dataset, review its filters and export only the scope you need.
Open in CRMWorkspace and administration
Import and export
Open Settings → Import & export. Download or review the lead template, map the supported columns and check a small CSV before importing the full list. Confirm the import result, then find the imported rows in Leads.
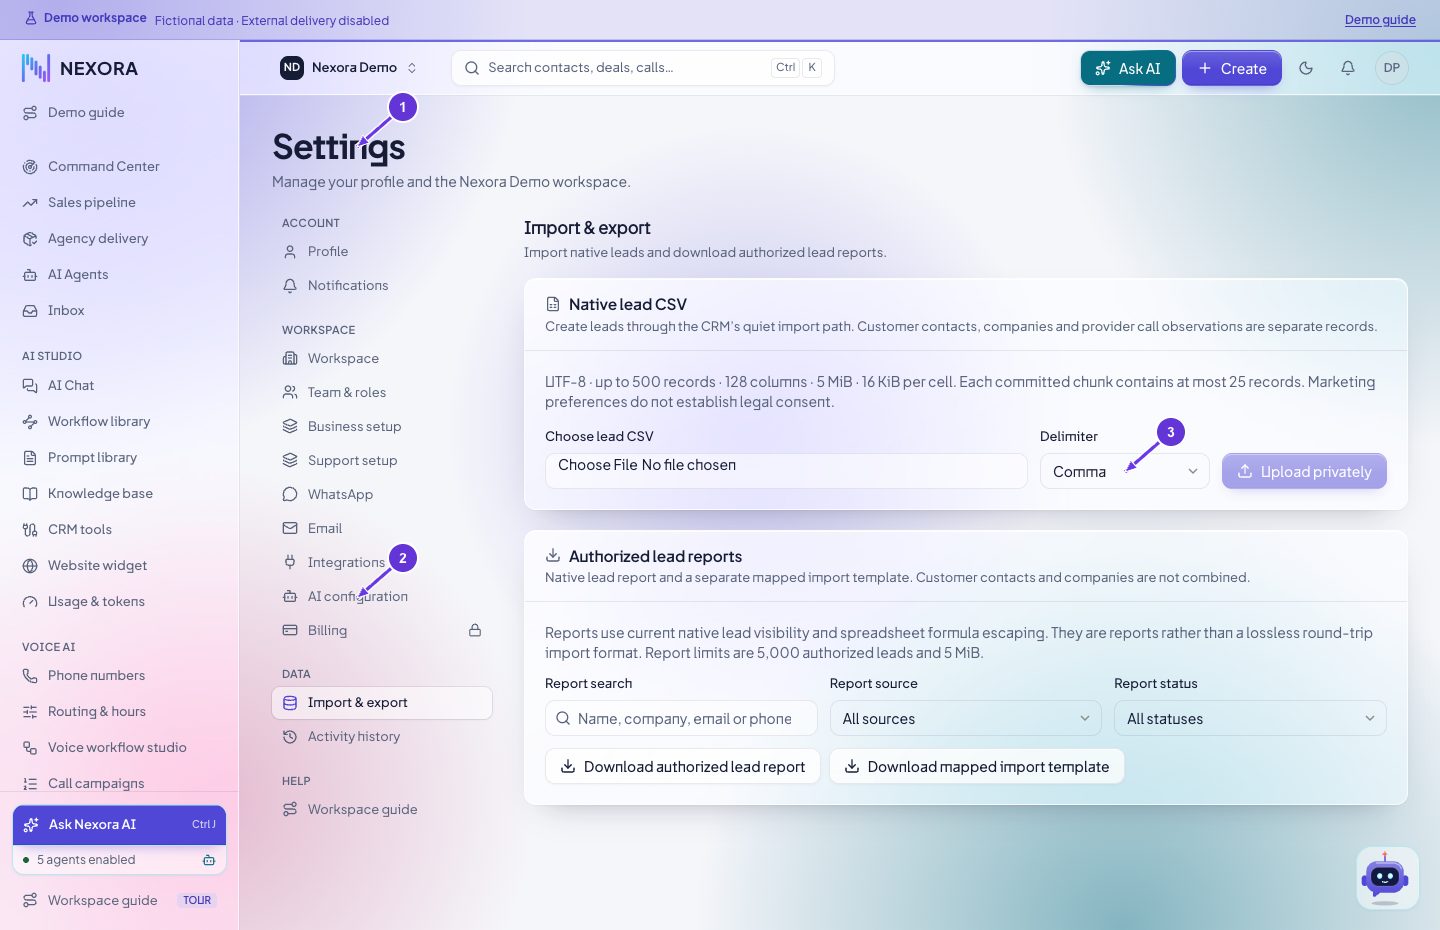
- Settings
- AI configuration
- Comma Semicolon Tab
WhatsApp settings
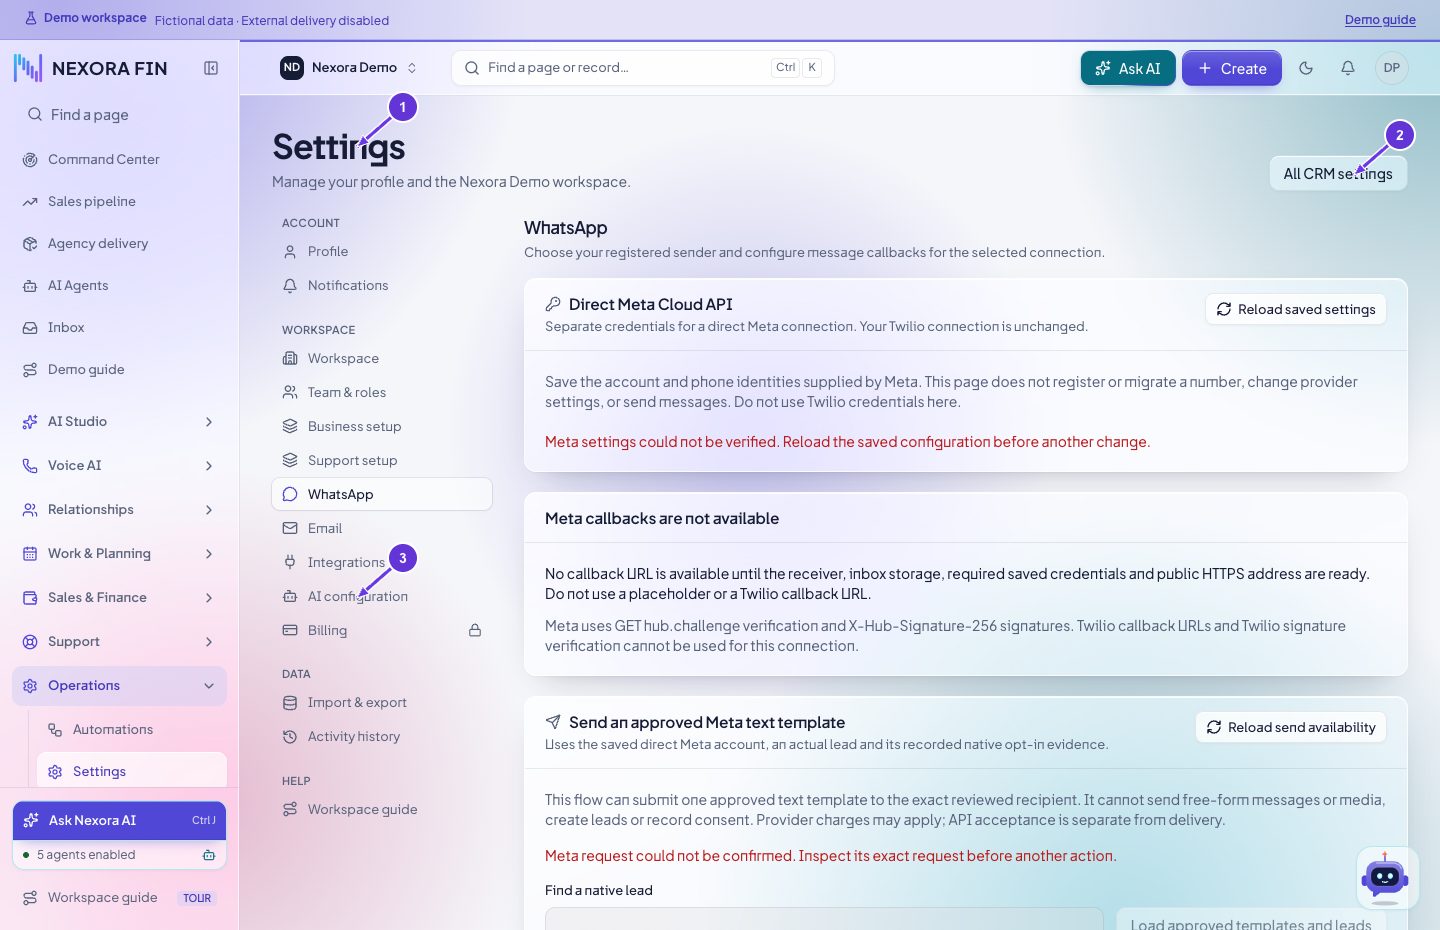
Open Settings → WhatsApp and select the intended Meta or Twilio connection. Verify the sender identity and callbacks. Check recipient consent and use an approved template when required. Verify final delivery in provider/message history. Add keys only in the credential fields in Settings.
- Settings
- All CRM settings
- AI configuration
Email settings
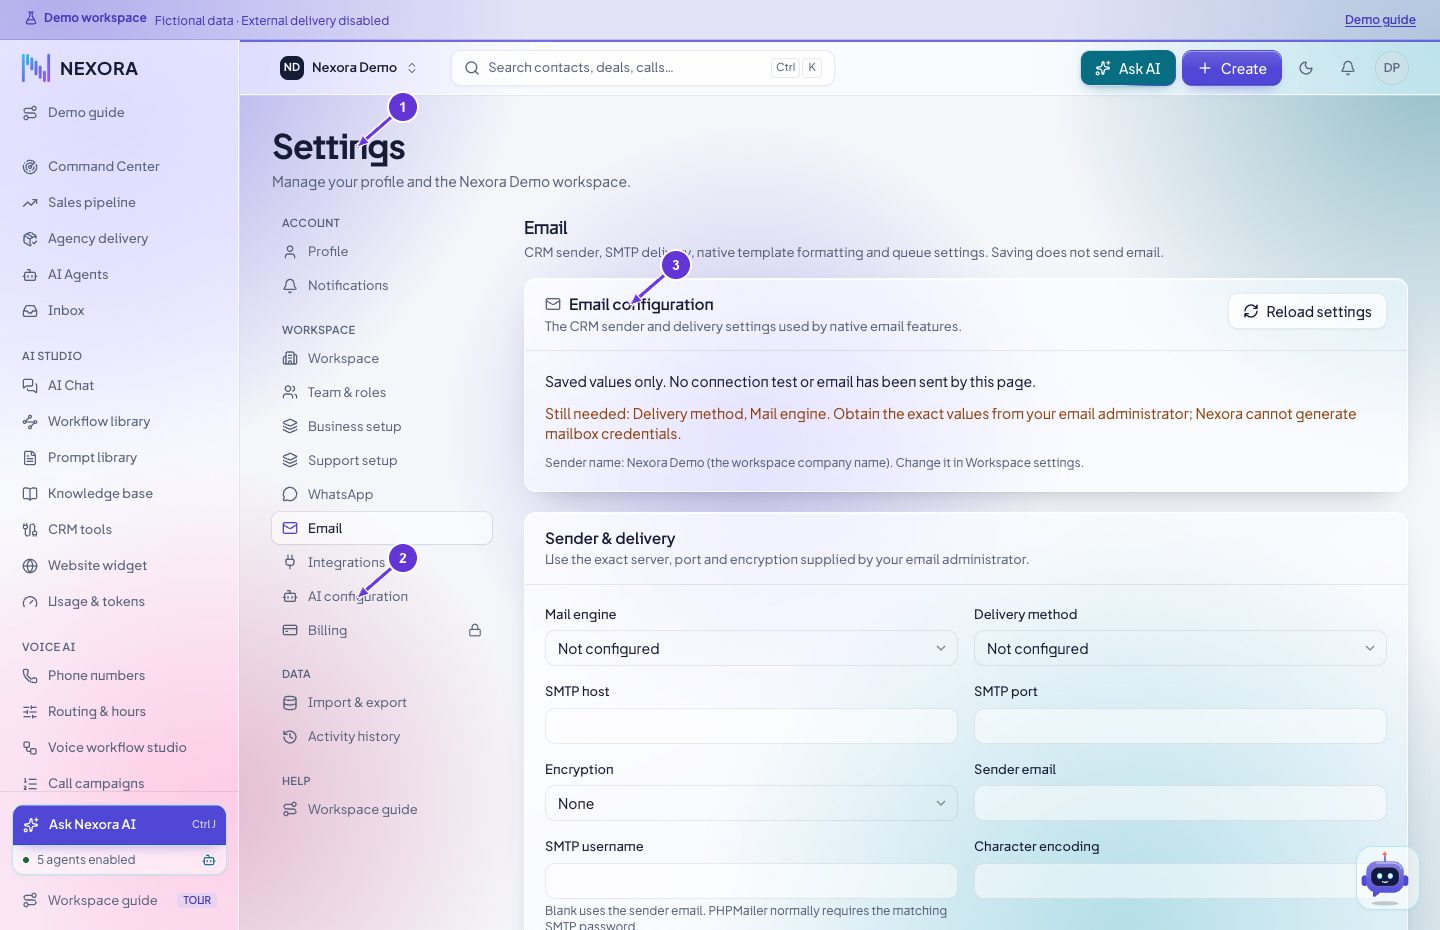
Open Settings → Email and choose the supported transport. Enter the sender, SMTP host, port, encryption and account fields from your provider. Save and verify a controlled email in the recipient inbox. Keep passwords out of Chat.
- Settings
- AI configuration
- Email configuration
Integration settings
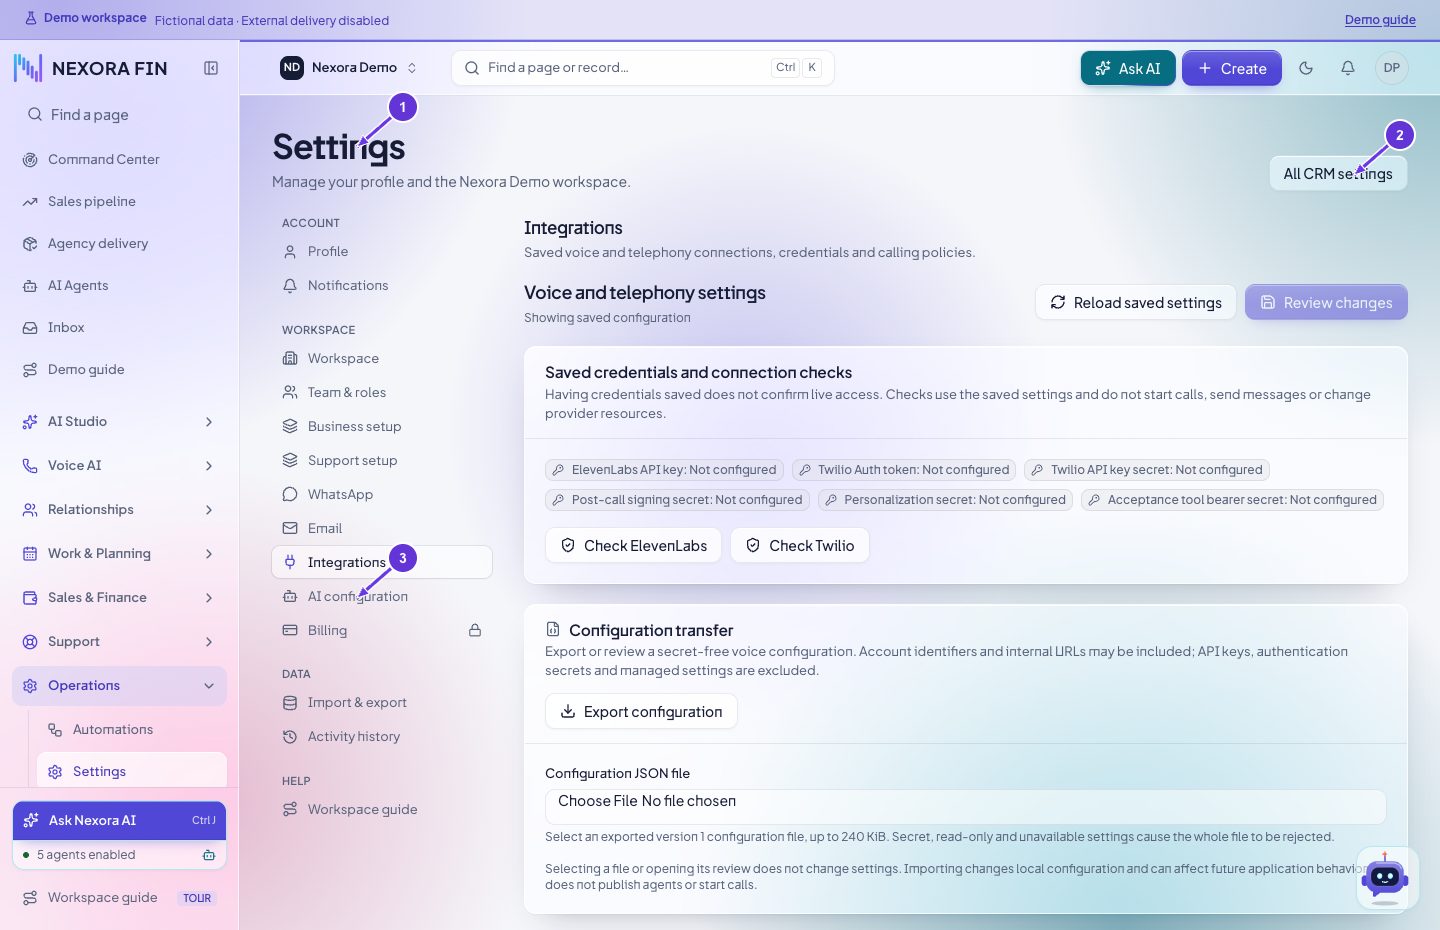
Open Settings → Integrations. Select the provider, enter credentials in the designated fields, save and use the available connection check. Verify the exact intended feature separately, because reading a provider account does not verify a send or callback.
- Settings
- All CRM settings
- AI configuration
My profile
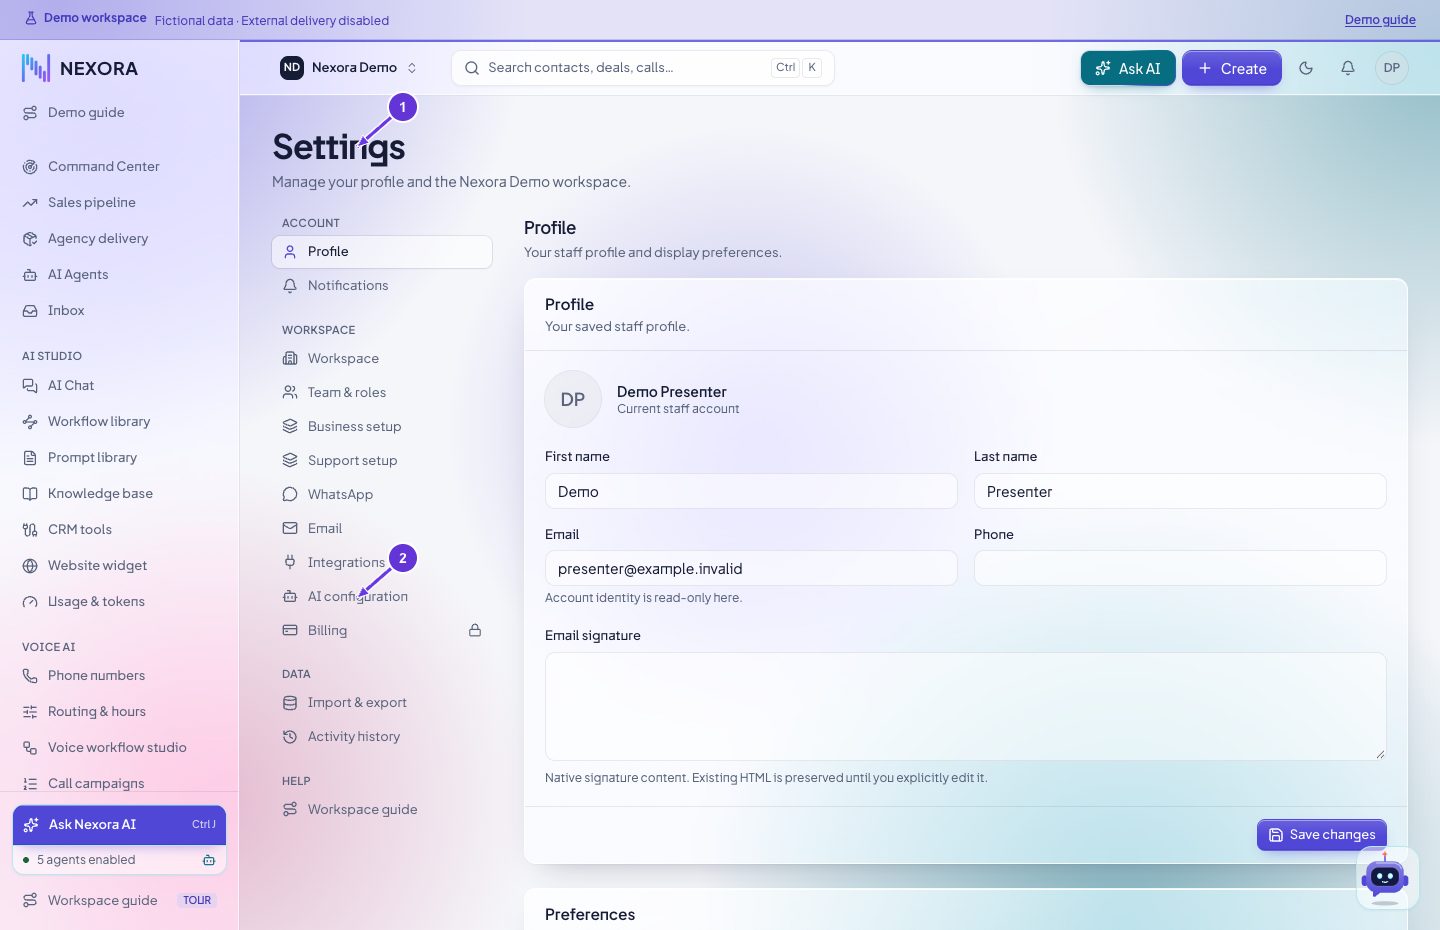
Open Settings → Profile and edit your permitted identity or display preferences. Save and reopen Profile to confirm.
- Settings
- AI configuration
Notification preferences
Open Settings → Notifications to view the notification center for your account. Use Reload inbox to refresh it. If an unread notification is available, select Mark read on that row or use Mark displayed notifications read. Delivery preferences for email, push and Slack are unavailable on this screen.
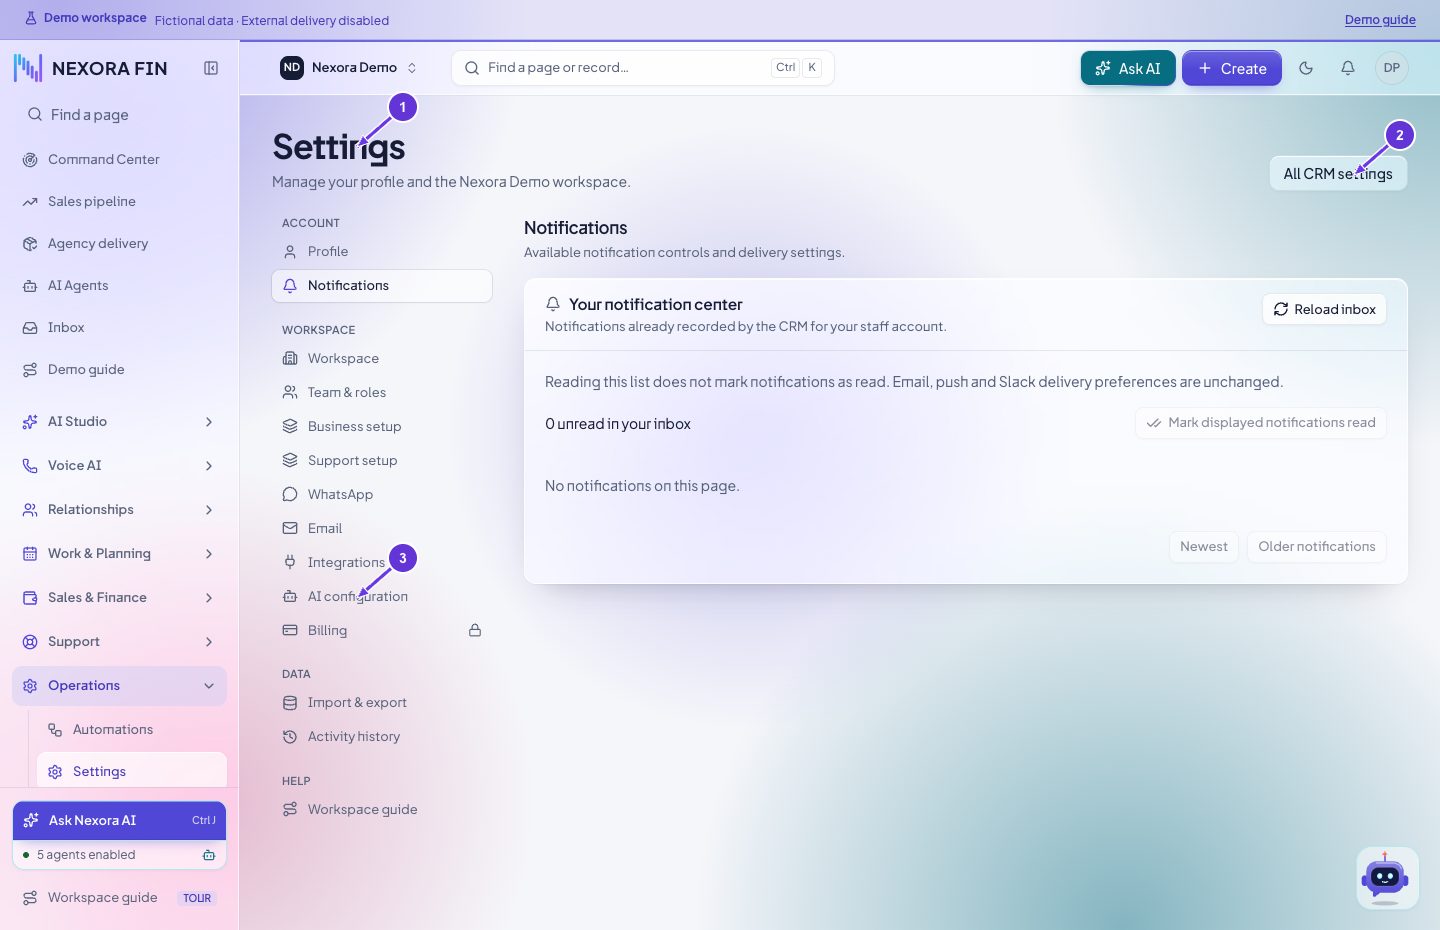
- Settings
- All CRM settings
- AI configuration
Workspace preferences
Open Settings → Workspace. Review the company name, website, time zone, language and date and time formats. Base currency is read-only here. Use Save only if the form is editable for your account, then reopen Workspace to check the saved values.
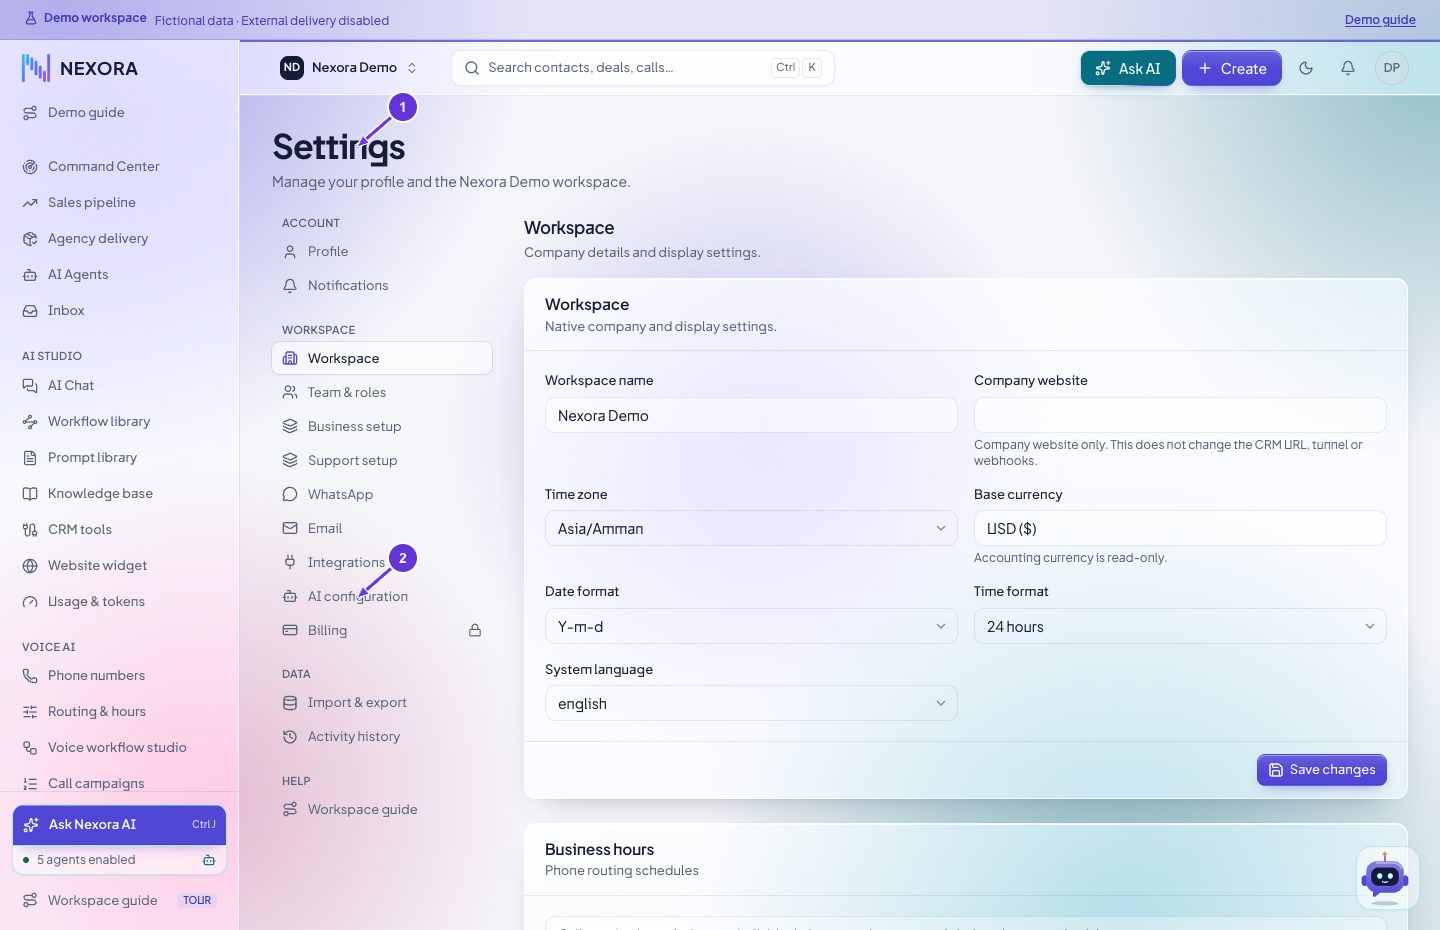
- Settings
- AI configuration
Team and roles
Open Settings → Team & roles. Choose the staff member or role, review permitted actions and save. Verify access using the intended role.
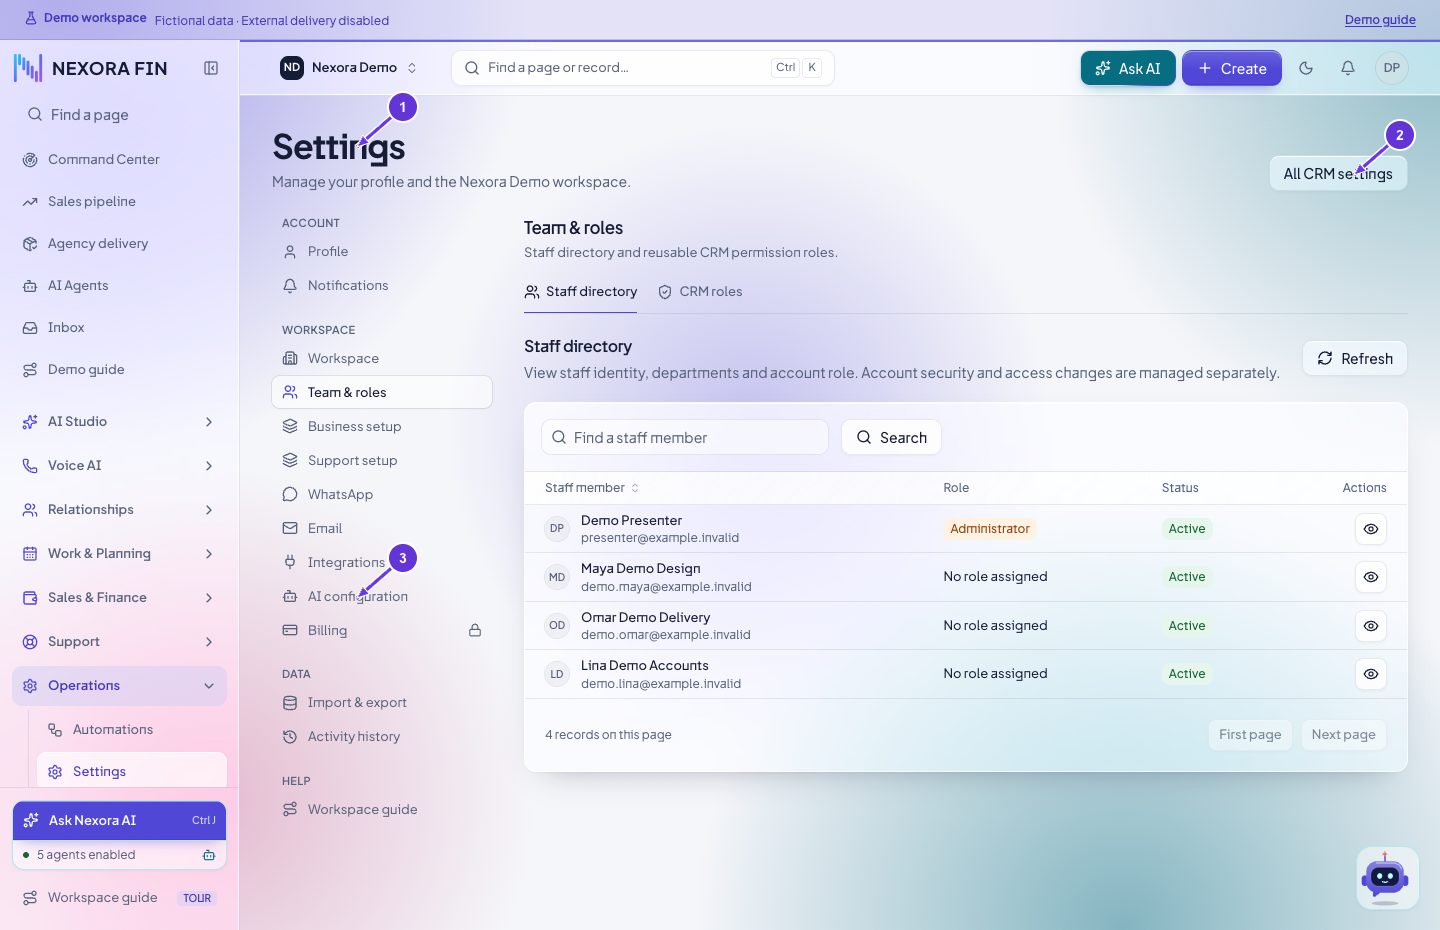
- Settings
- All CRM settings
- AI configuration
Business setup
Open Settings → Business setup. Choose the relevant catalog or the Taxes or Currencies tab. Save and verify the new value is selectable on the corresponding record.
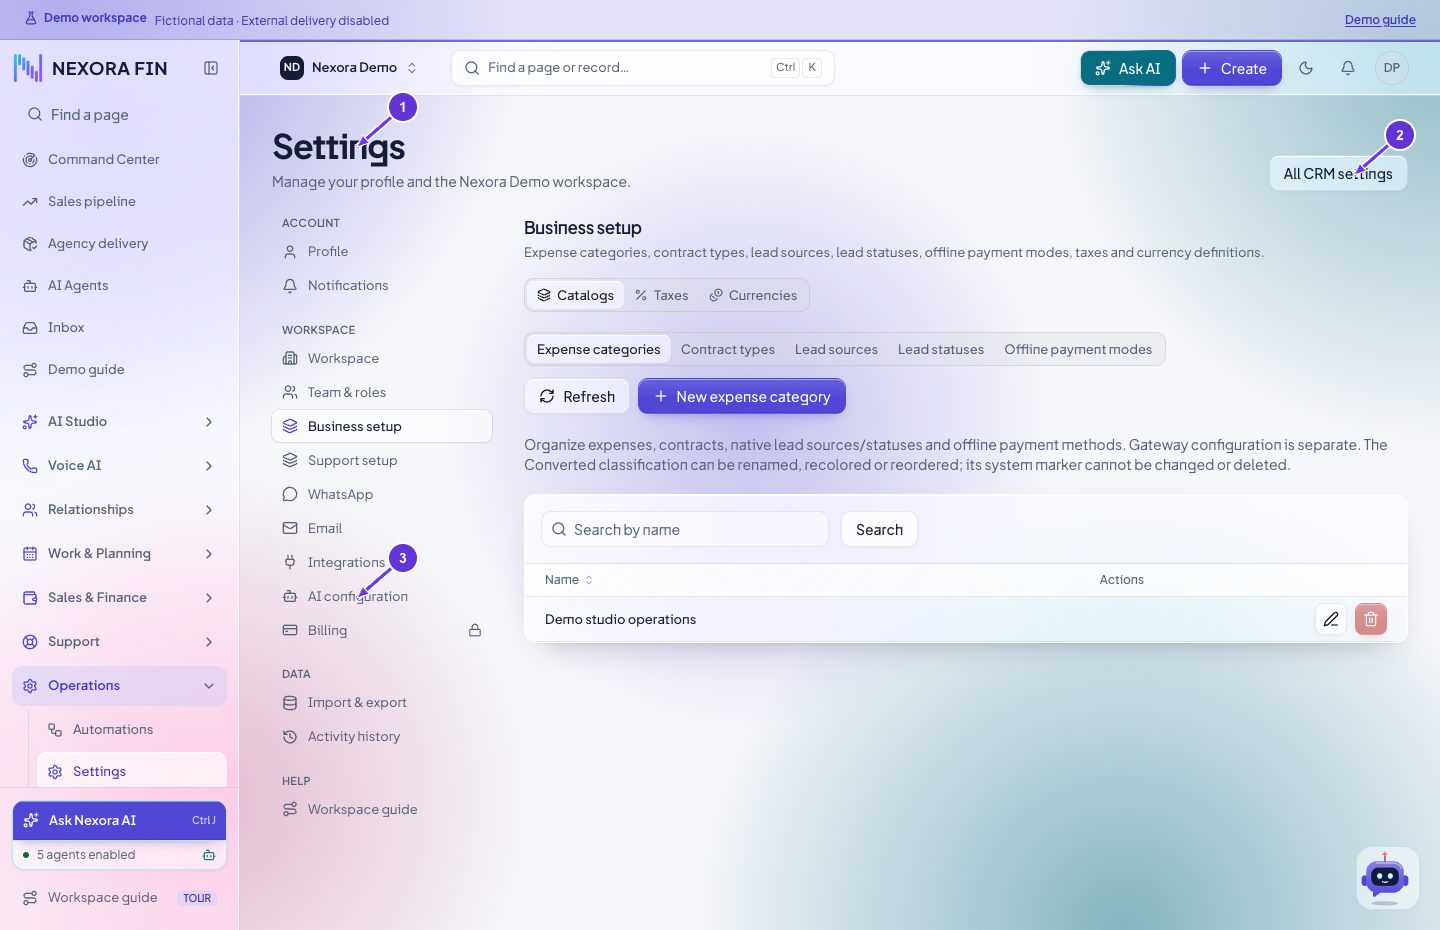
- Settings
- All CRM settings
- AI configuration
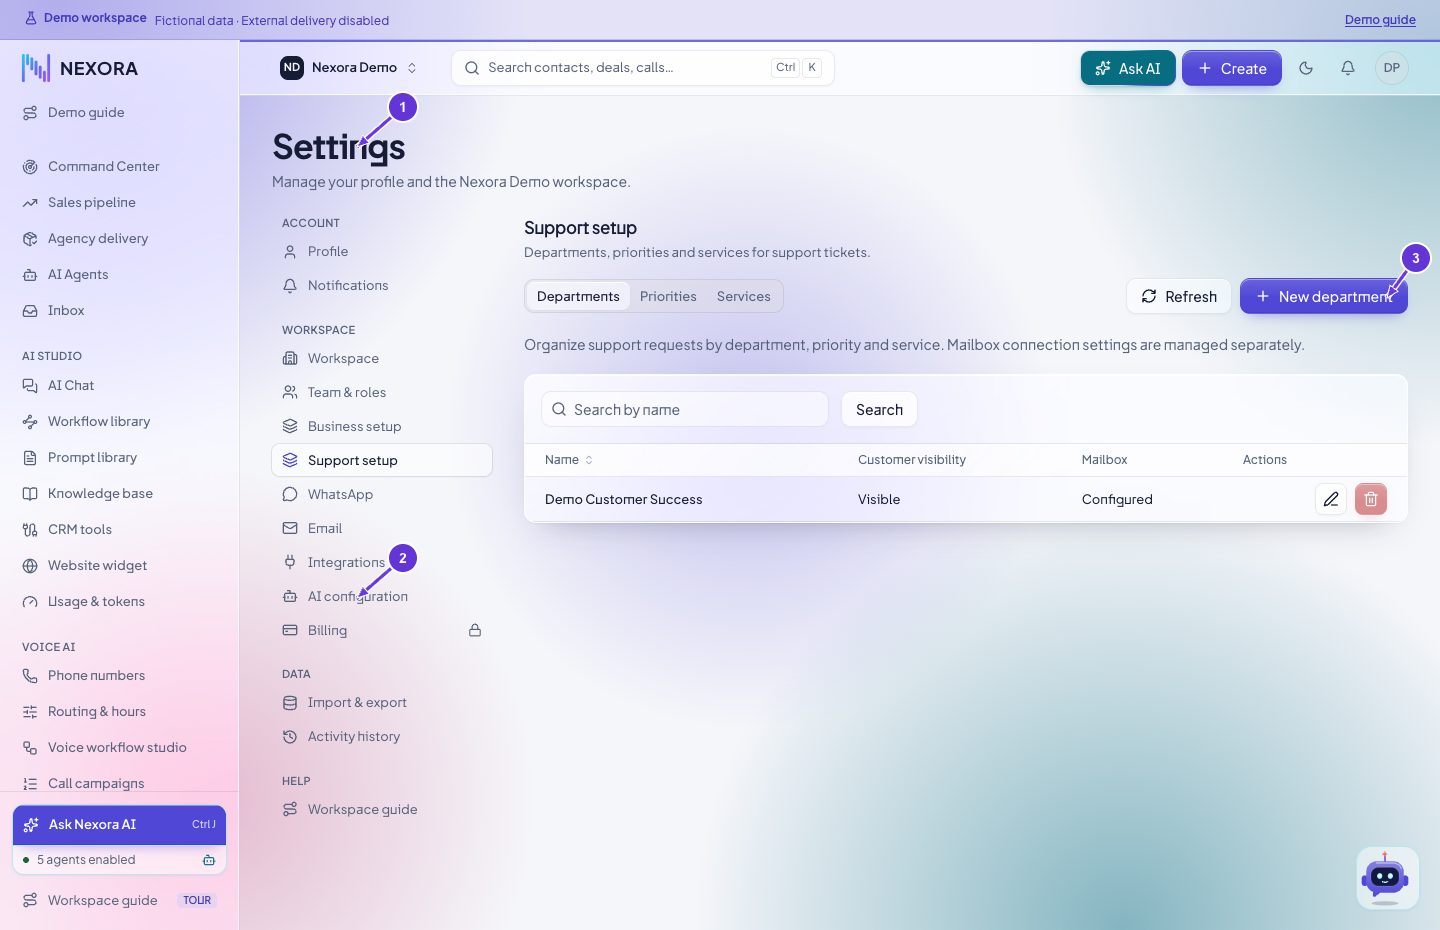
Support setup
Open Settings → Support setup. Choose Departments, Priorities or Services, make the intended change and confirm it appears in the ticket form.
- Settings
- AI configuration
- Refresh
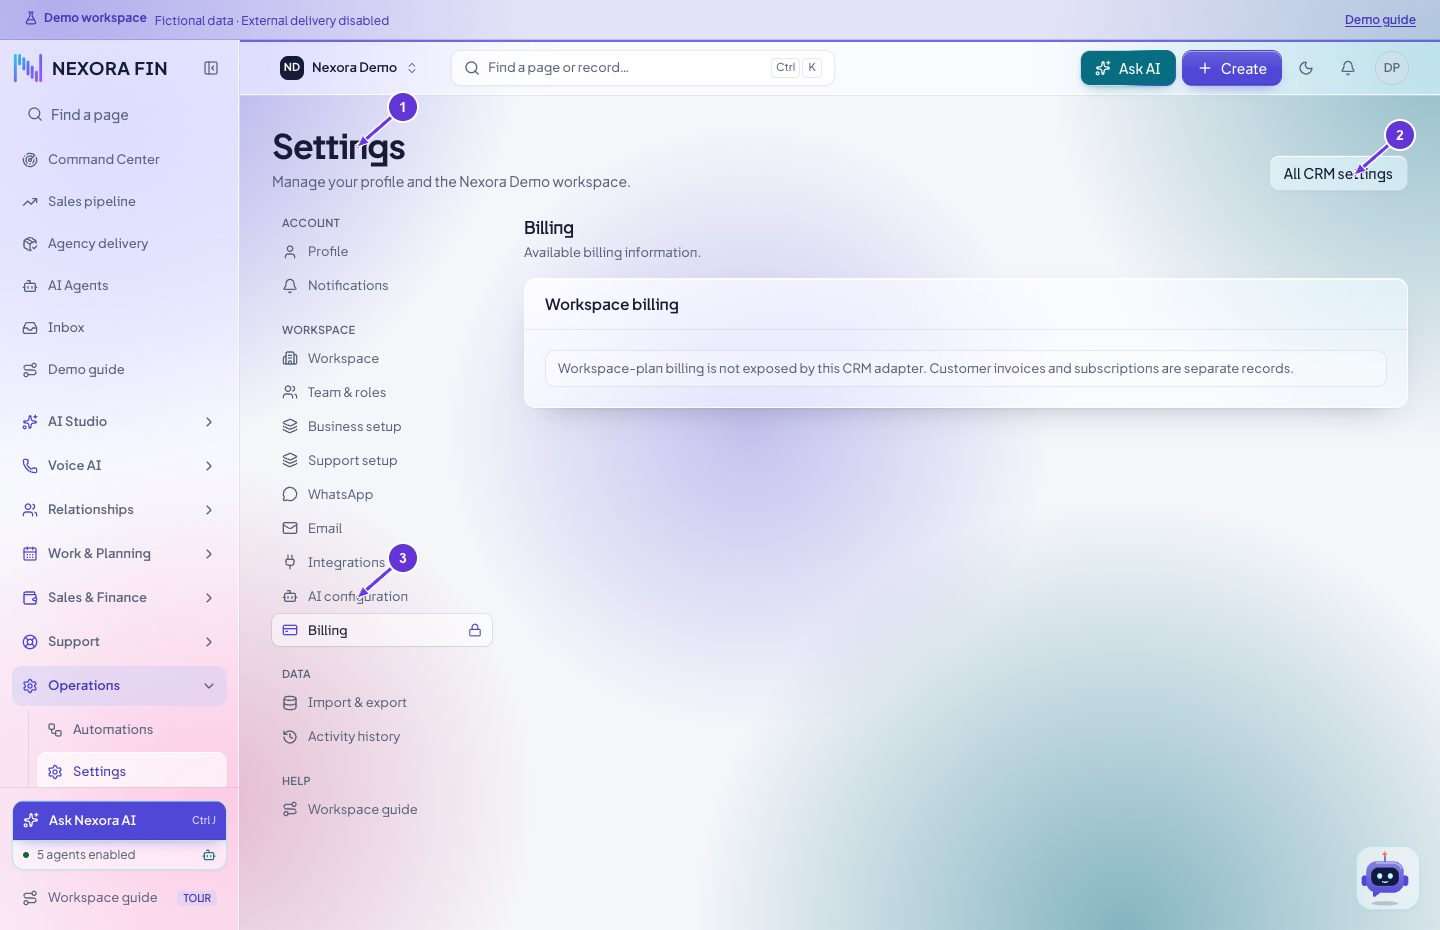
Workspace billing
Open Settings → Billing to check the workspace billing status. The live CRM does not expose a workspace subscription or payment form here. Customer invoices and customer subscriptions are separate records.
- Settings
- All CRM settings
- AI configuration
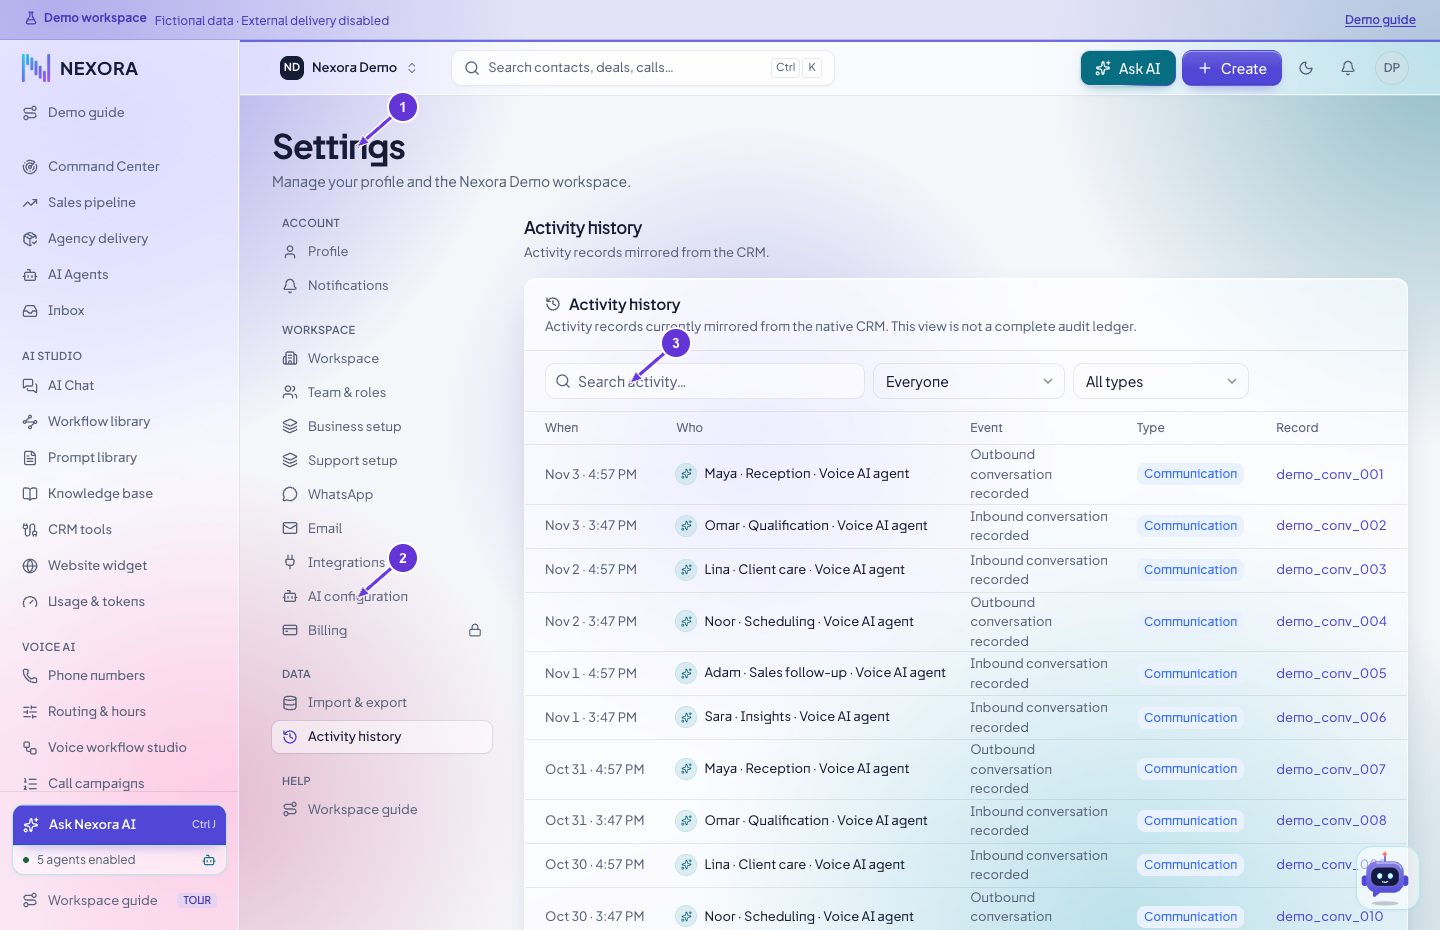
Activity history
Open Settings → Activity history. Filter or locate the record, compare its timestamp and actor with the source record, and use the available audit details.
- Settings
- AI configuration
- Search activity
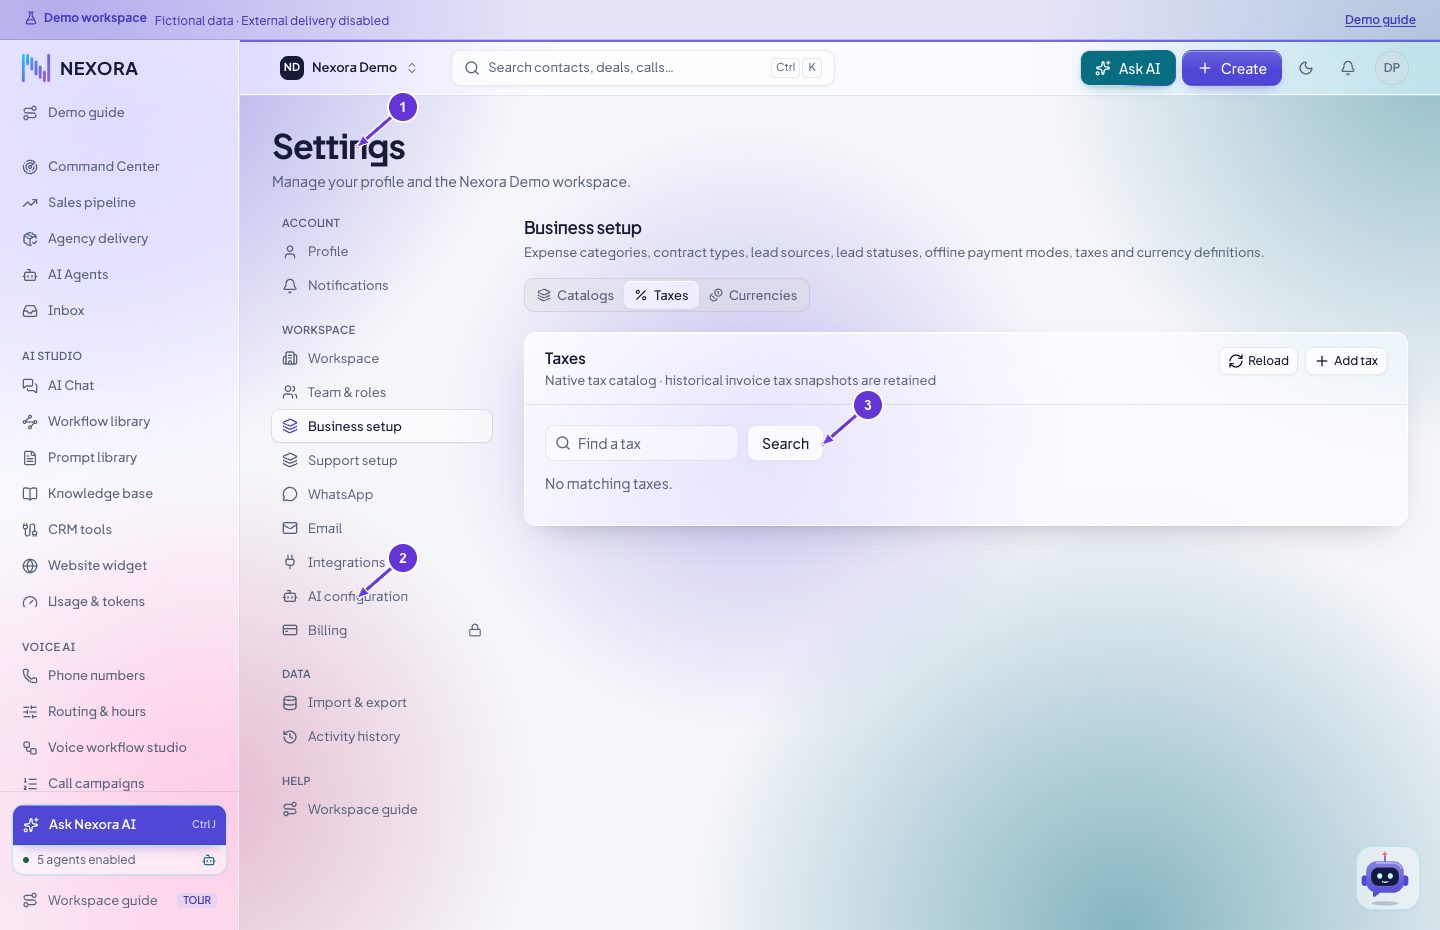
Taxes catalog
Open Taxes in Business setup. Review tax name and rate, save and confirm the tax is selectable on a draft sales document.
- Settings
- AI configuration
- Search
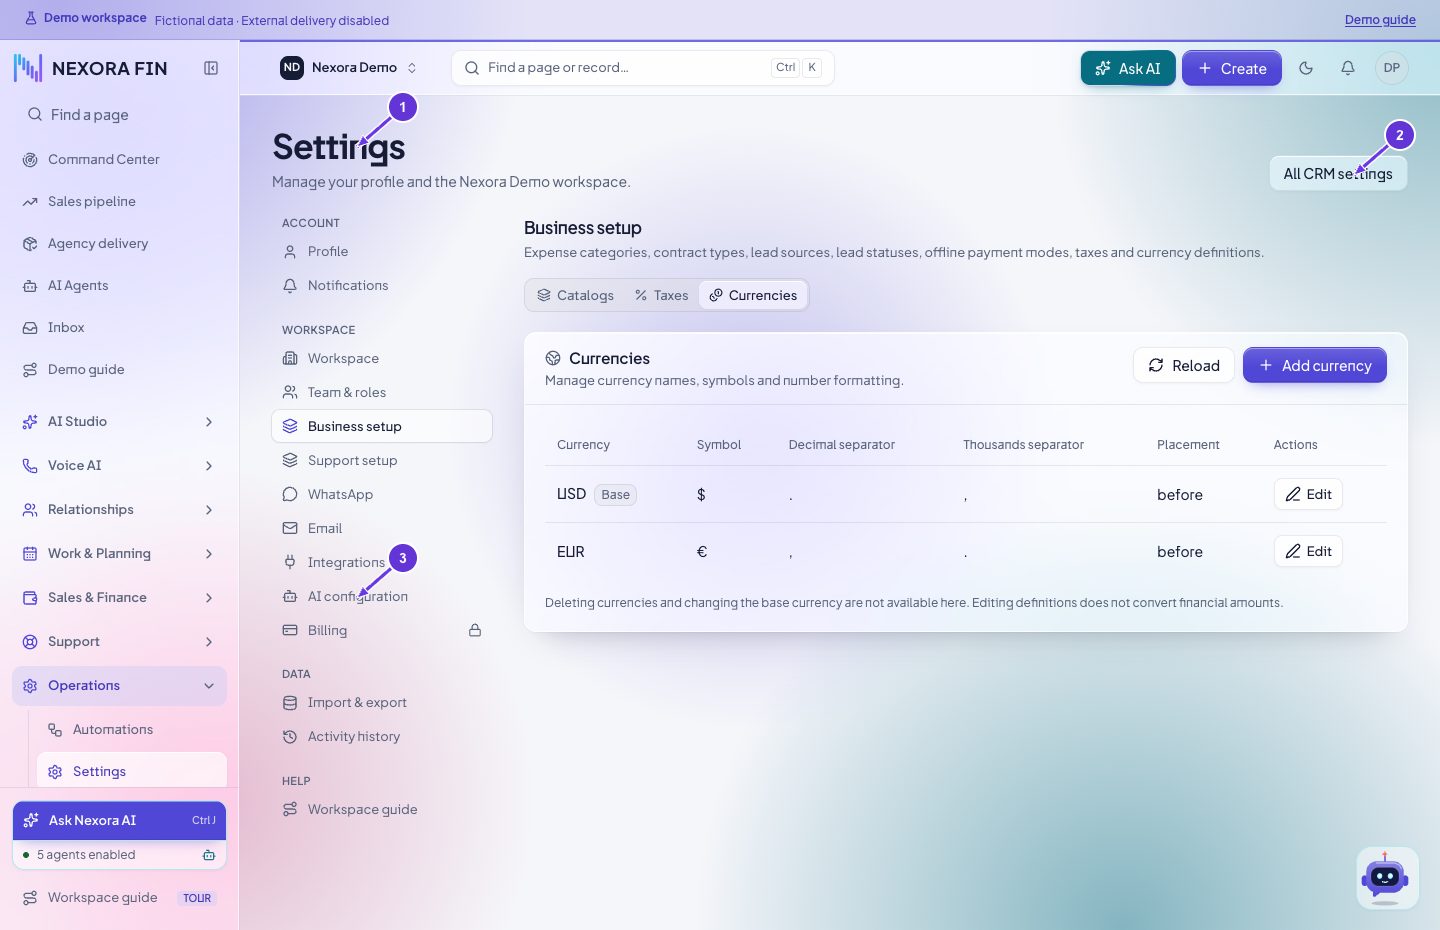
Currencies catalog
Open Currencies in Business setup. Review the code and display settings, save and confirm the currency appears in the relevant sales or expense form.
- Settings
- All CRM settings
- AI configuration
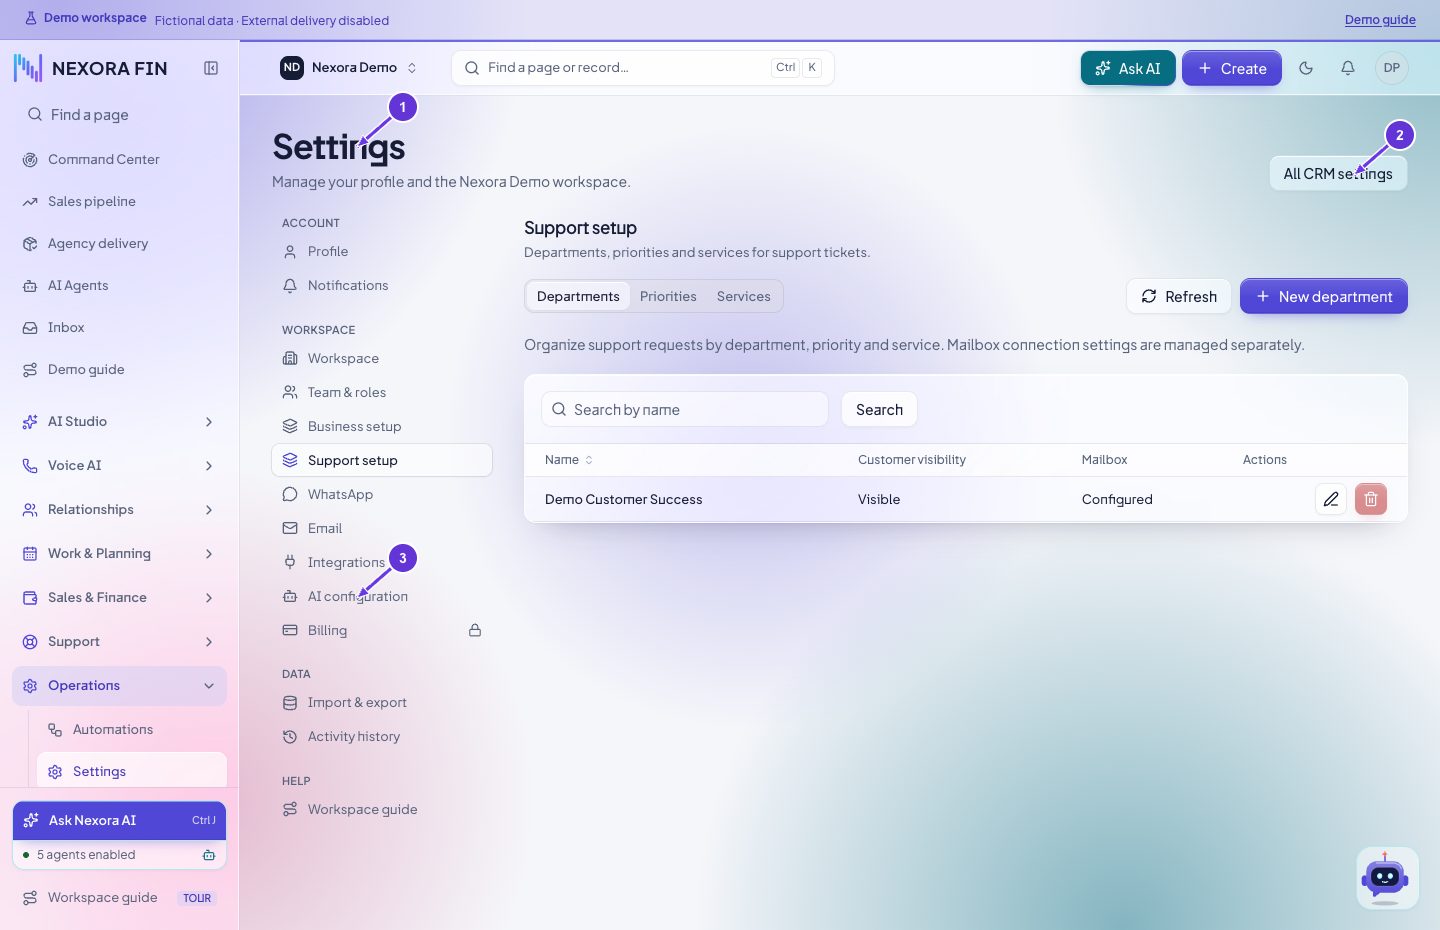
Support departments
Open Support setup → Departments. Review the name and staff assignments, save and verify the department in the ticket form.
- Settings
- All CRM settings
- AI configuration
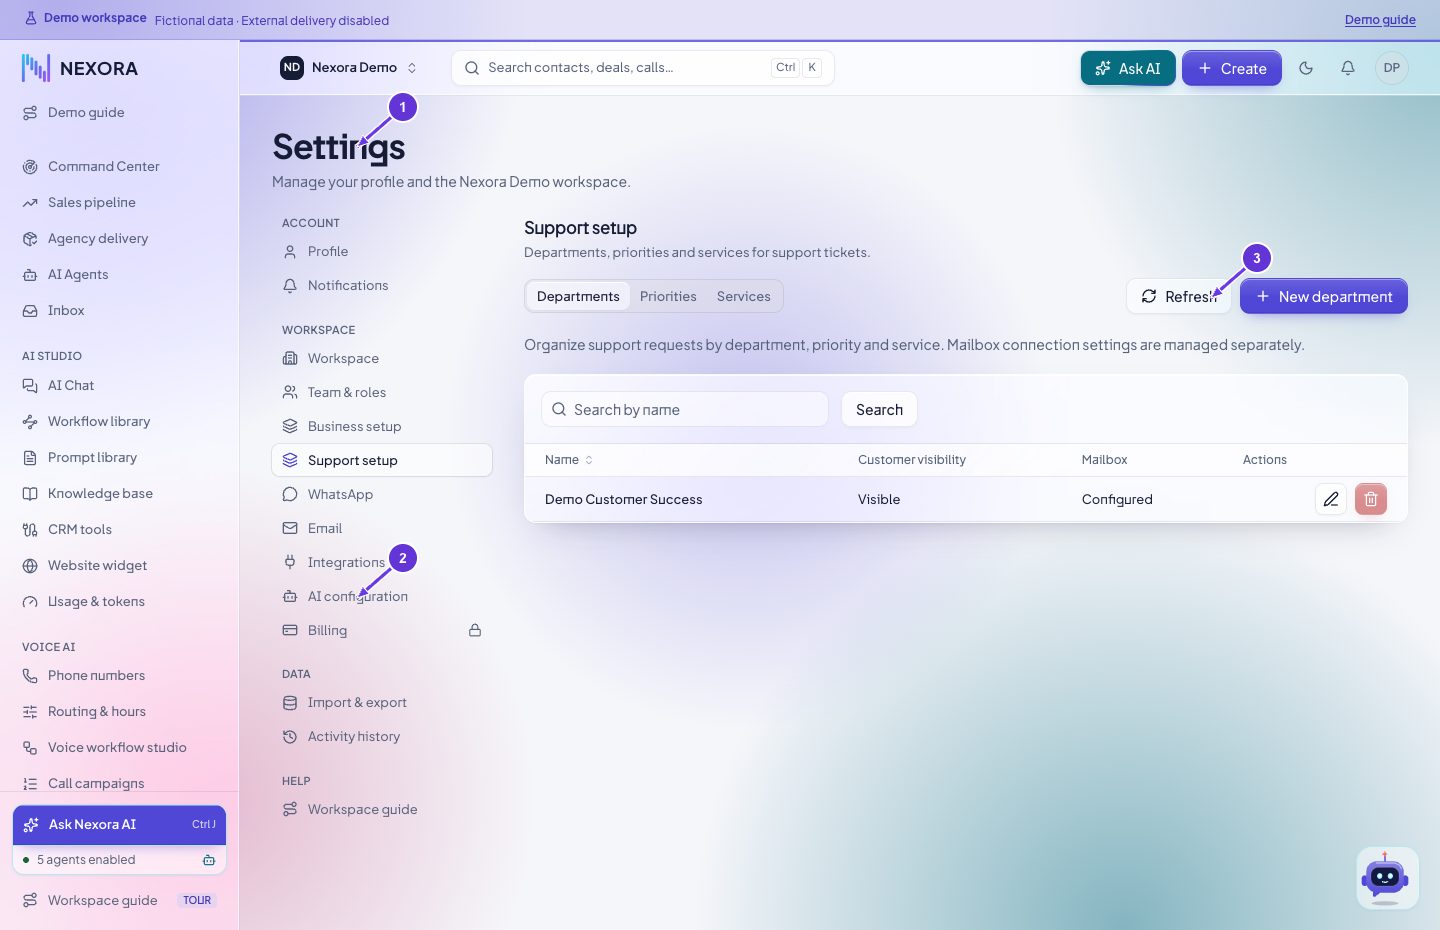
Support priorities
Open Support setup → Priorities. Review labels and order, save and verify the priorities available on a ticket.
- Settings
- AI configuration
- Refresh
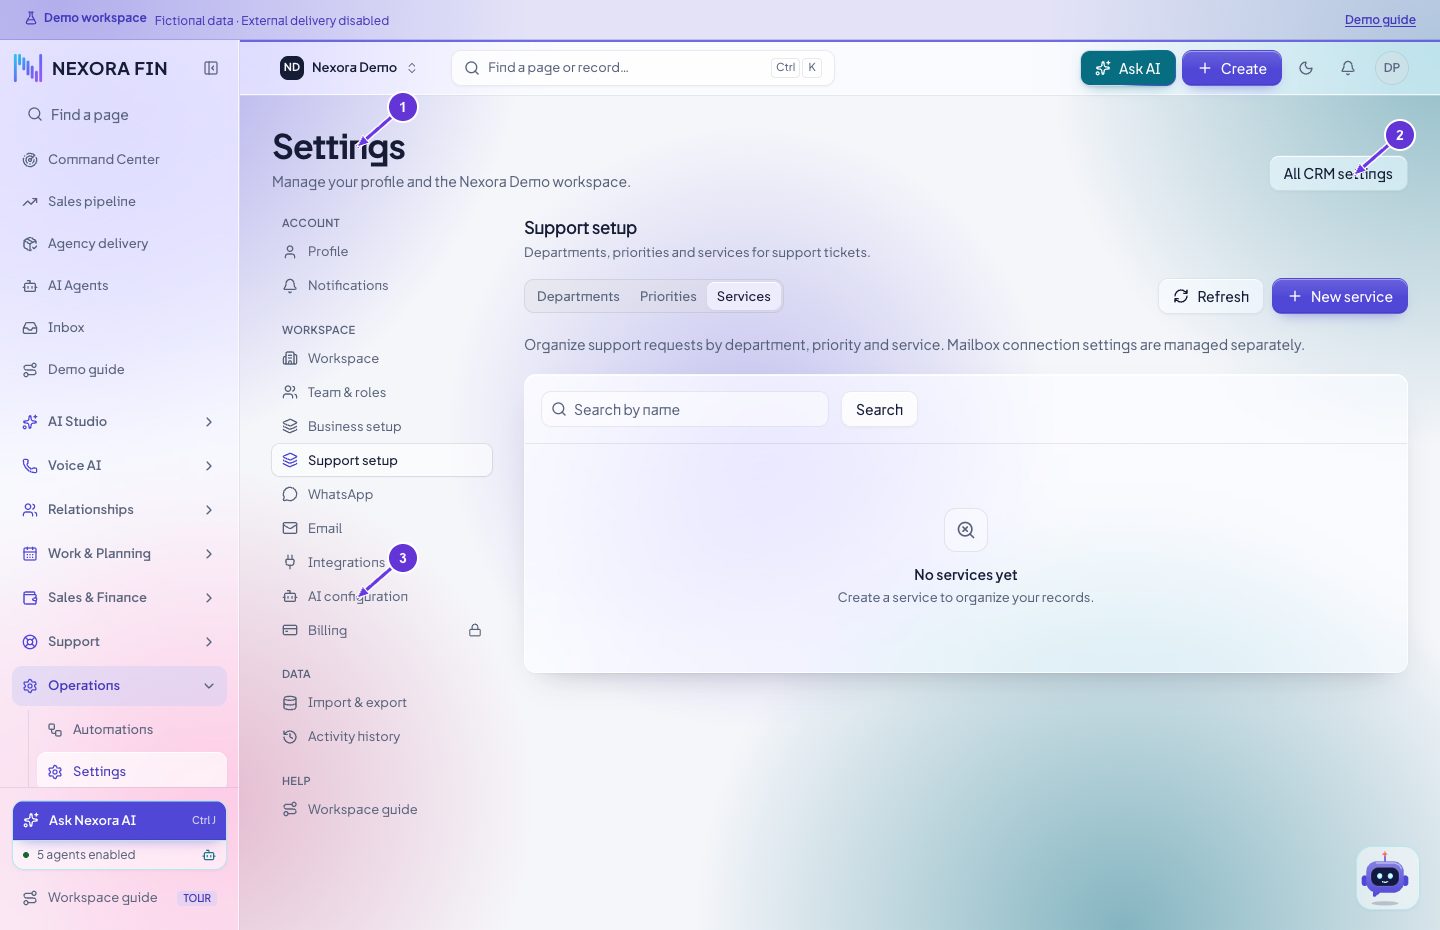
Support services
Open Support setup → Services. Review the service name, save and check the service options on a ticket.
- Settings
- All CRM settings
- AI configuration
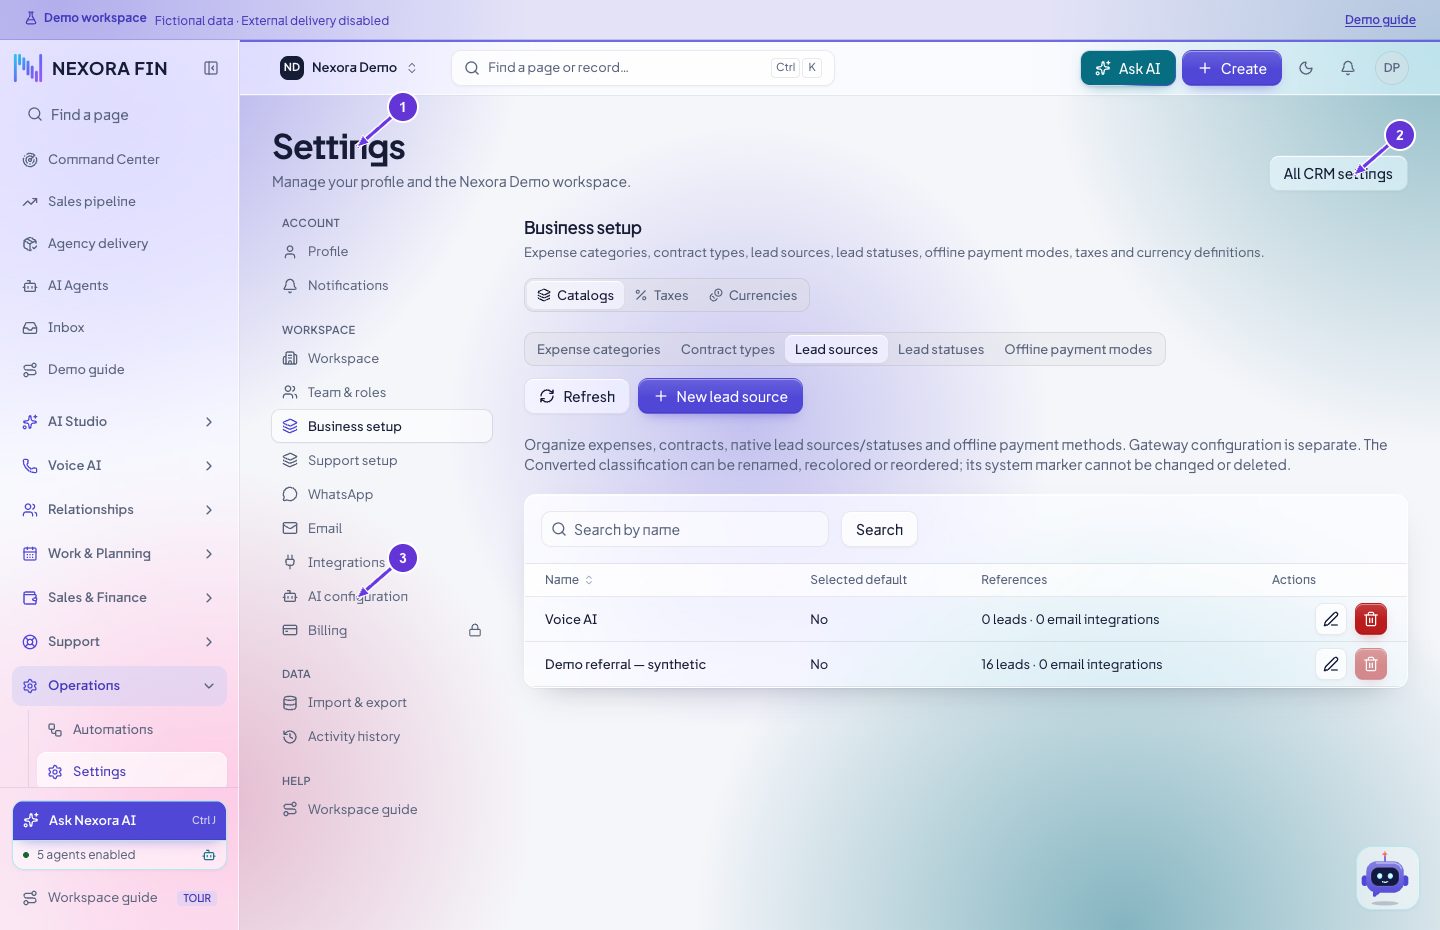
Lead sources catalog
Open Business setup → Lead sources. Save the source and verify it appears on the Lead form before using it in imports or reports.
- Settings
- All CRM settings
- AI configuration
Lead statuses catalog
Open Business setup → Lead statuses. Save the label and verify it appears on the Lead form and filters.
- Settings
- AI configuration
- Refresh
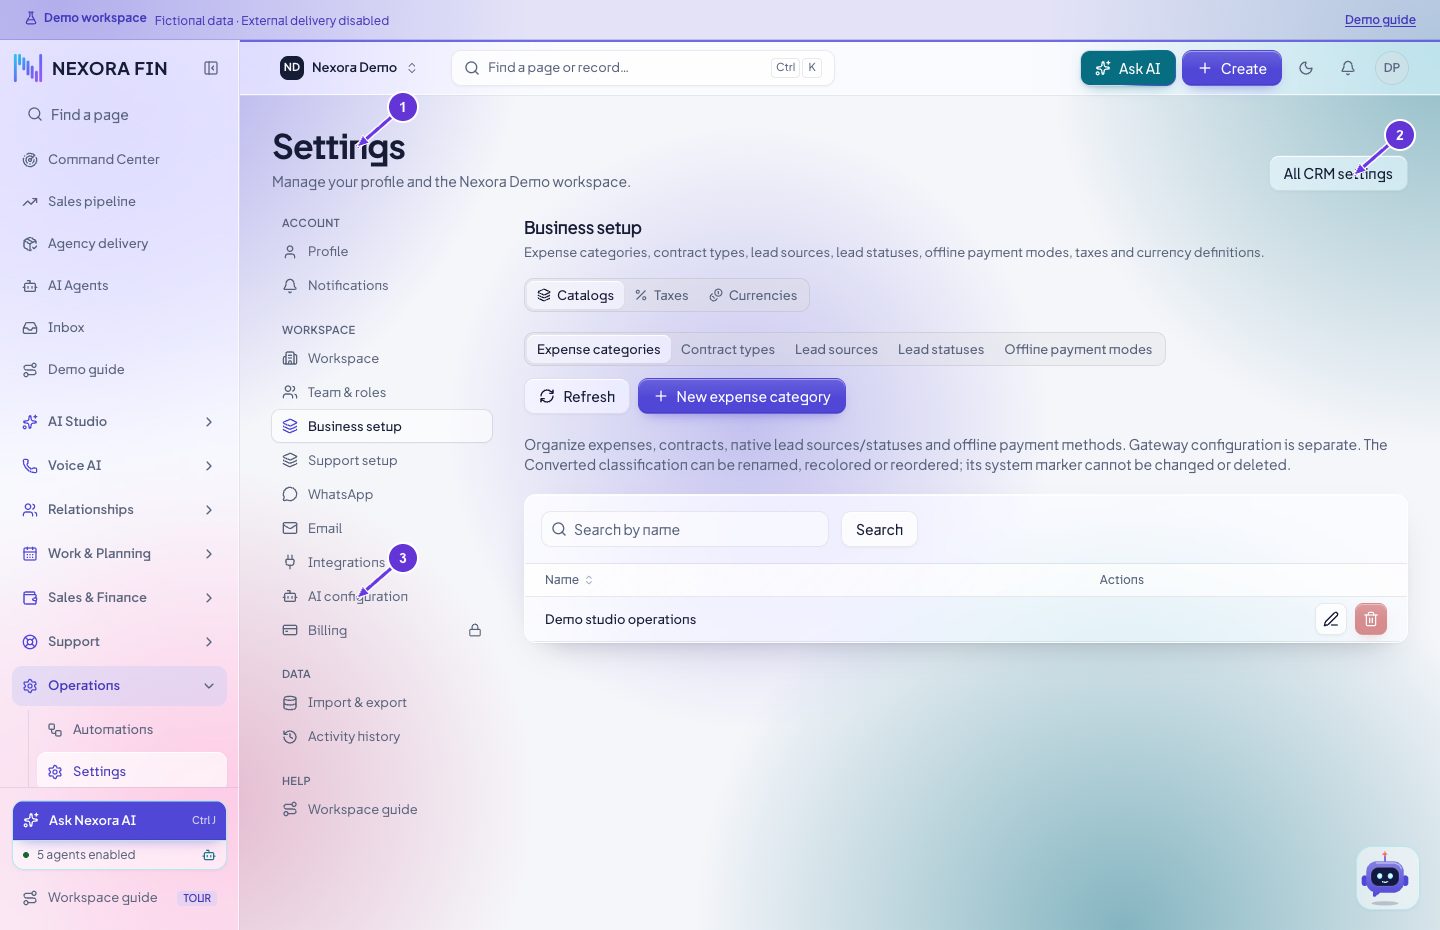
Expense categories catalog
Open Business setup → Expense categories. Save the label and verify it appears when creating an expense.
- Settings
- All CRM settings
- AI configuration
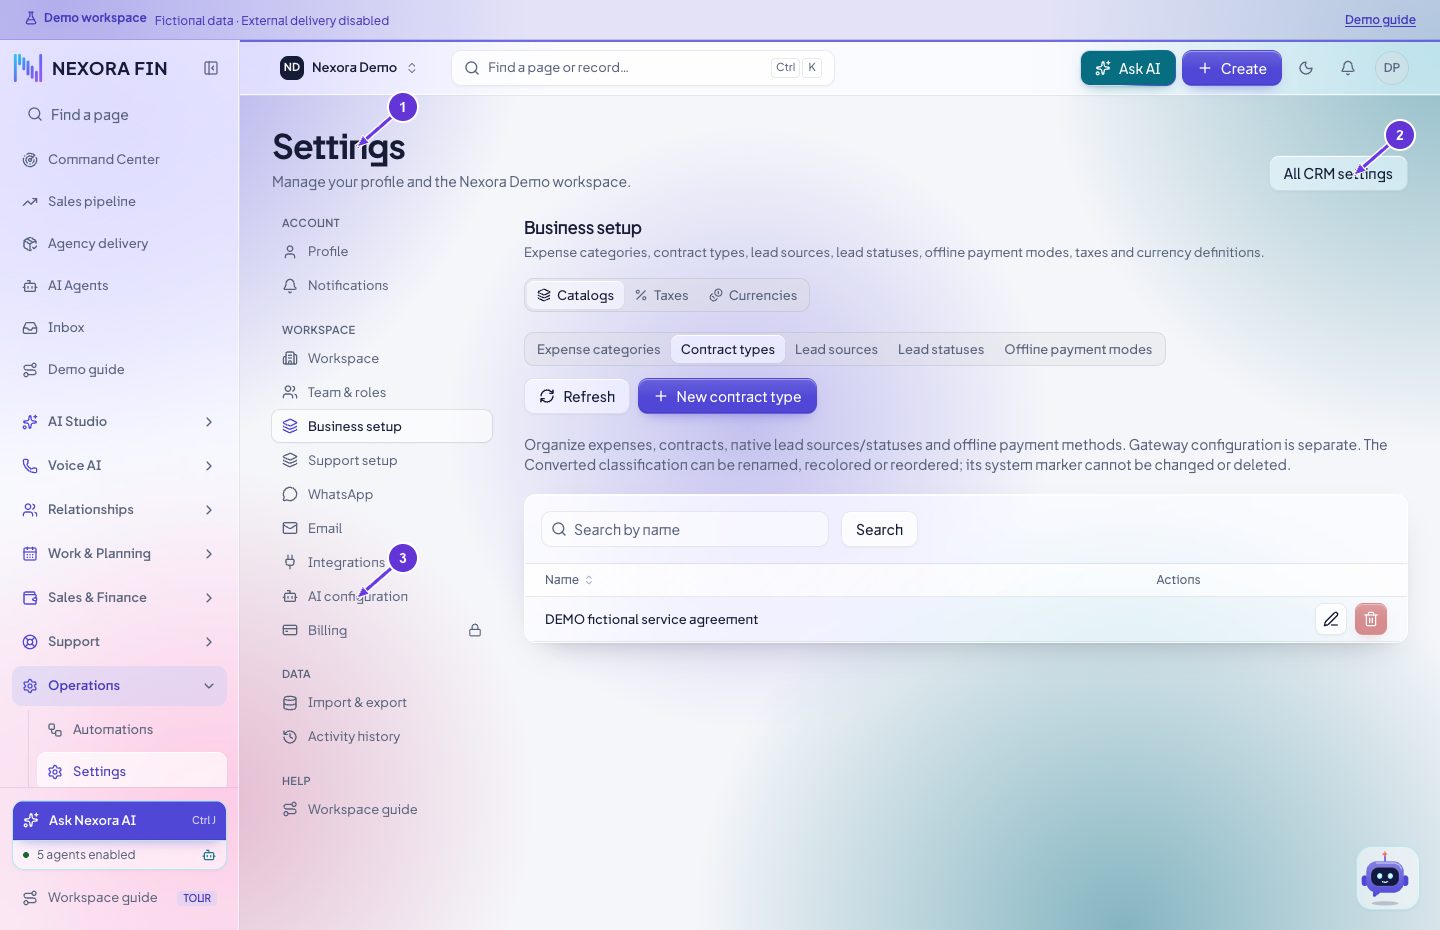
Contract types catalog
Open Business setup → Contract types. Save the type and verify it appears when creating a contract.
- Settings
- All CRM settings
- AI configuration
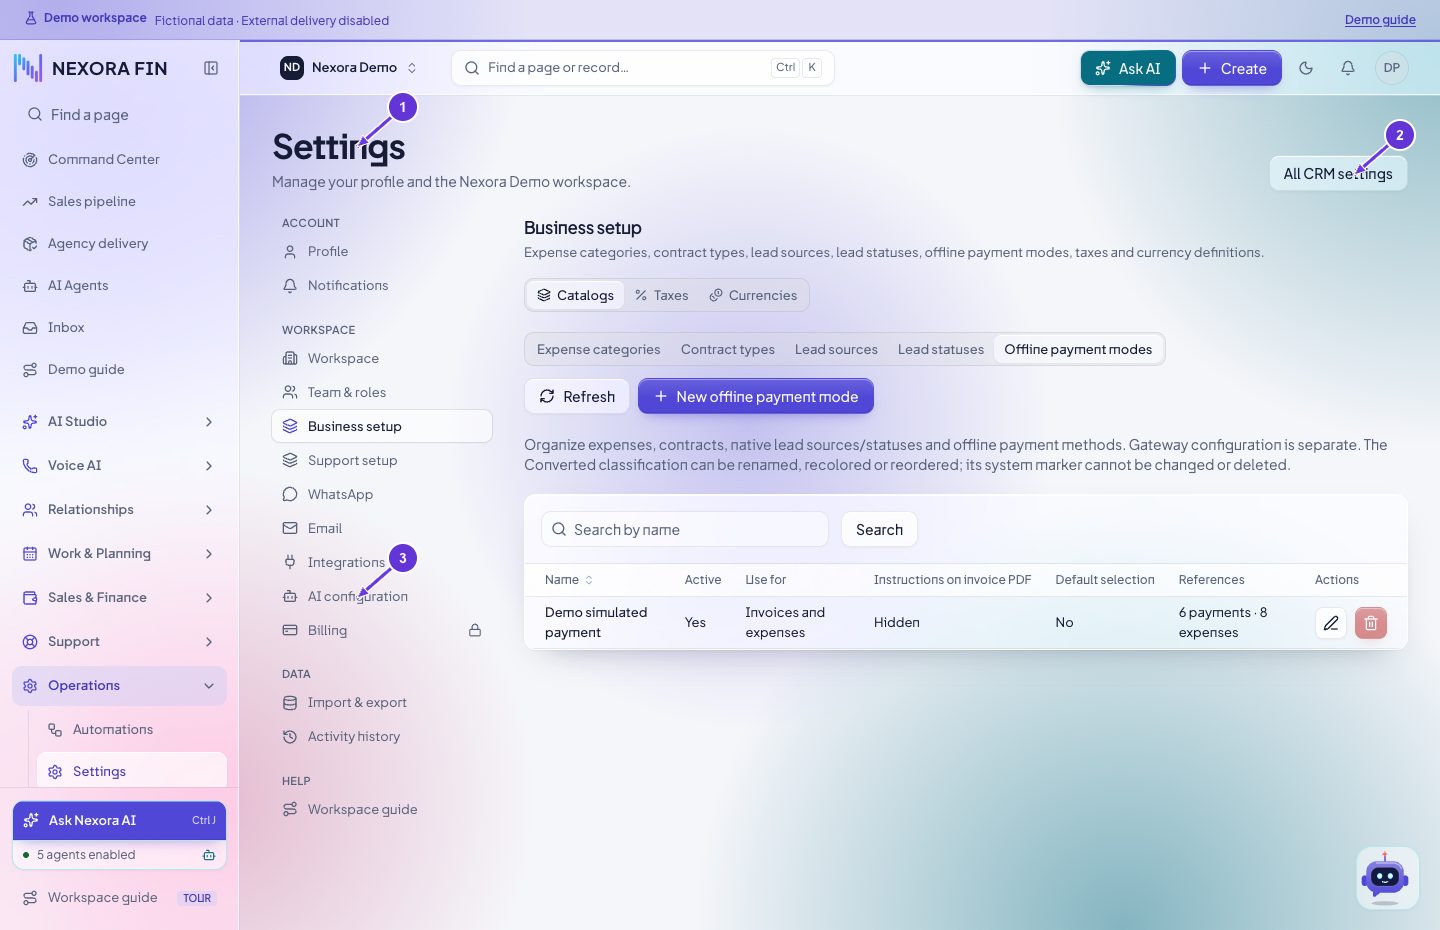
Offline payment modes
Open Business setup → Payment modes. Review the label and availability, save and verify it appears in the payment form.
- Settings
- All CRM settings
- AI configuration
Branches
Open Administration → Branches. Select the branch to review its routing or workspace details. Check the exact branch after any change.
Open in CRMLaunch setup
Review the setup checklist by dependency. Confirm provider access, number assignment, required callbacks and a controlled test before enabling live traffic.
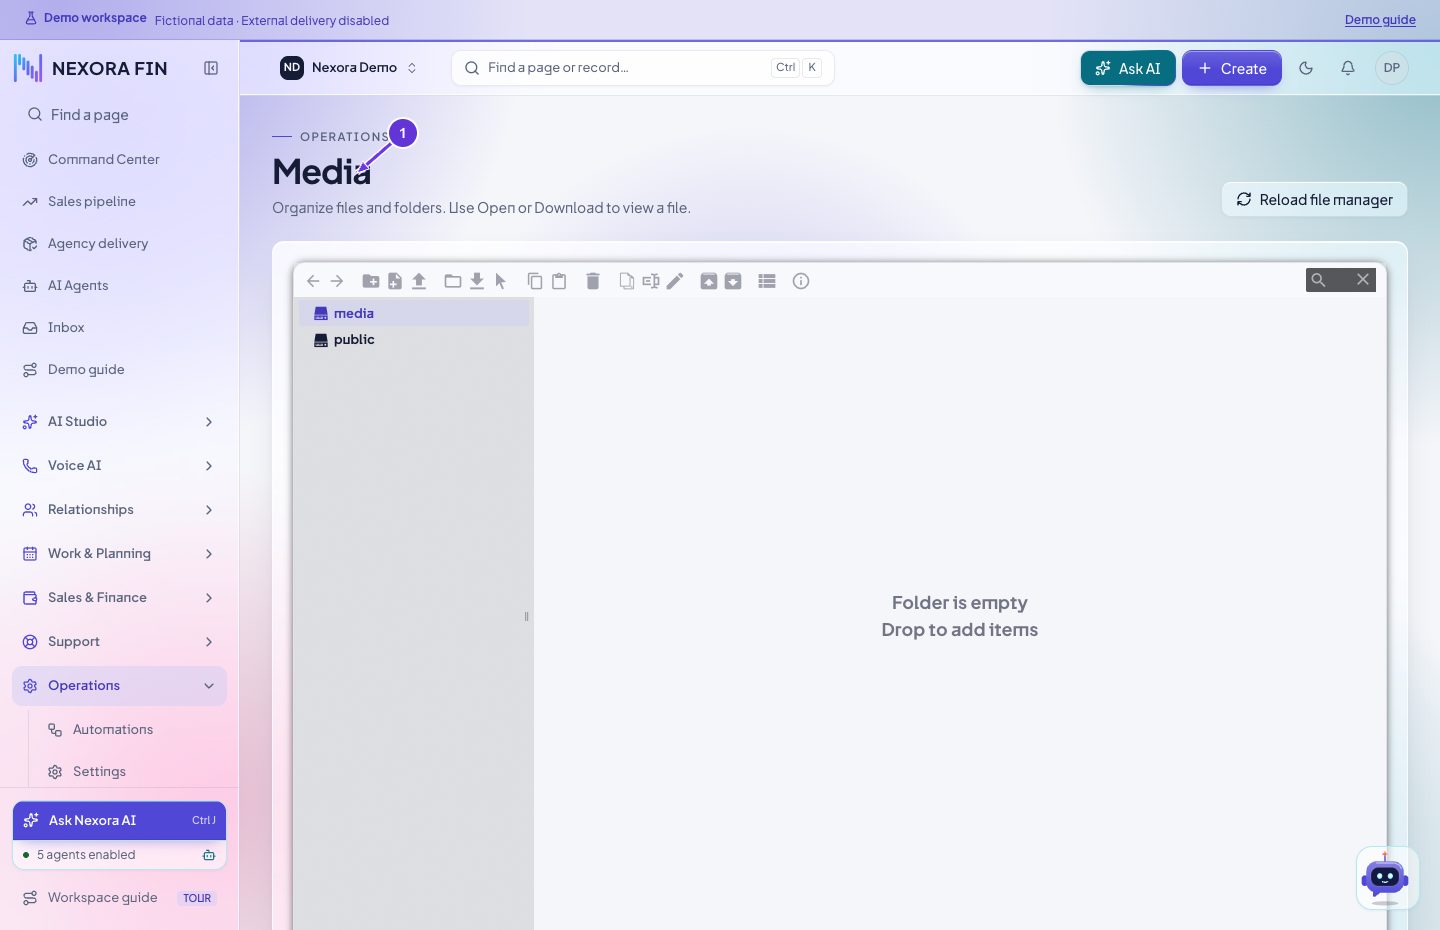
Open in CRMMedia
Find the file by name or folder and check permissions and location. Use the visible file actions and confirm the exact item afterward.
- Media
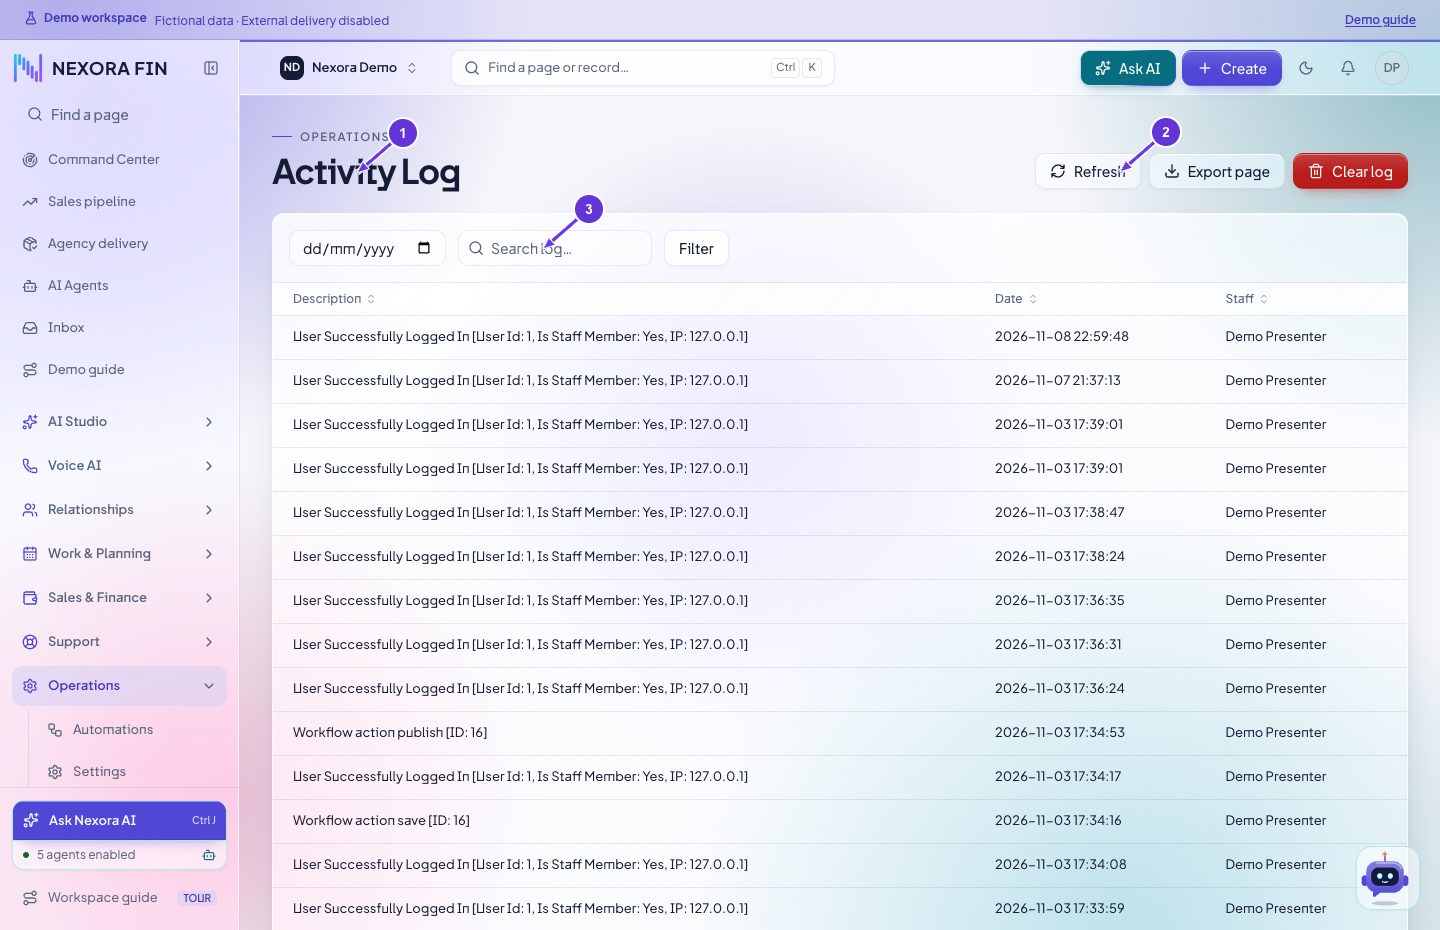
Activity log
Search by time, staff member or recorded action. Match the result to the source record. treat missing entries as unconfirmed activity.
- Activity Log
- Refresh
- Search log
Backups
Review available backup records and module status. Use only the backup or restore actions authorized by your organization.
Open in CRMAll CRM settings
Open Administration → All CRM settings. Search for the feature or configuration group and open its matching editor. save and reopen to verify any change.
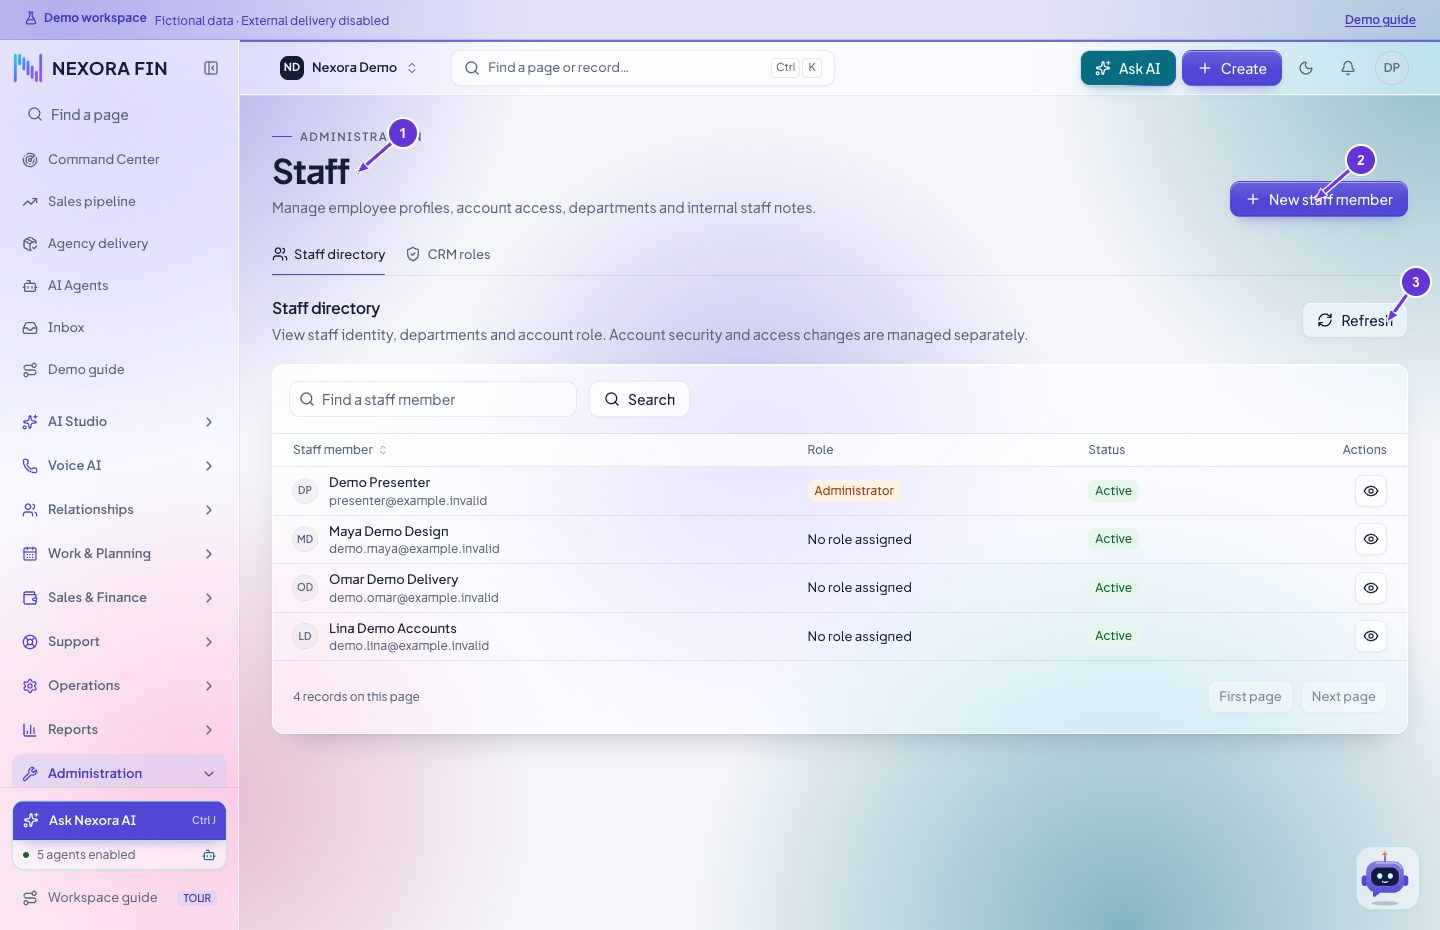
Open in CRMStaff
Open Administration → Staff, select the staff member or create one if permitted. Verify the role and access, save, then review the staff record.
- Staff
- New staff member
- Refresh
Modules
Inspect the module name and installed status. Review what the module controls before changing its state, then verify the relevant pages after any permitted change.
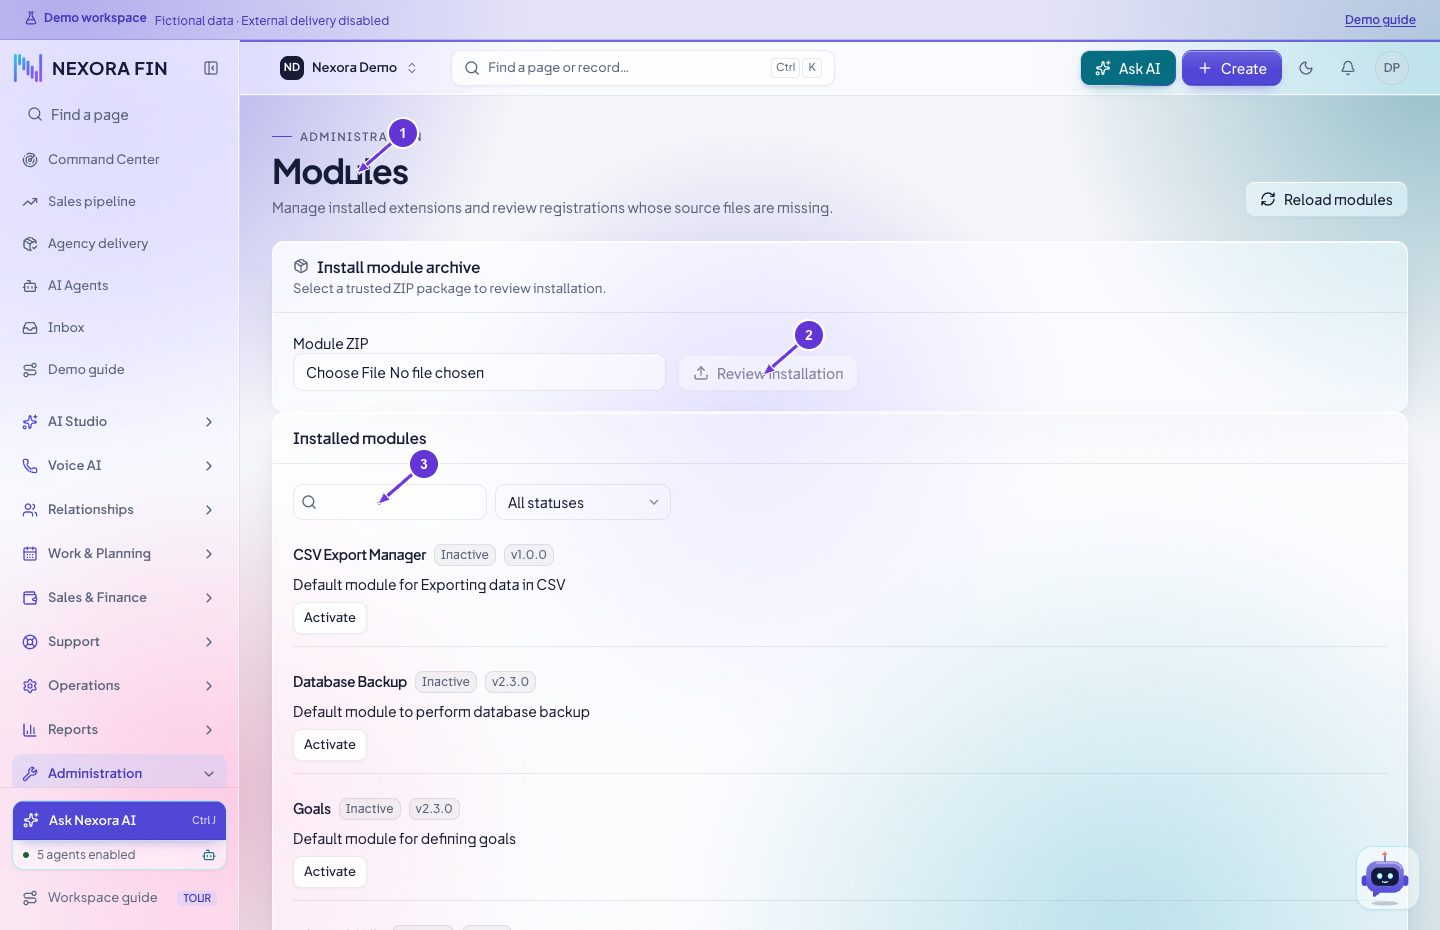
- Modules
- Review installation
- Search modules
Custom fields
Choose the target record type, field type and visibility, then save. Reopen a record of that type to verify placement and required-field behavior.
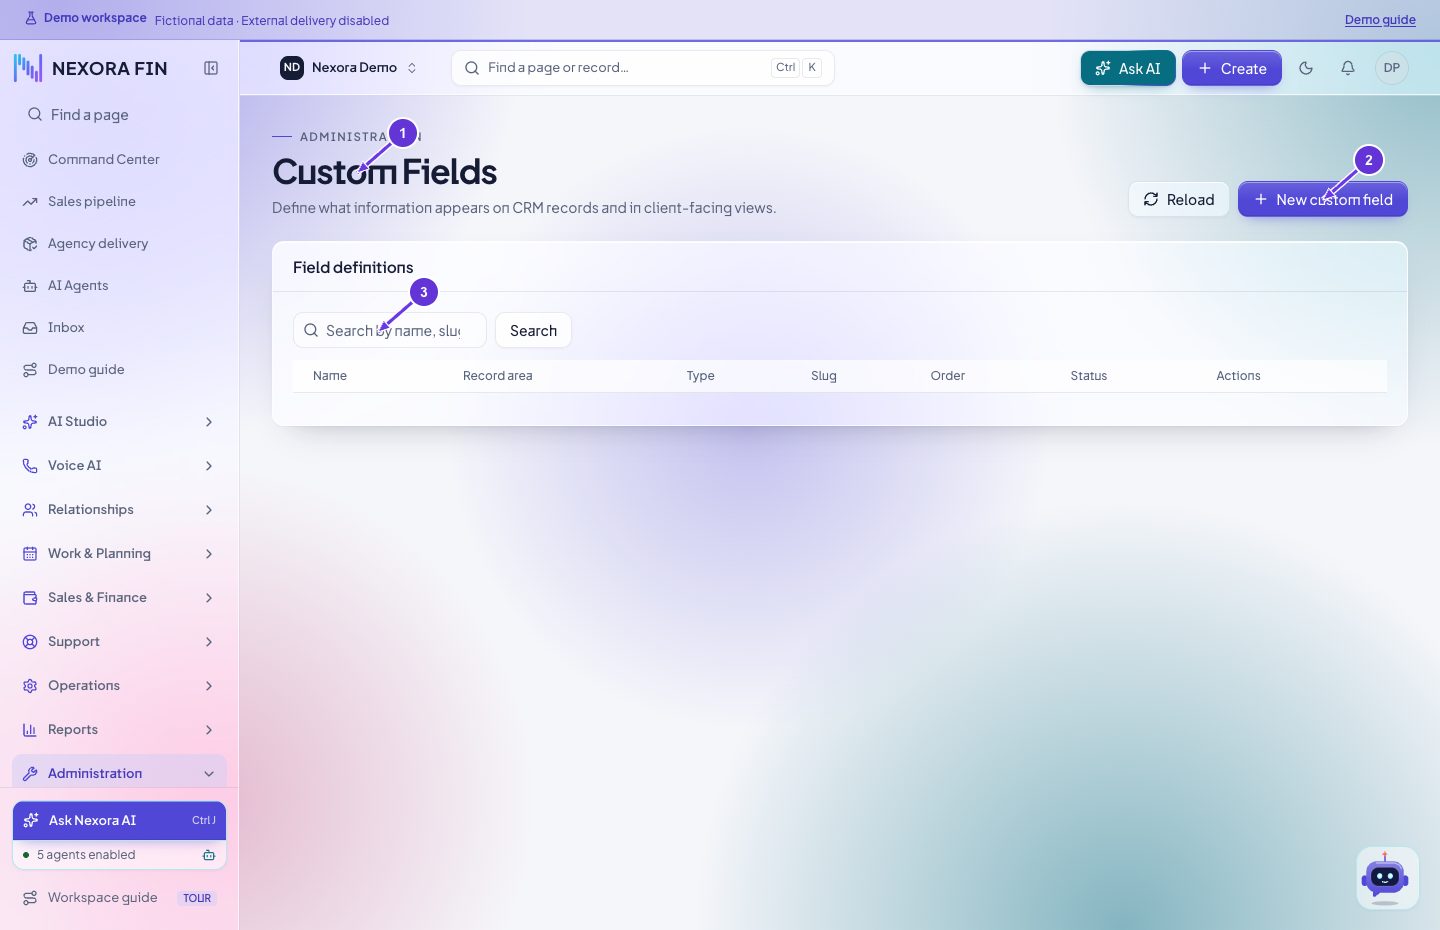
- Custom Fields
- New custom field
- Search custom fields
Email templates
Select the correct template and language, edit subject or body and preserve required merge fields. Save and preview before a controlled send.
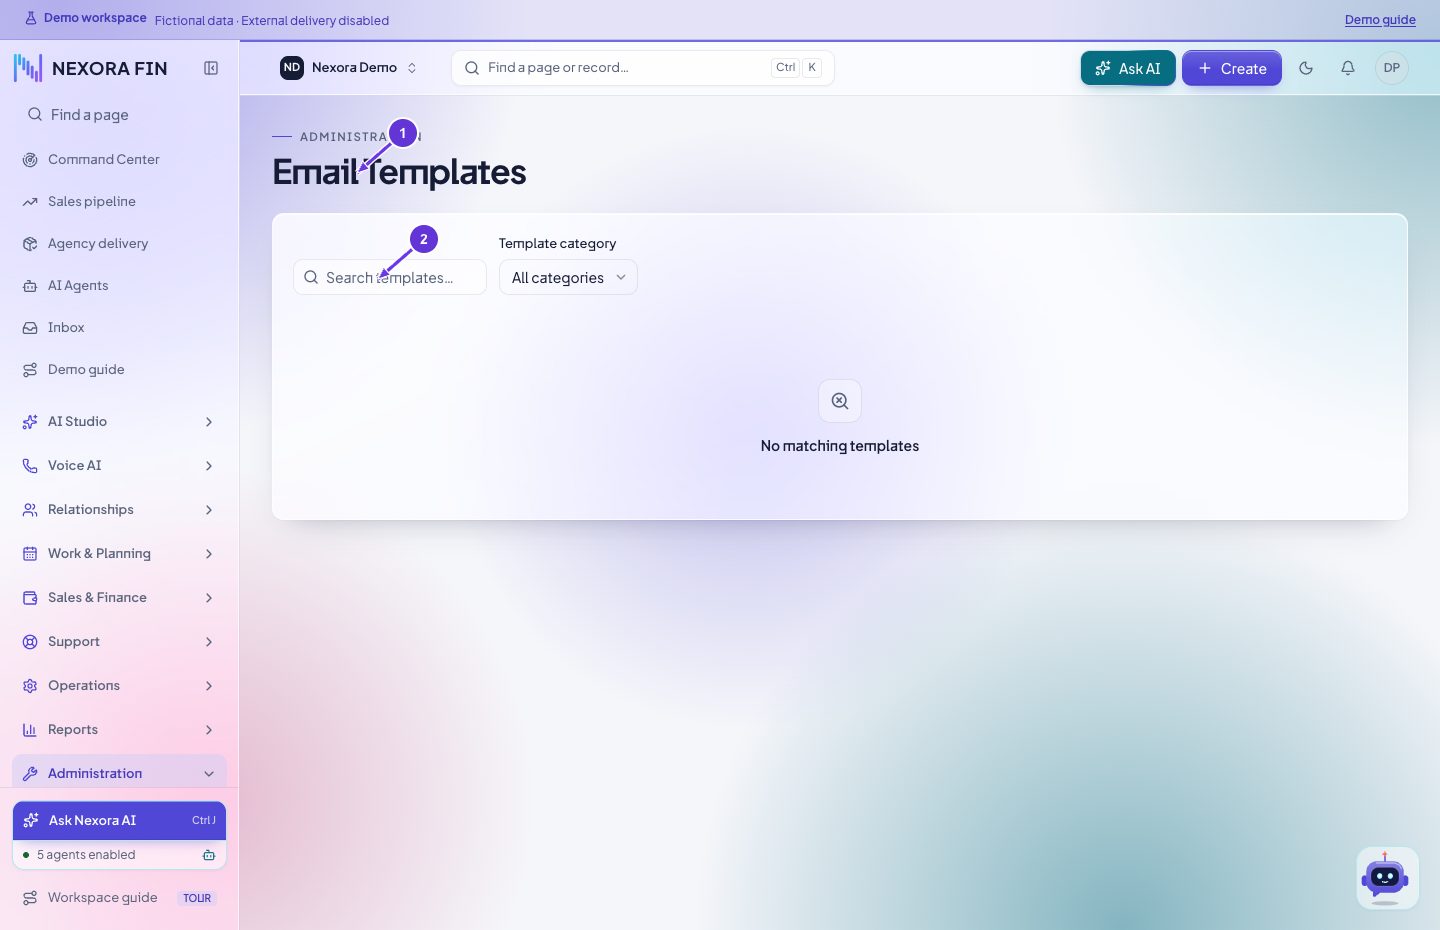
- Email Templates
- Search templates
WhatsApp delivery checks
Verify the active sender and current provider connection in WhatsApp settings. Use the webhook URL and verification settings shown for that connection. Confirm consent, provider approval and the template when required. Use the message record and provider receipt to distinguish accepted, delivered and failed.
- Settings
- All CRM settings
- AI configuration
Core CRM settings reference
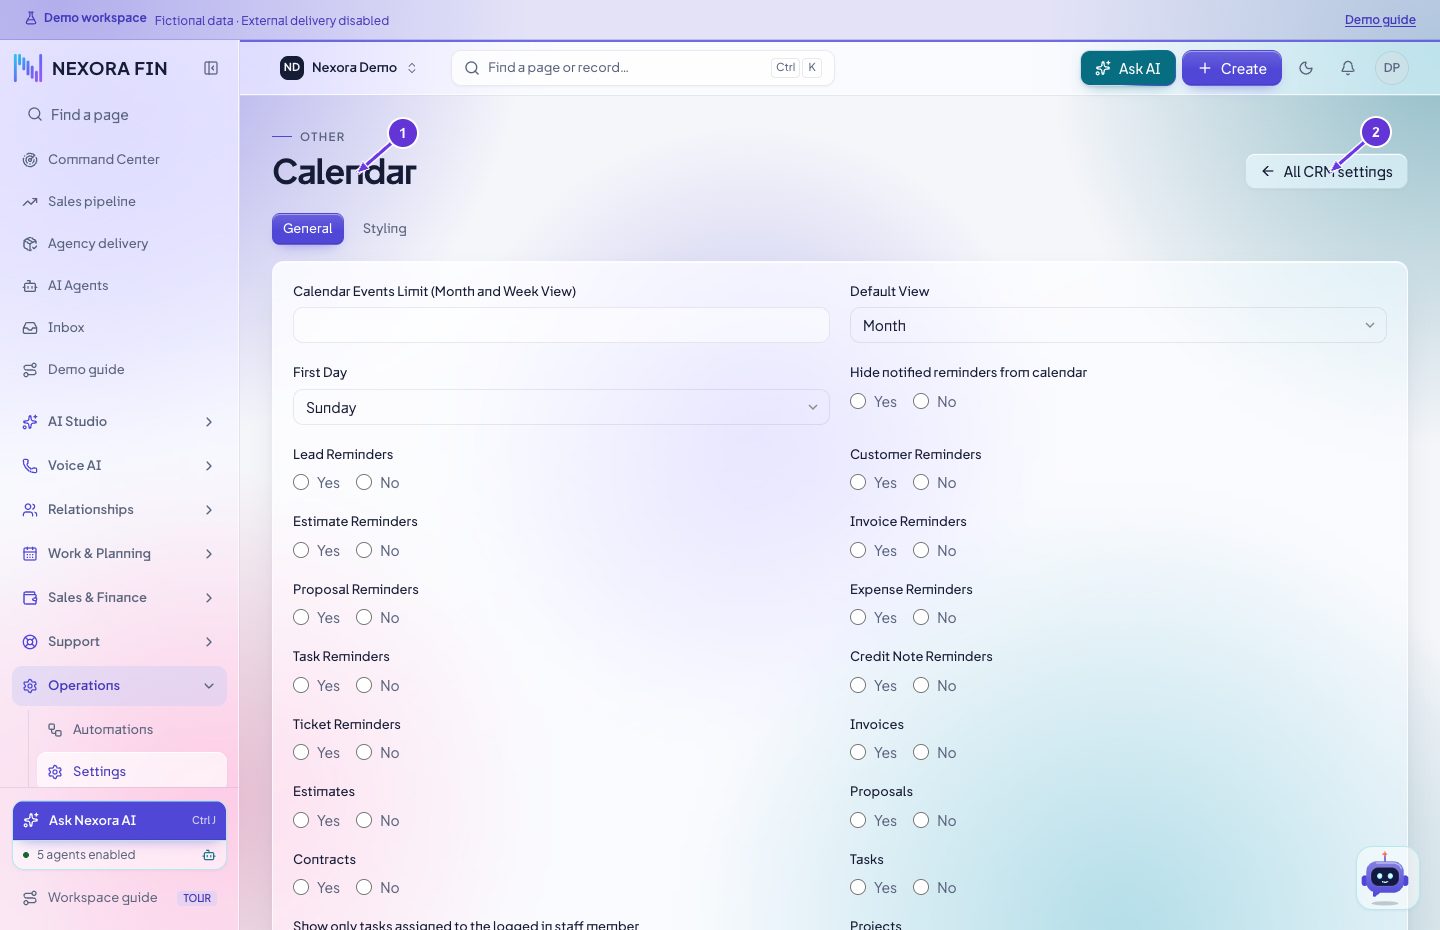
Calendar General tab
Open Calendar settings → General and review event visibility and display options. Save and reopen Calendar.
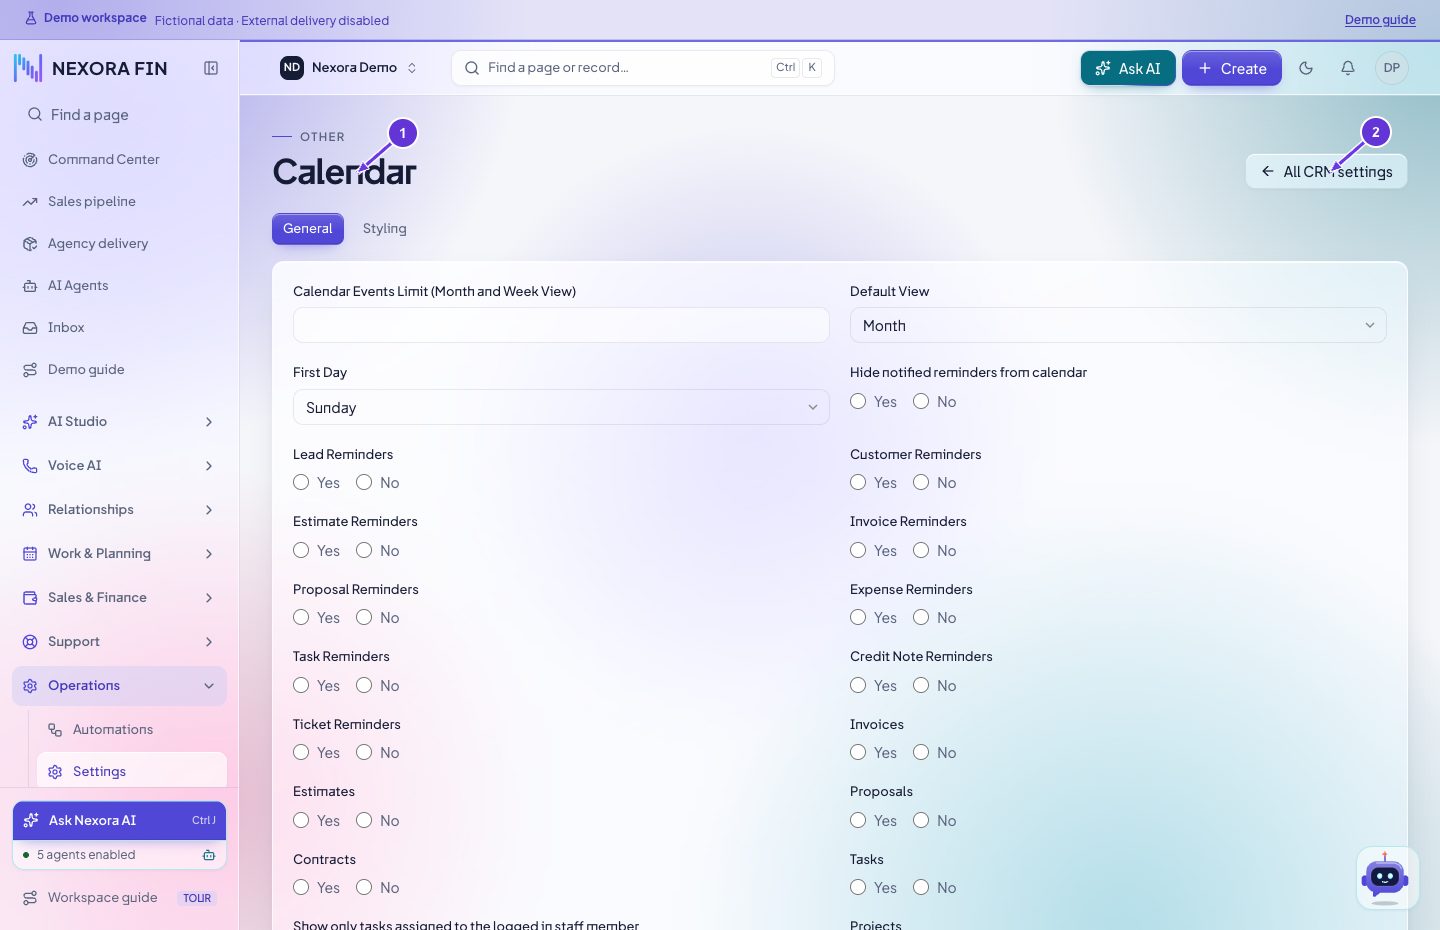
- Calendar
- All CRM settings
Calendar Colors tab
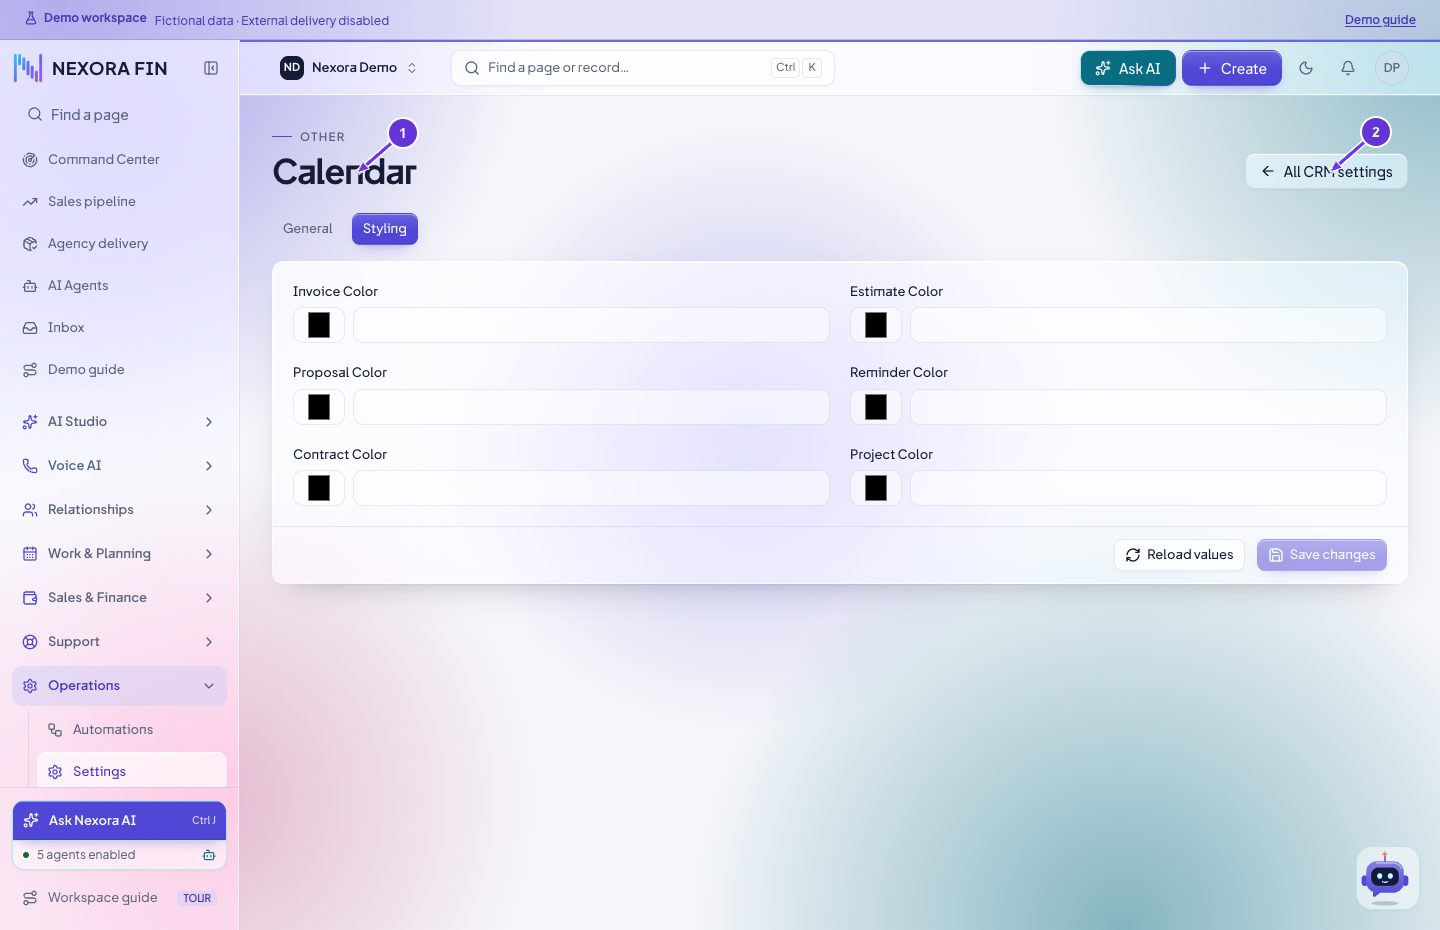
Open Calendar settings → Colors and review the color for each event type. Save and verify in Calendar.
- Calendar
- All CRM settings
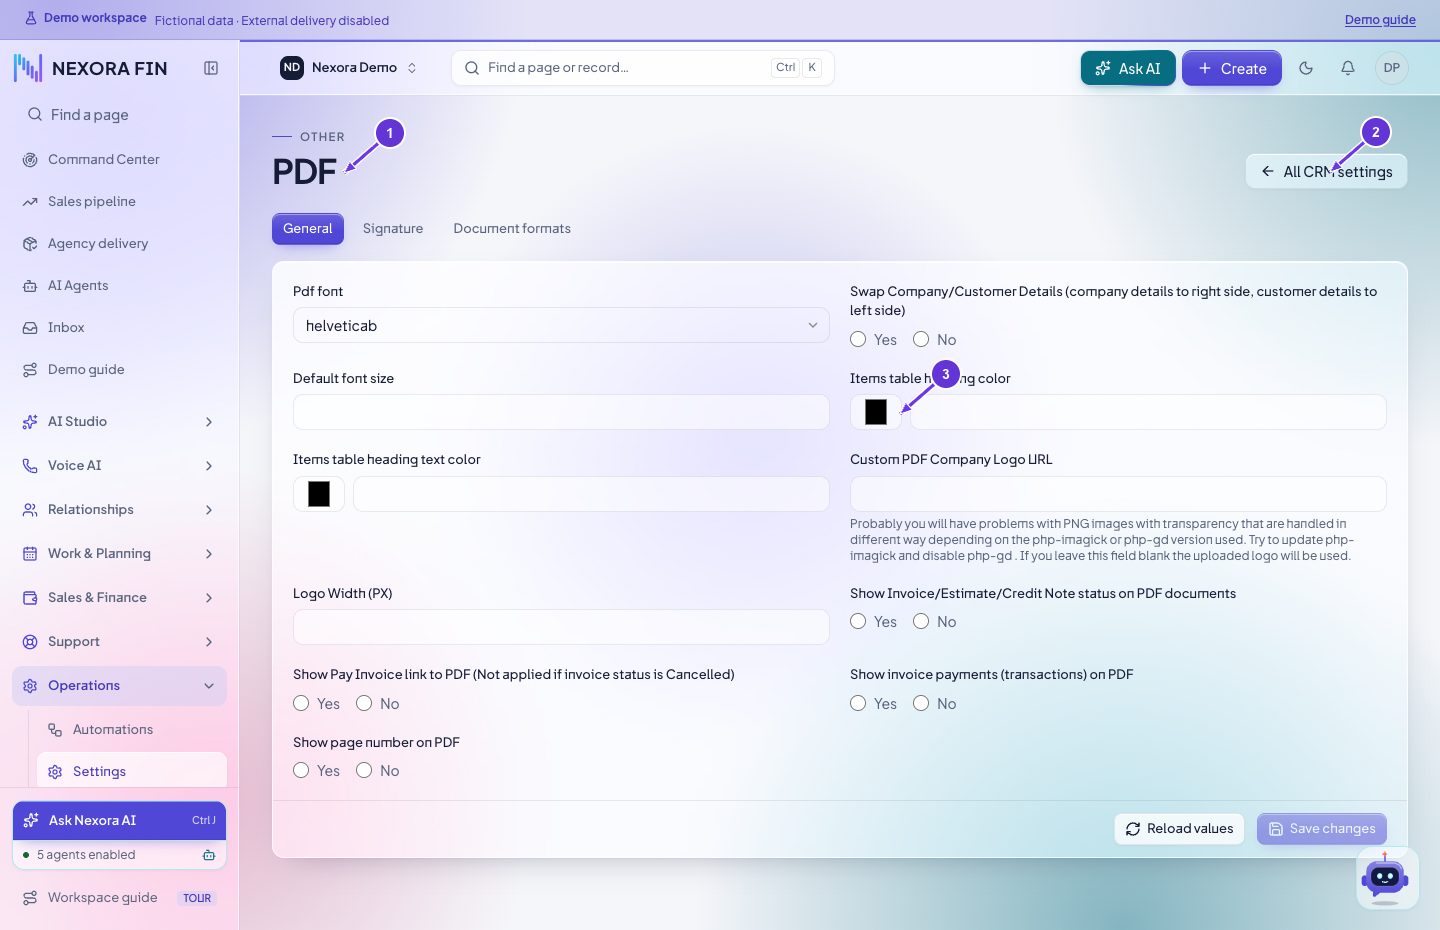
PDF General tab
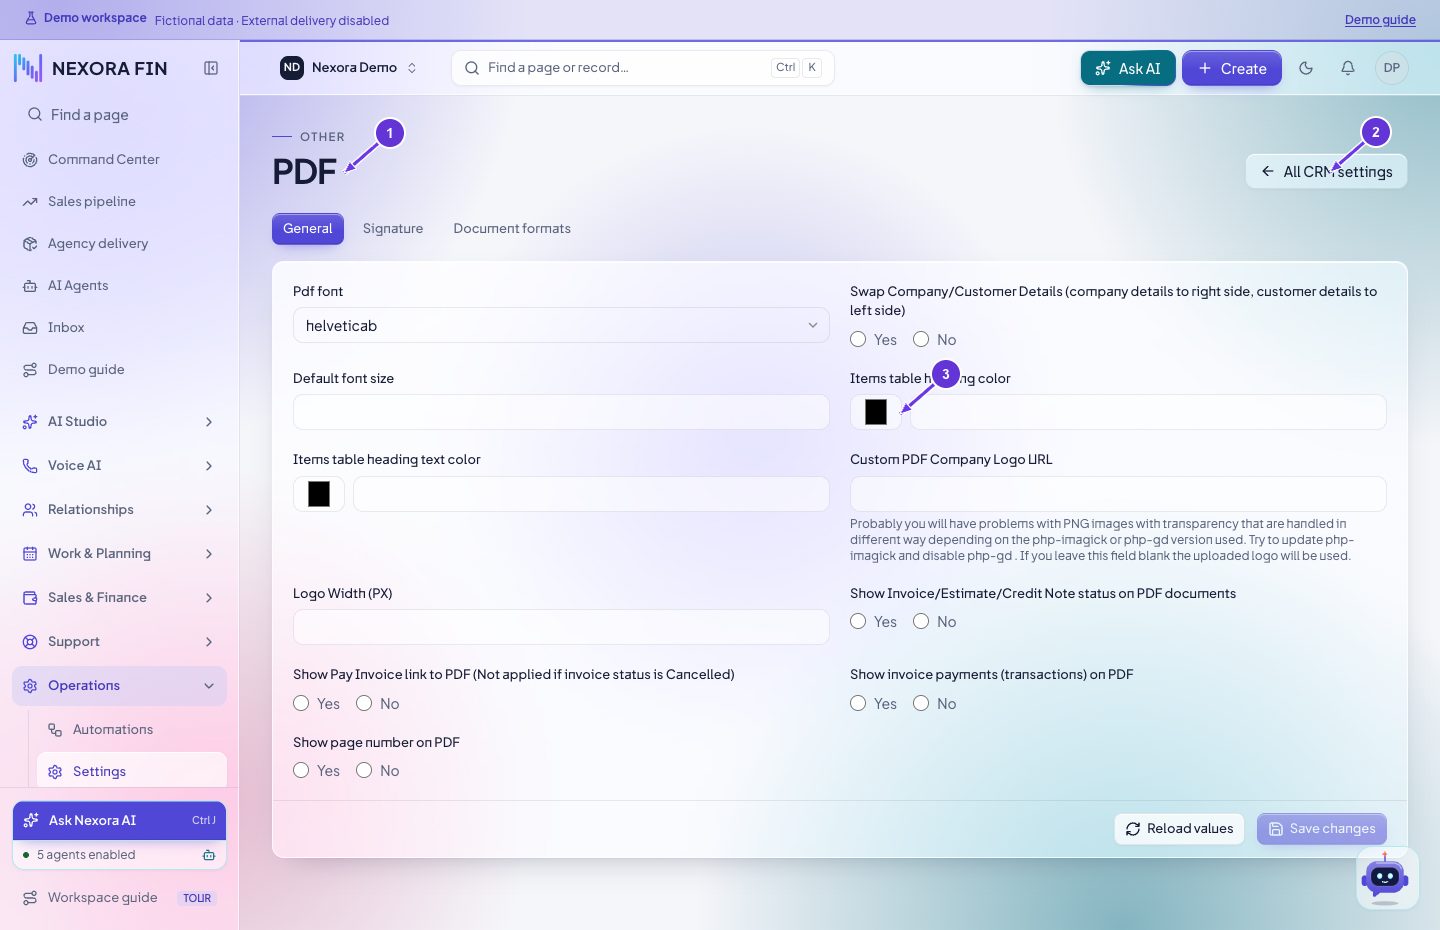
Open PDF settings → General. Review document layout options, save and preview a representative document.
- All CRM settings
- Items table heading color color picker
PDF Signature tab
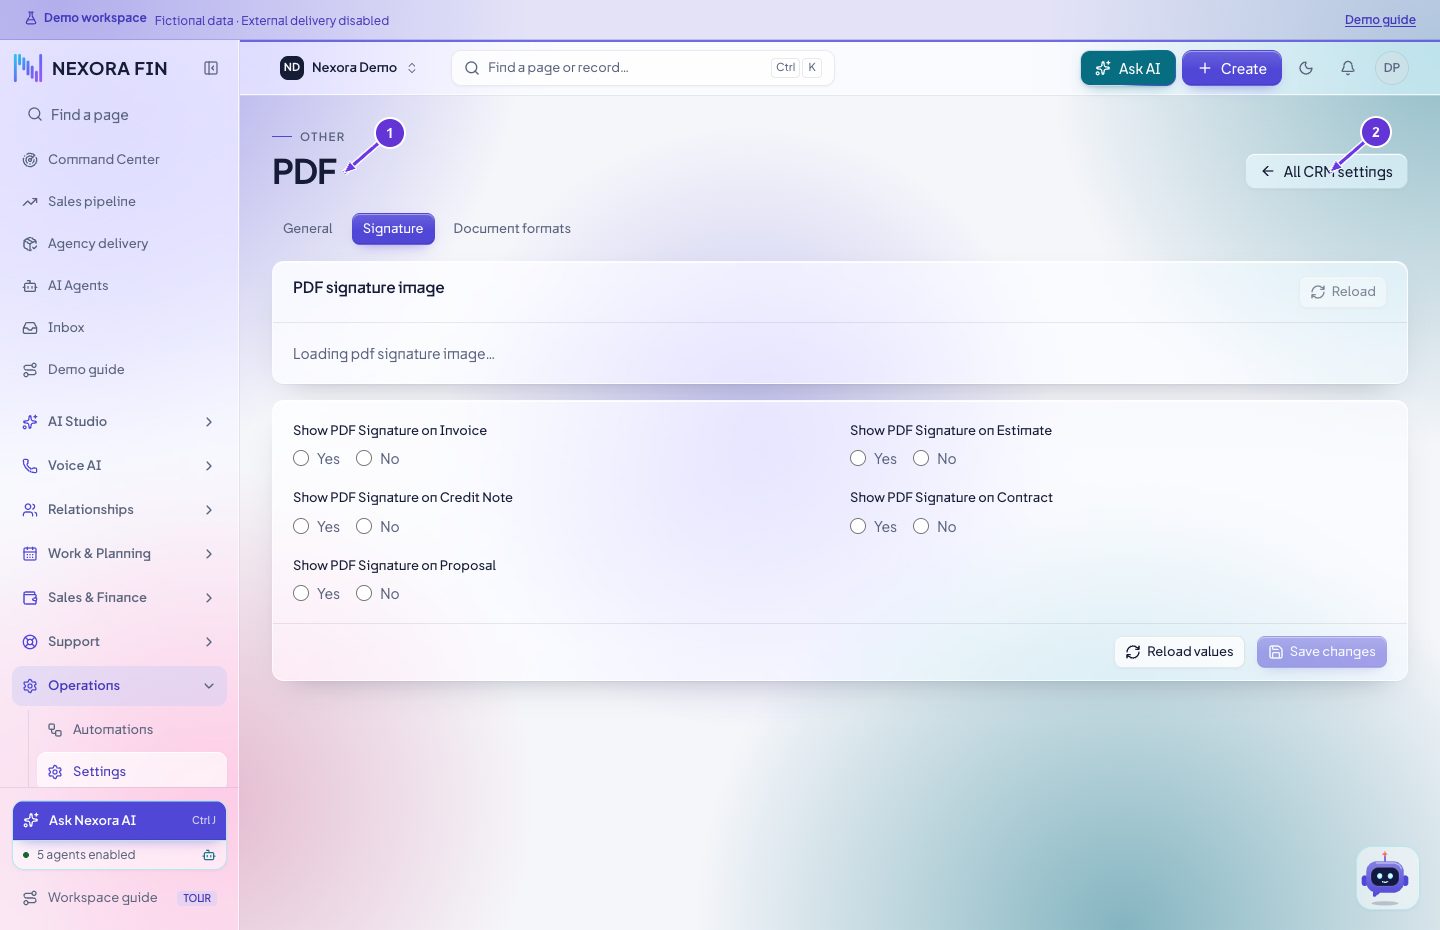
Open PDF settings → Signature, review the approved signature settings, save, and check a PDF preview.
- All CRM settings
PDF Formats tab
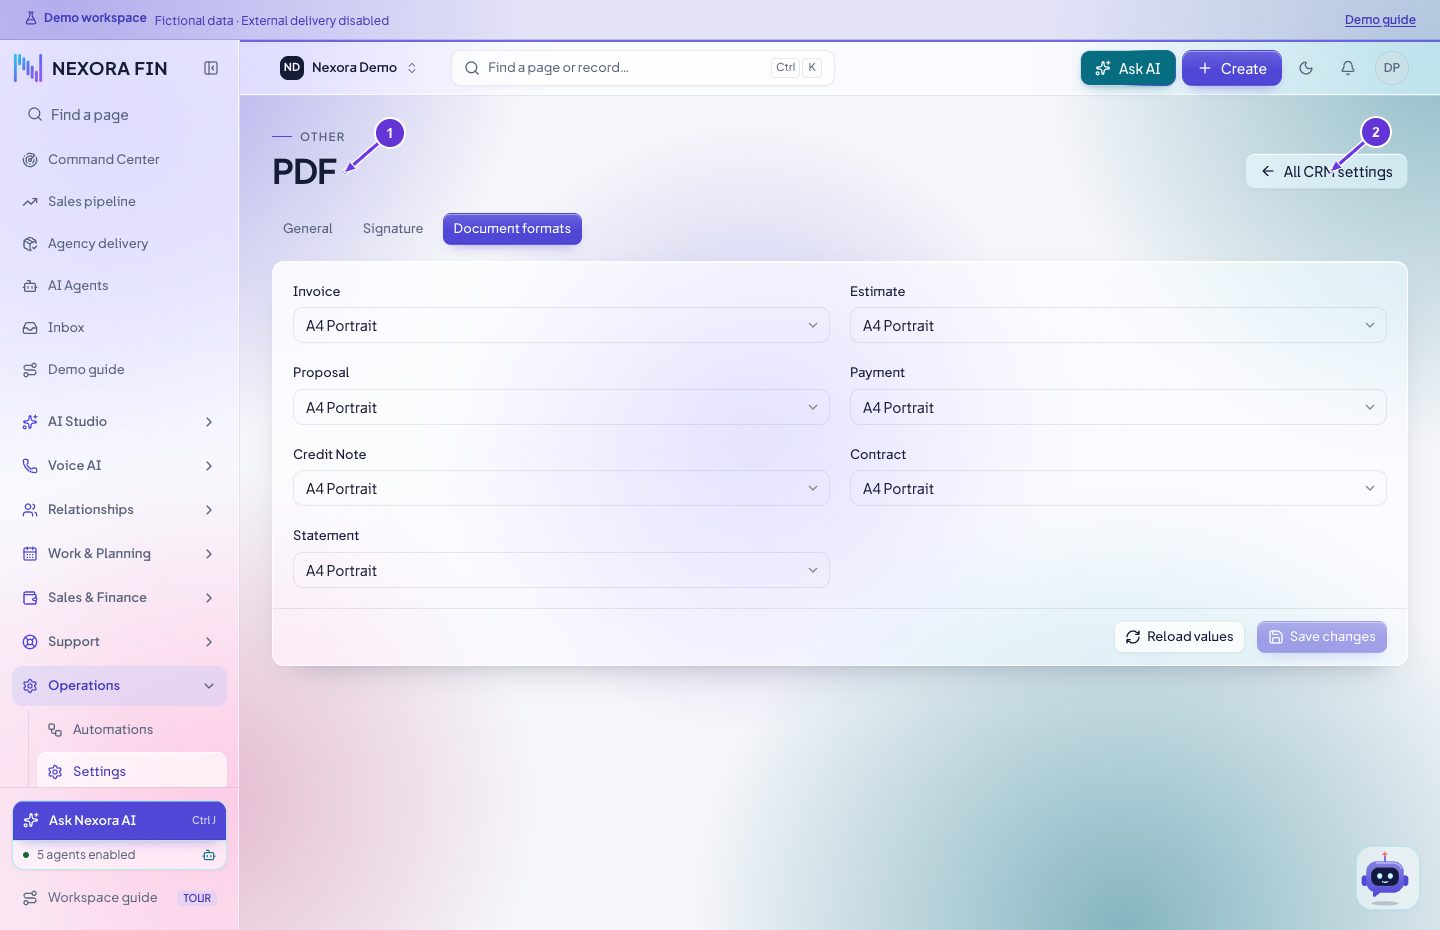
Open PDF settings → Formats. Select the intended page format, save, and verify the output PDF.
- All CRM settings
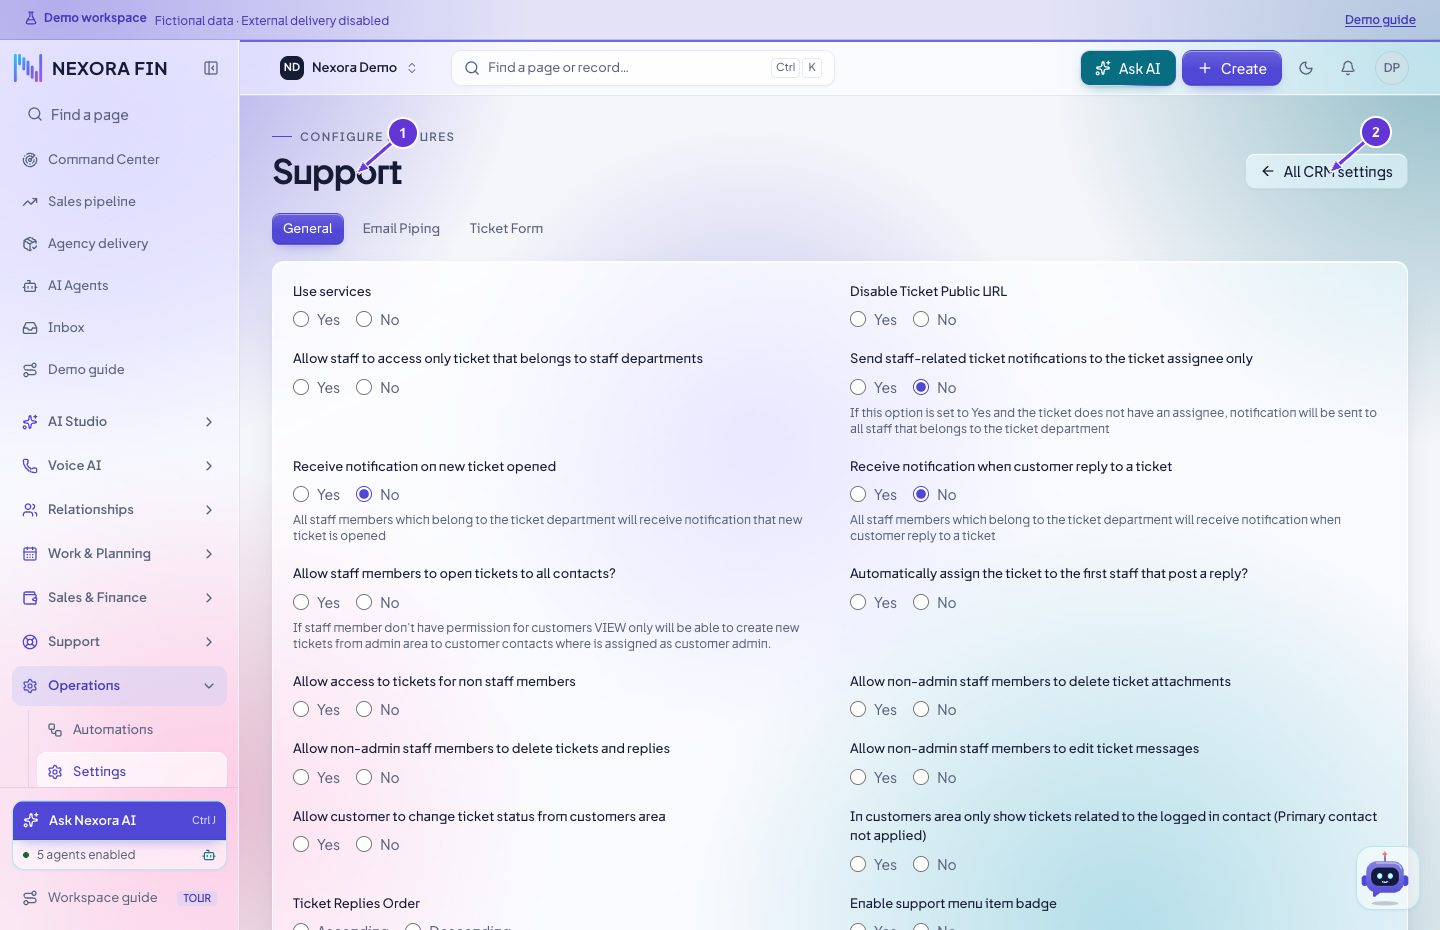
Tickets General tab
Open Ticket defaults → General and review ticket behavior, visibility and defaults. Save, then verify with a controlled ticket.
- Support
- All CRM settings
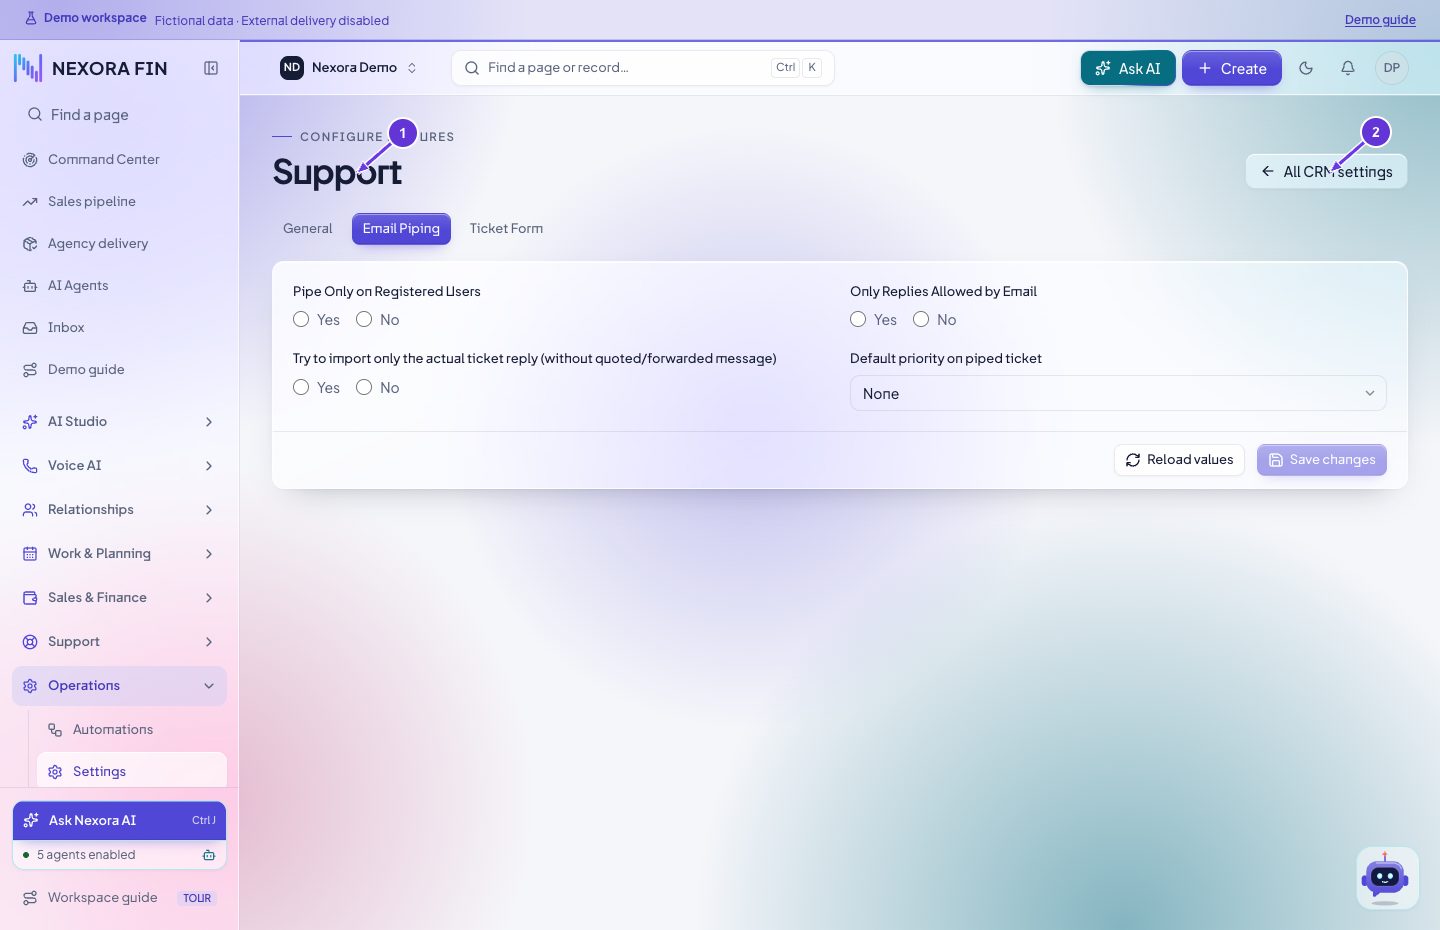
Ticket email piping tab
Open Ticket defaults → Email piping and review incoming mail processing. Compare a controlled incoming message with the incoming support email log and its ticket.
- Support
- All CRM settings
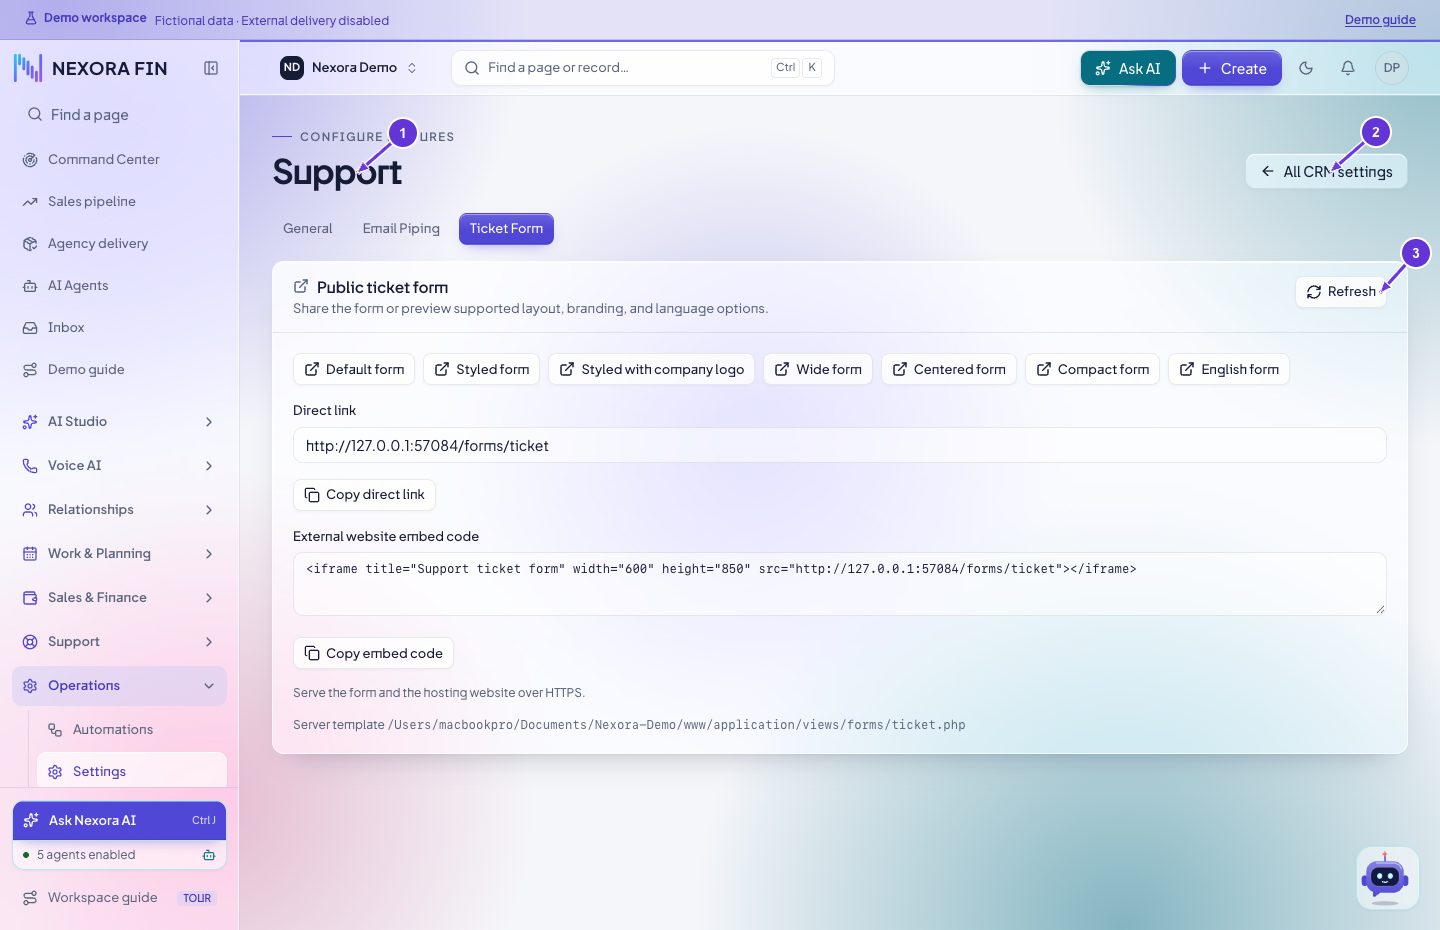
Ticket Form tab
Open Ticket defaults → Ticket Form, review the form behavior, save, and verify the form using the intended client role.
- Support
- All CRM settings
- Refresh
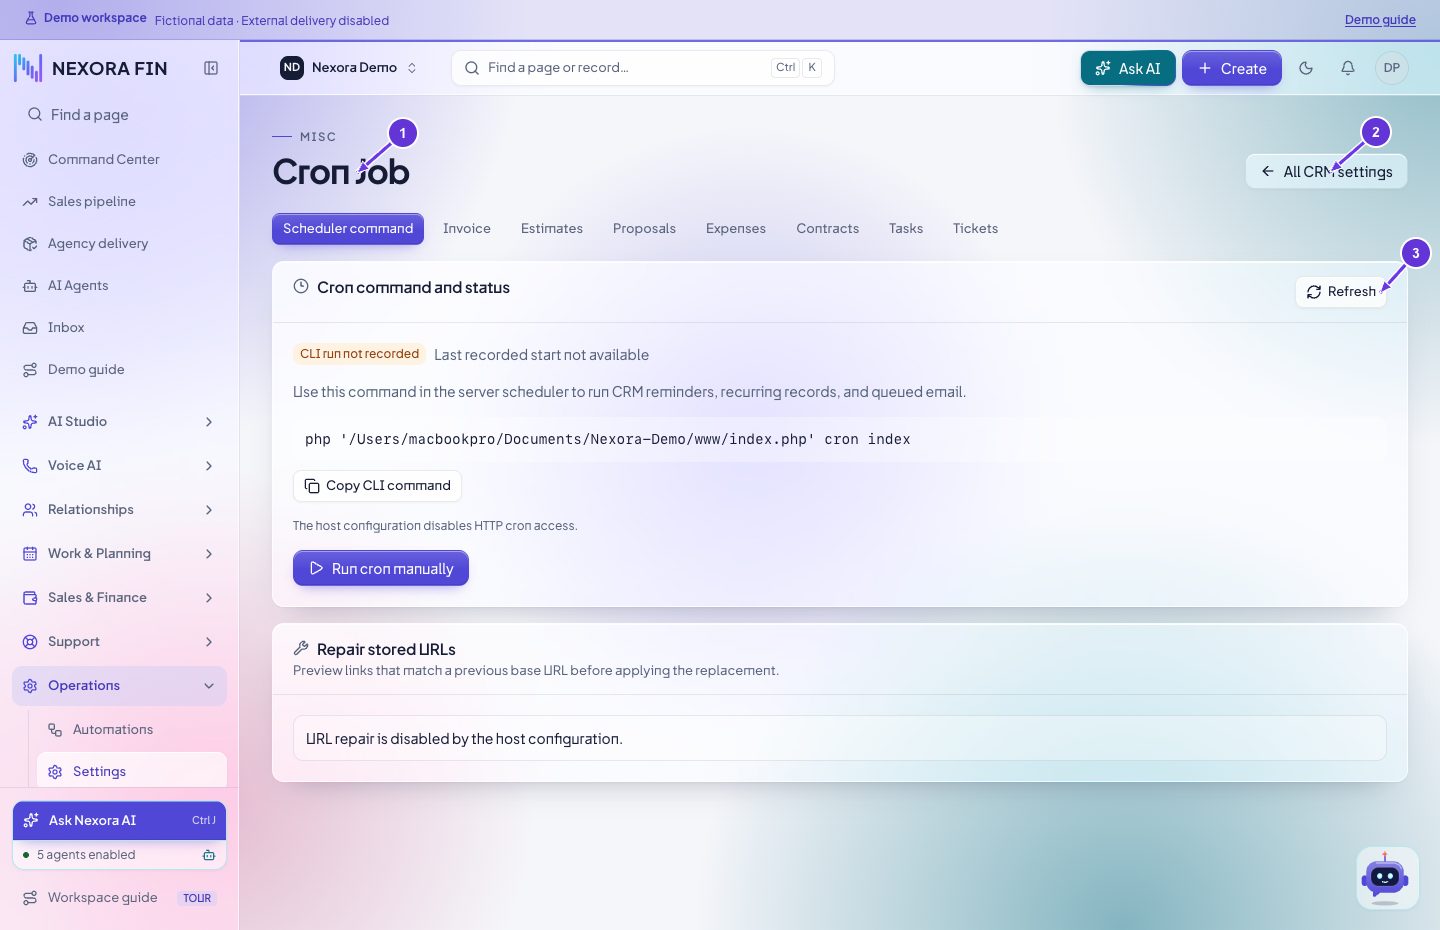
Cron command tab
Open Scheduled jobs → Cron command. Review the configured command and last execution, then verify the scheduler on the host and the resulting job evidence.
- Cron Job
- All CRM settings
- Refresh
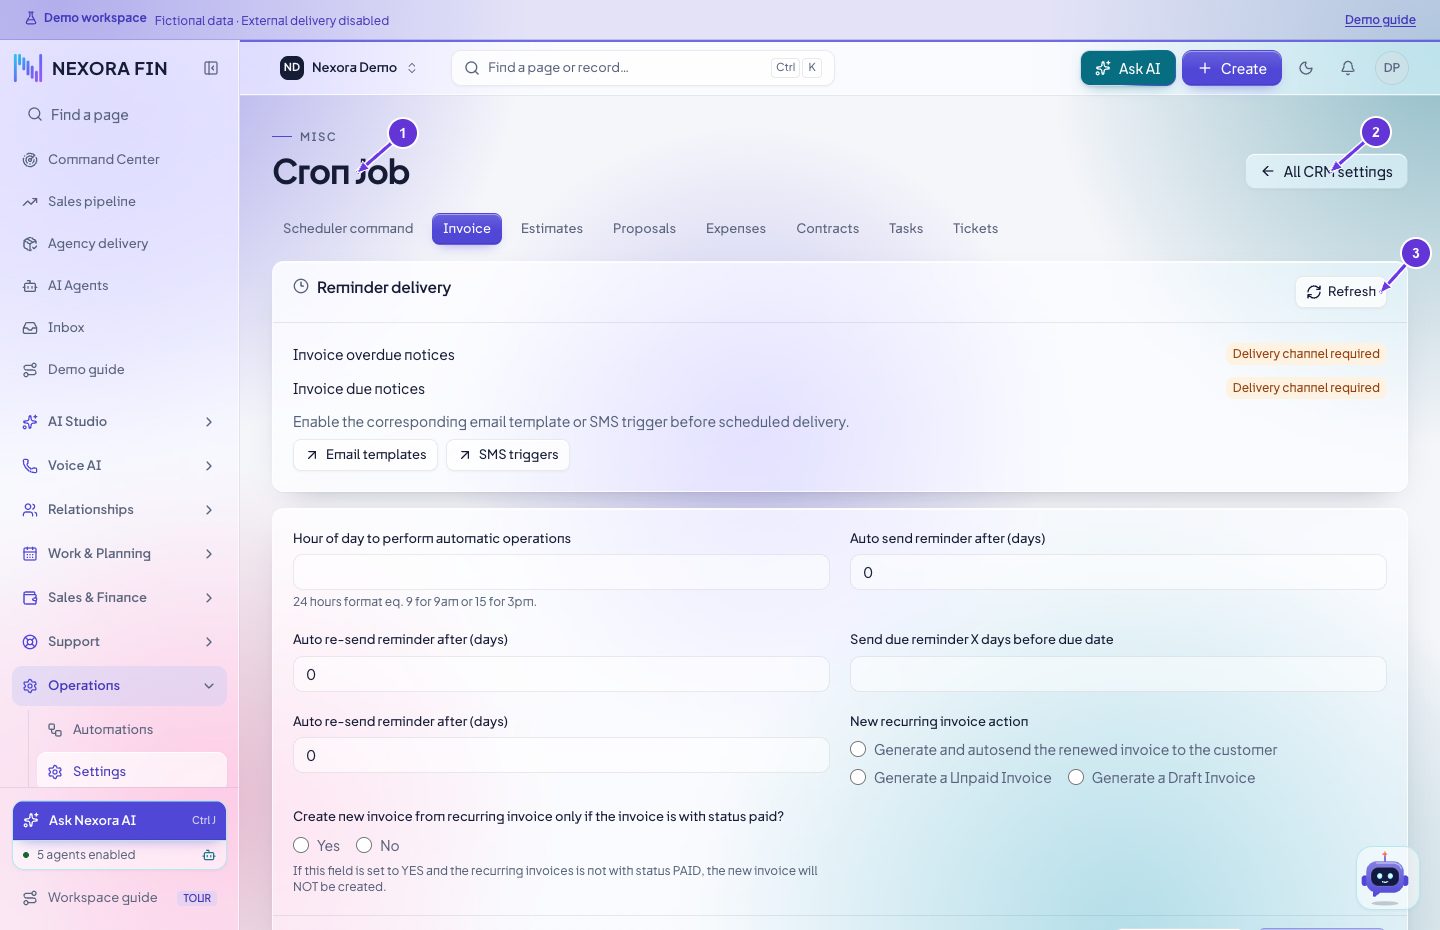
Scheduled invoice jobs
Open the invoice tab under Scheduled jobs and review the invoice automation rules. Check an eligible invoice and its recorded outcome.
- Cron Job
- All CRM settings
- Refresh
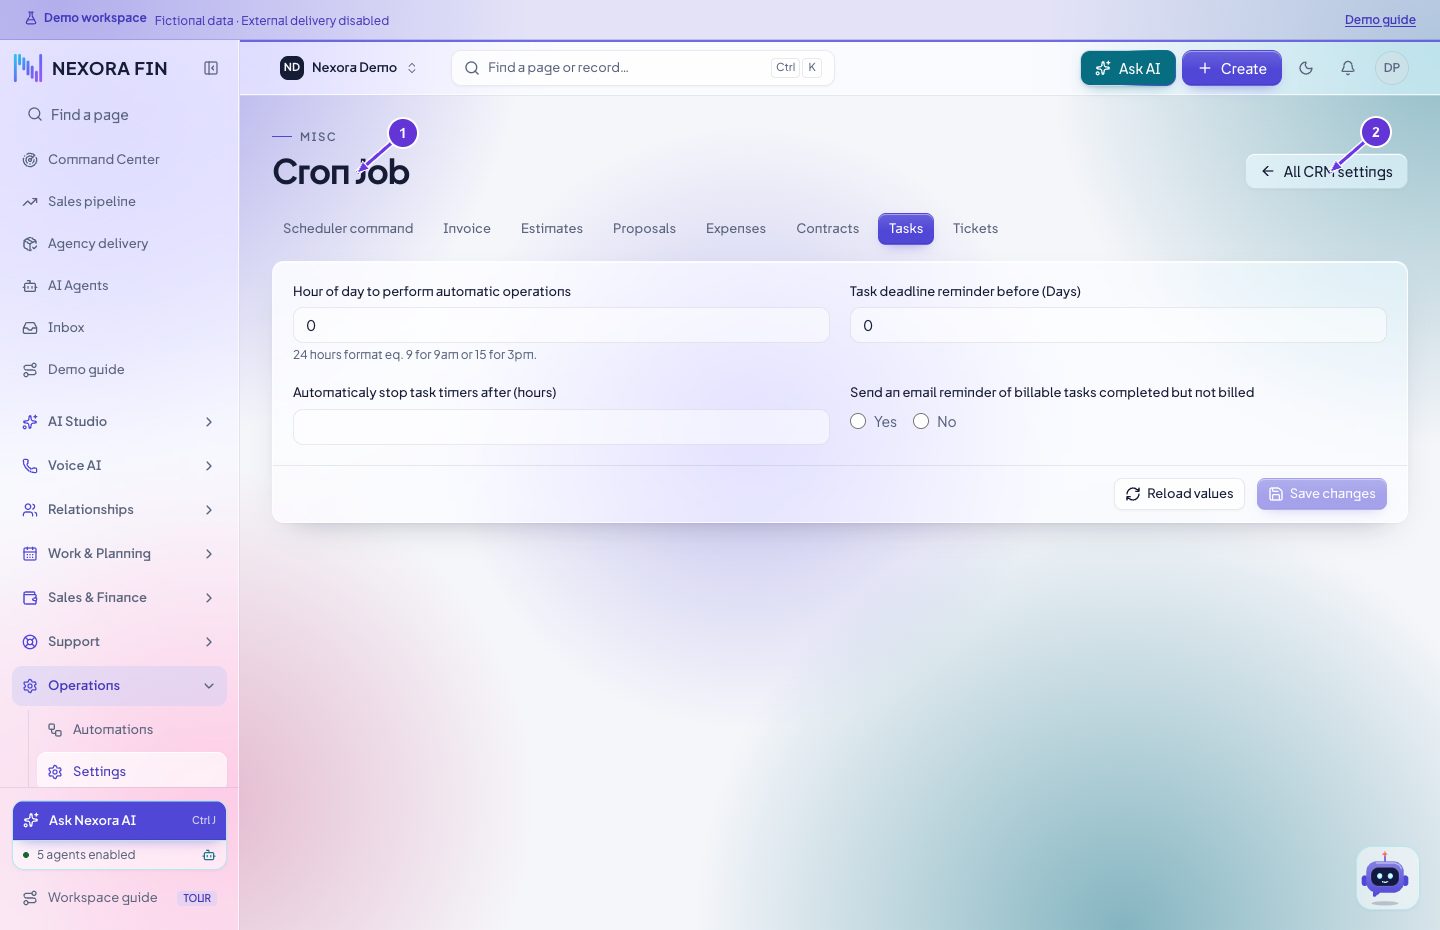
Scheduled task jobs
Open the tasks tab under Scheduled jobs. Review the task automation rules and verify the next eligible record in Tasks.
- Cron Job
- All CRM settings
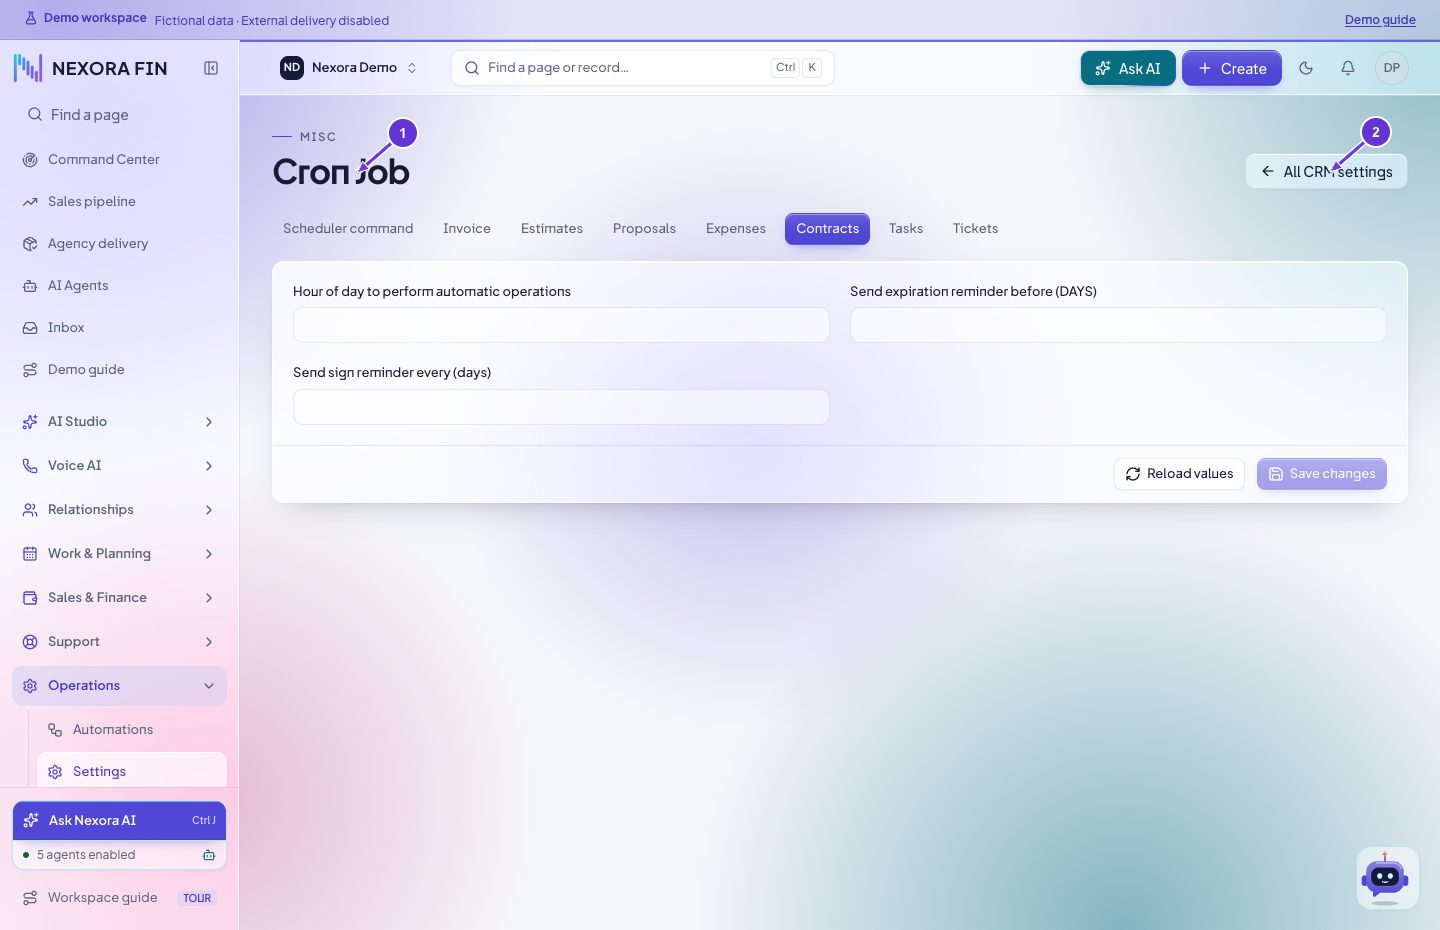
Scheduled contract jobs
Open the contracts tab under Scheduled jobs. Review expiry and related reminders, then verify their outcomes on an eligible contract.
- Cron Job
- All CRM settings
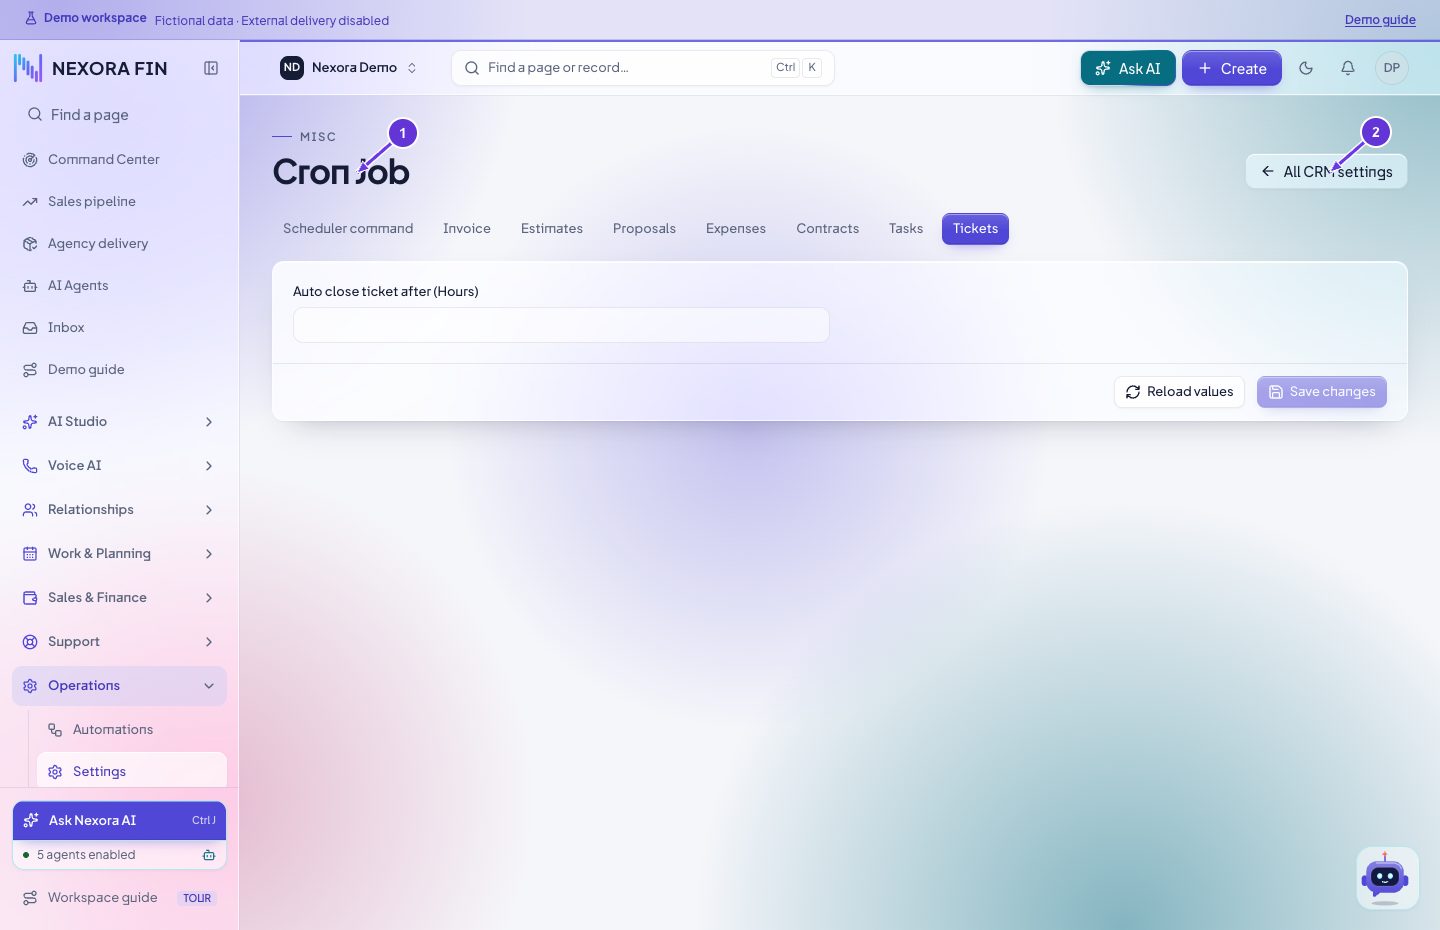
Scheduled ticket jobs
Open the tickets tab under Scheduled jobs. Review any ticket maintenance rules and confirm the resulting change on an eligible ticket.
- Cron Job
- All CRM settings
Scheduled estimate jobs
Open the estimates tab under Scheduled jobs. Review reminders and status behavior, then verify the result on an eligible estimate.
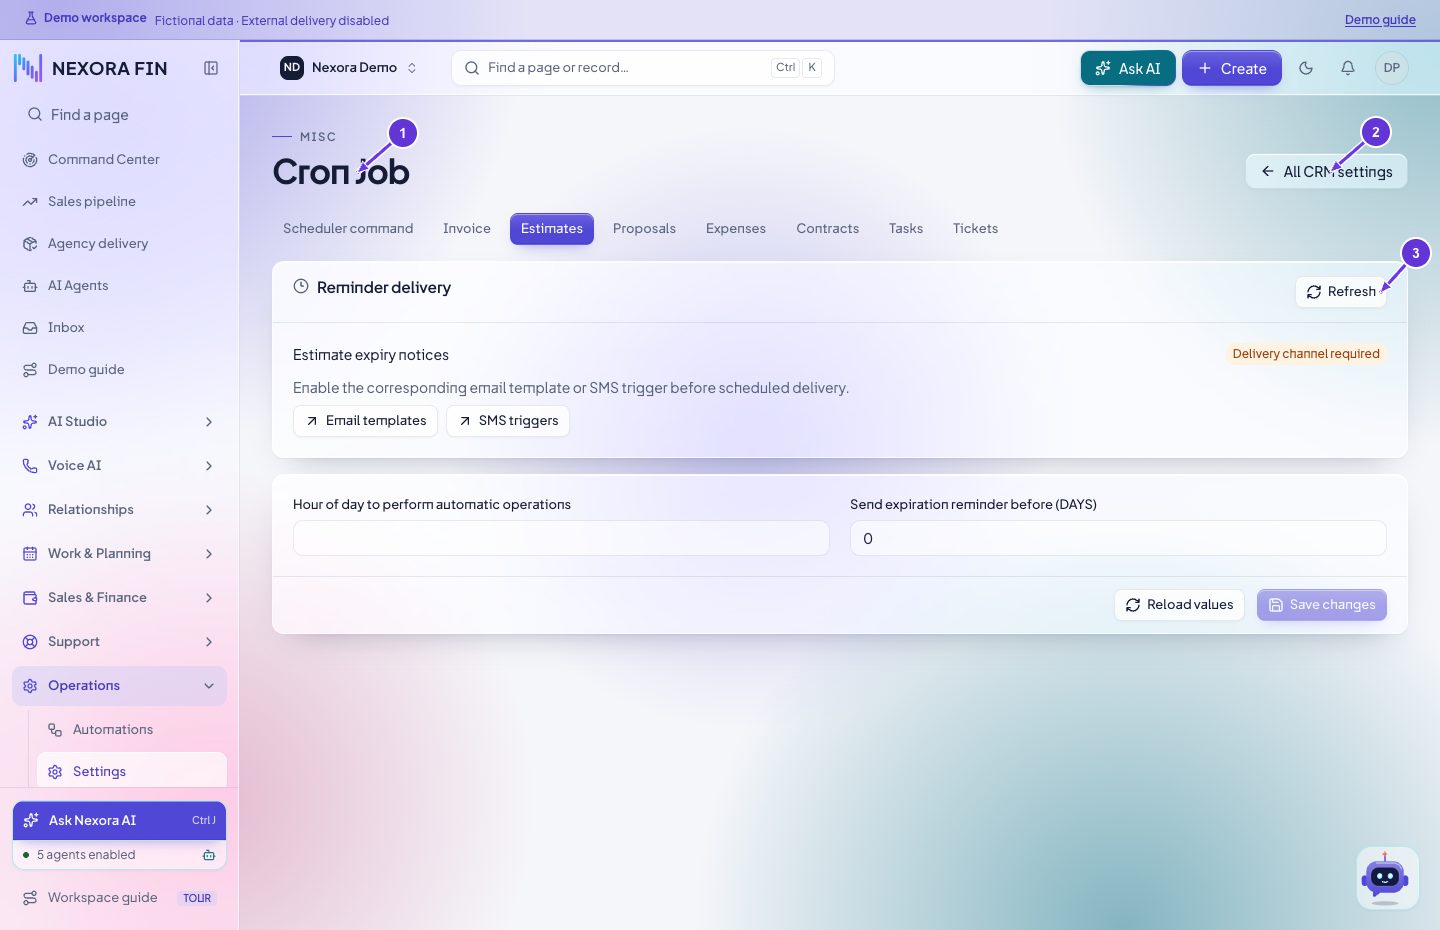
- Cron Job
- All CRM settings
- Refresh
Scheduled proposal jobs
Open the proposals tab under Scheduled jobs. Review expiry and notification behavior, and verify the result on an eligible proposal.
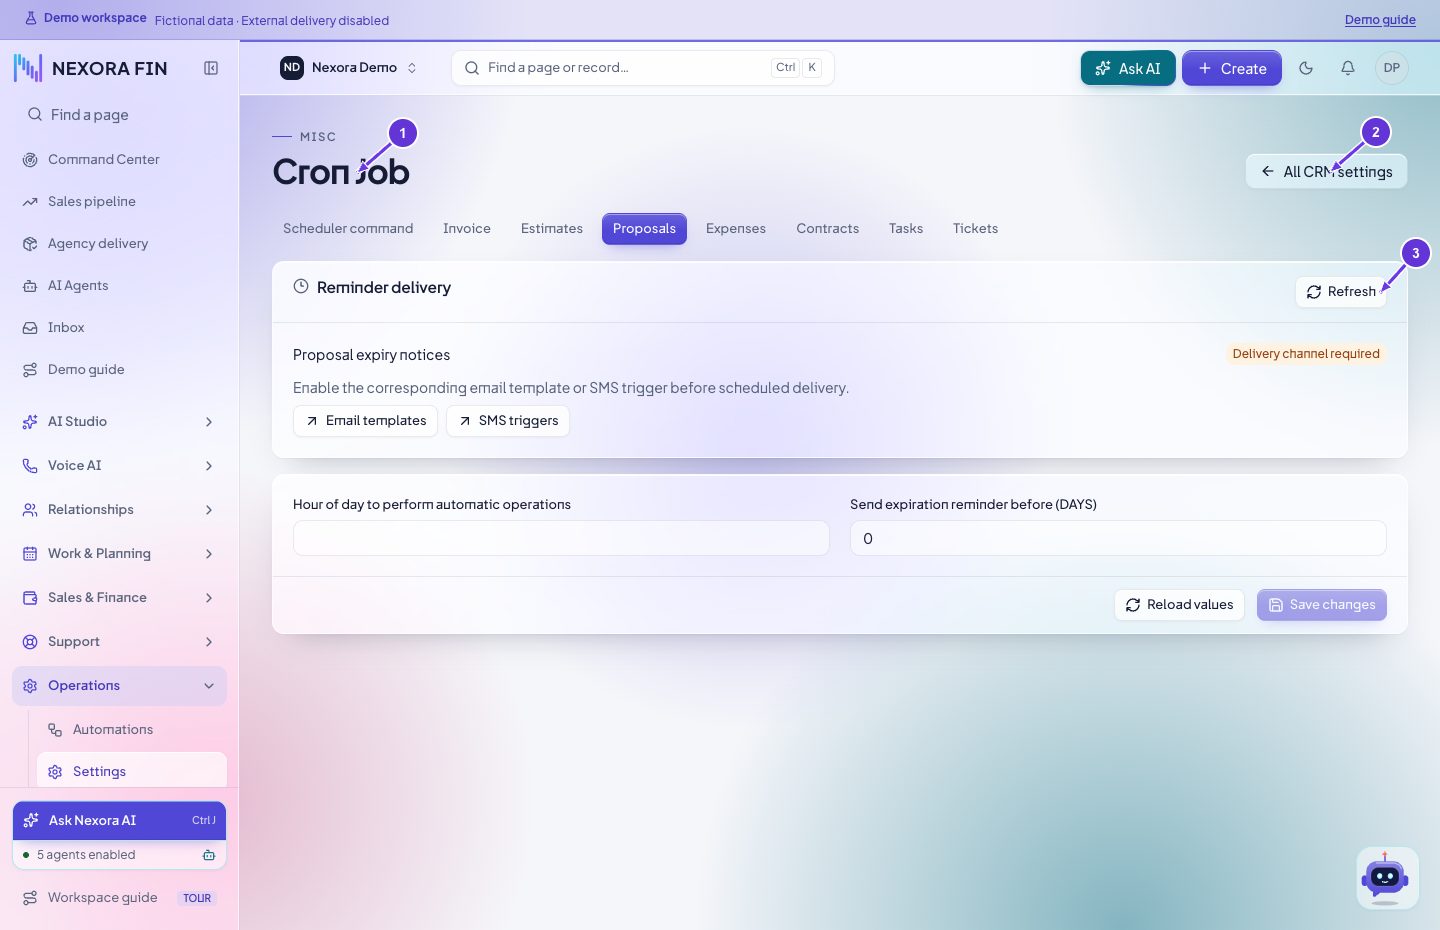
- Cron Job
- All CRM settings
- Refresh
Miscellaneous General tab
Open Miscellaneous and review the General tab. Check the relevant setting and verify the feature after saving.
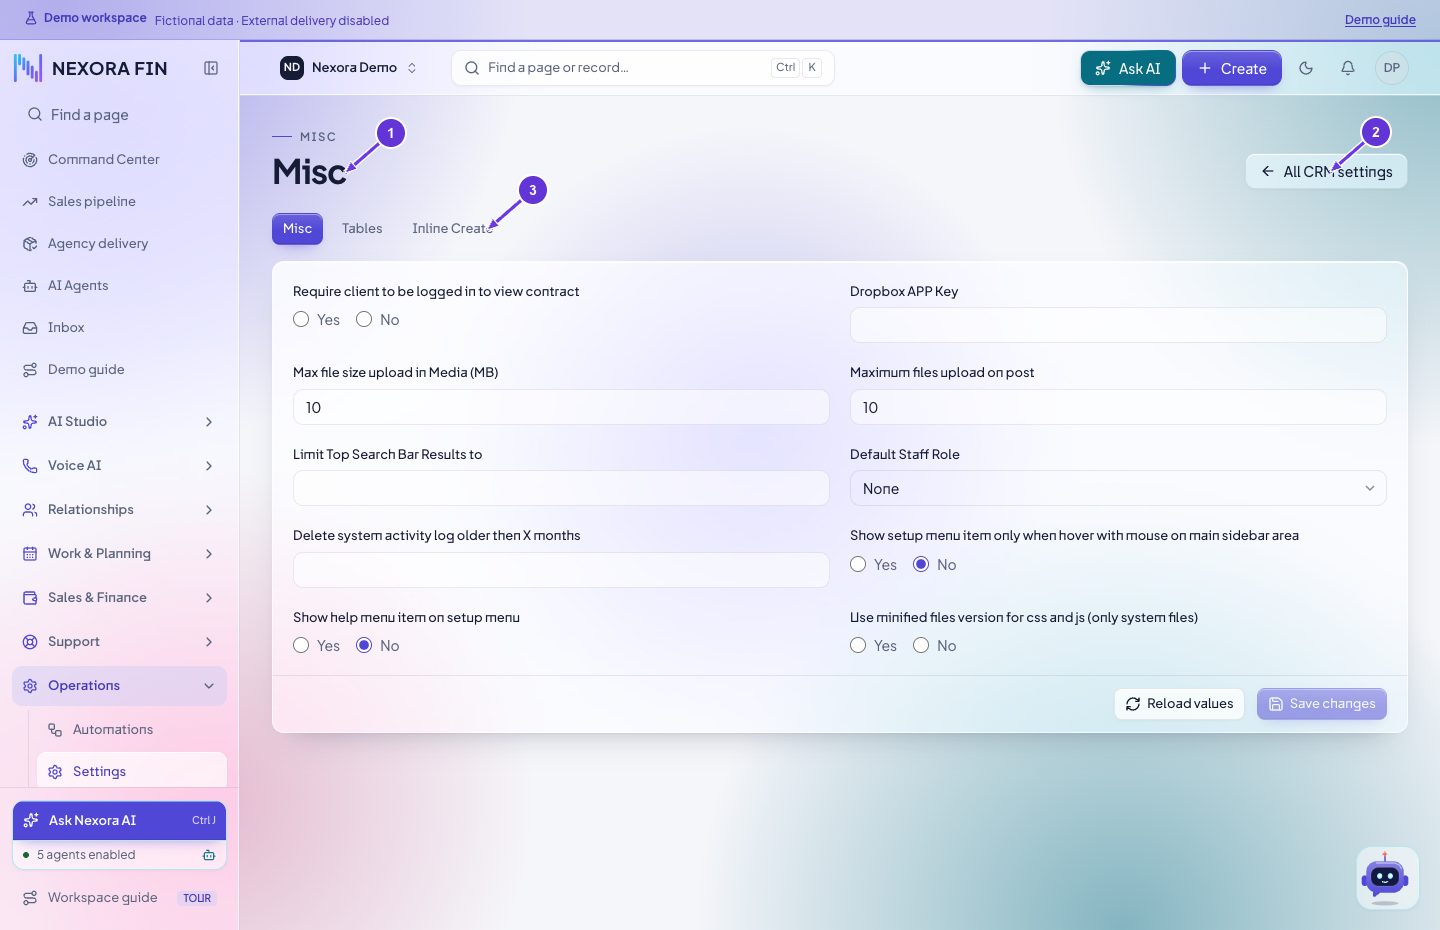
- Misc
- All CRM settings
- Inline Create
Table settings tab
Open Miscellaneous → Table settings and review table display options. Save and reopen the affected list.
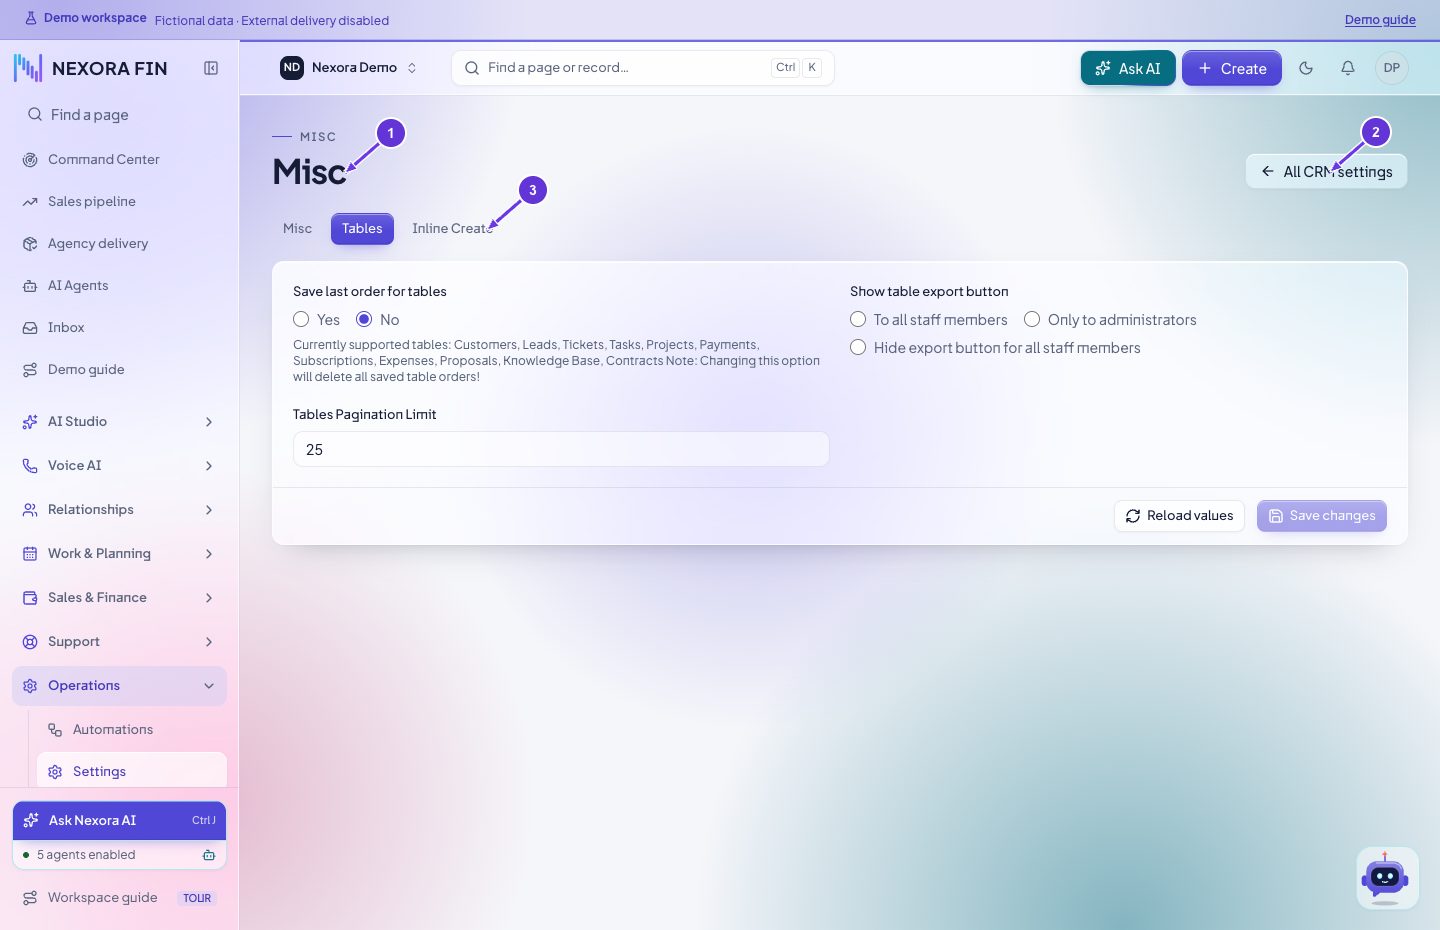
- Misc
- All CRM settings
- Inline Create
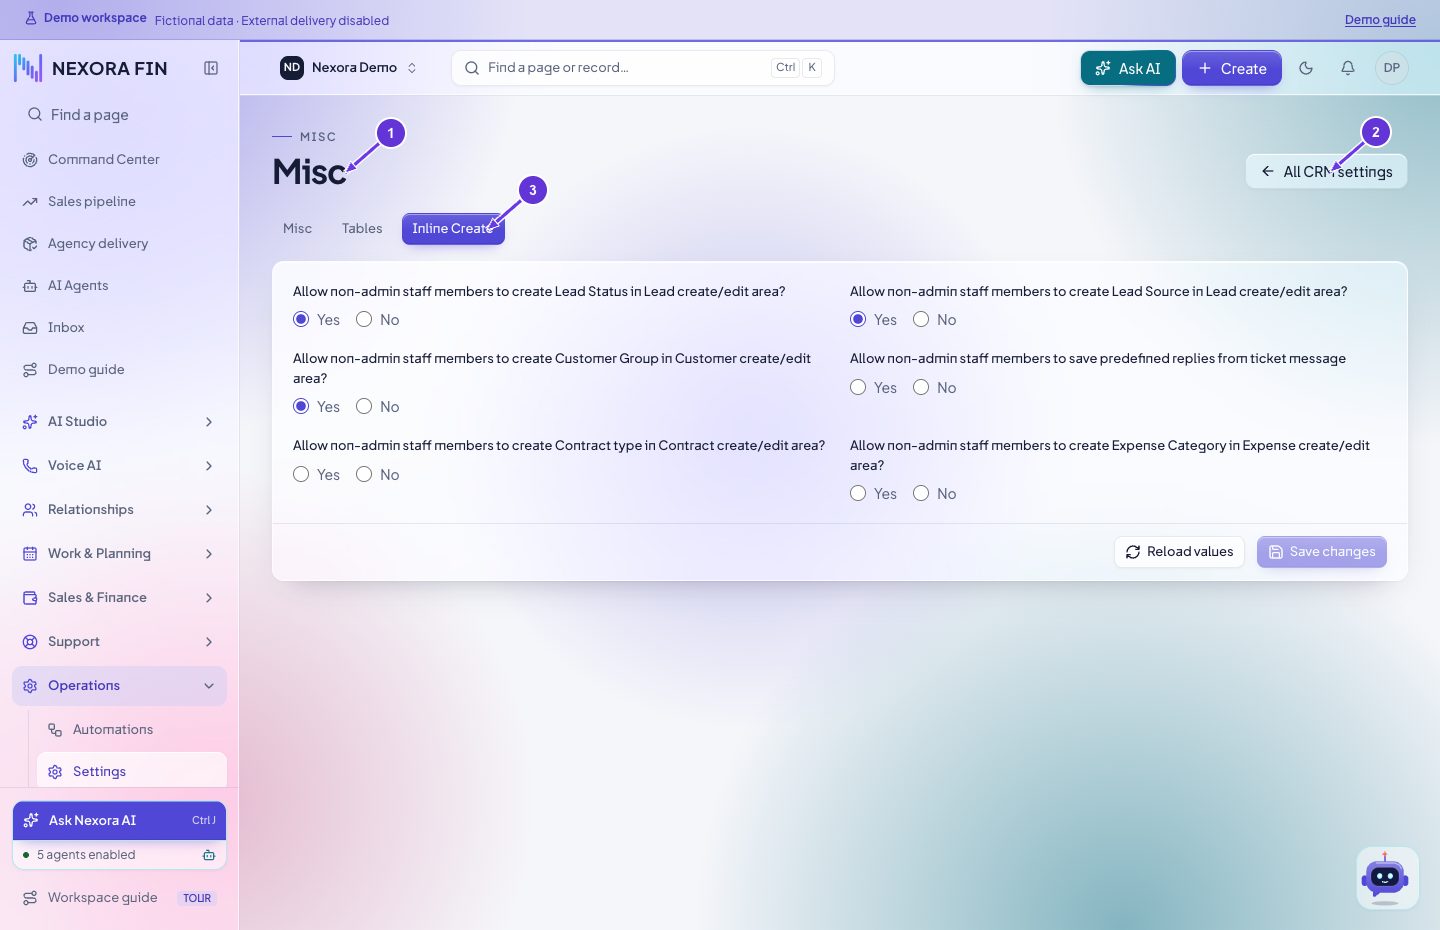
Inline creation tab
Open Miscellaneous → Inline creation. Review which inline controls are enabled, save, and verify on a relevant form.
- Misc
- All CRM settings
- Inline Create
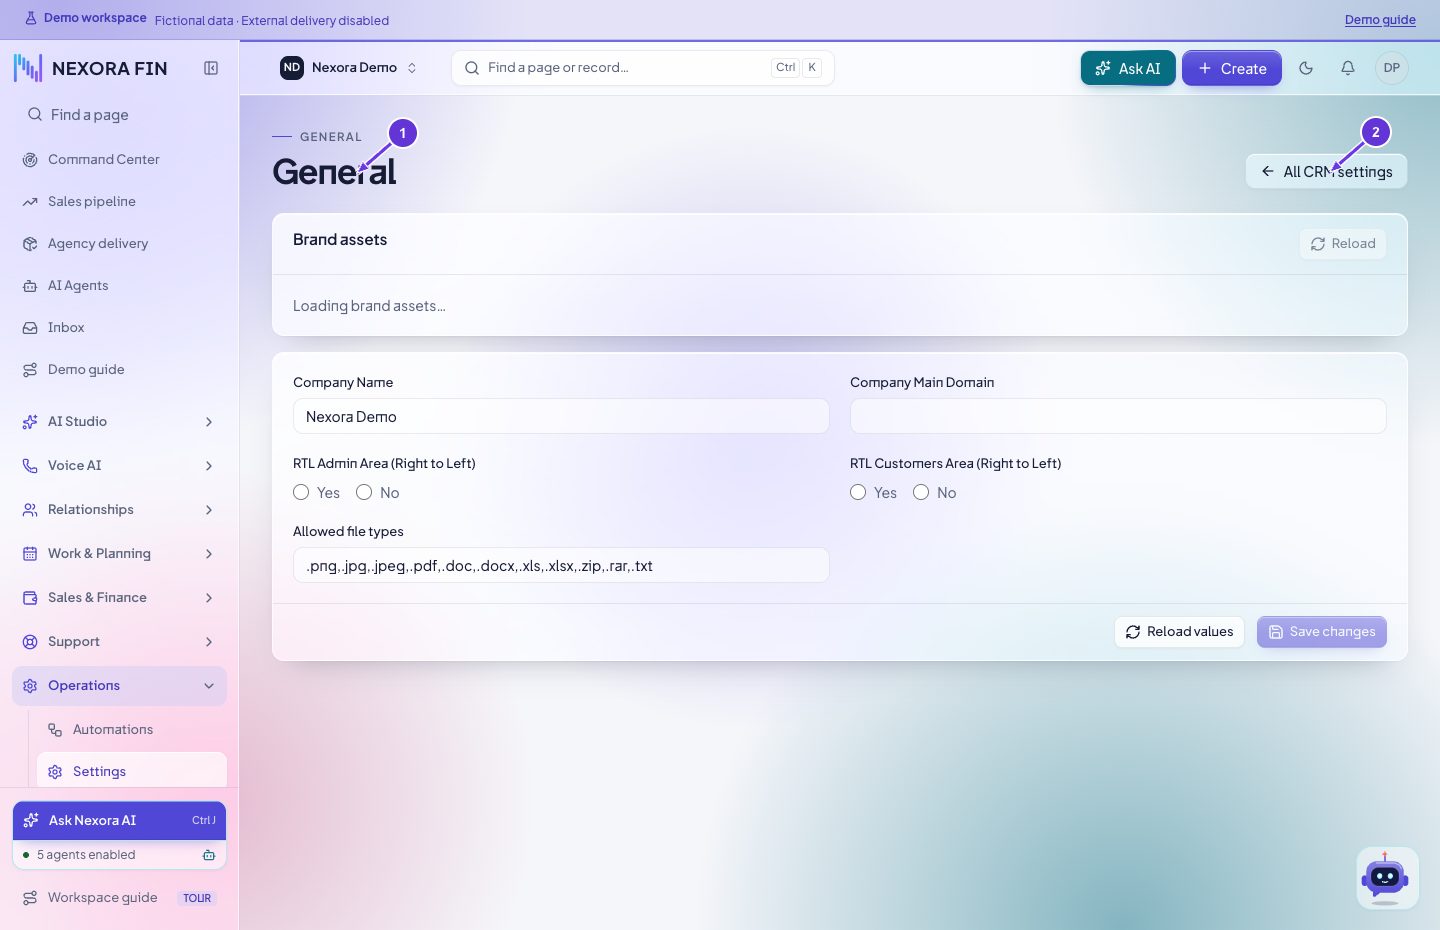
General CRM settings
Review general preferences and system defaults. Save only the intended fields and reload the group.
- General
- All CRM settings
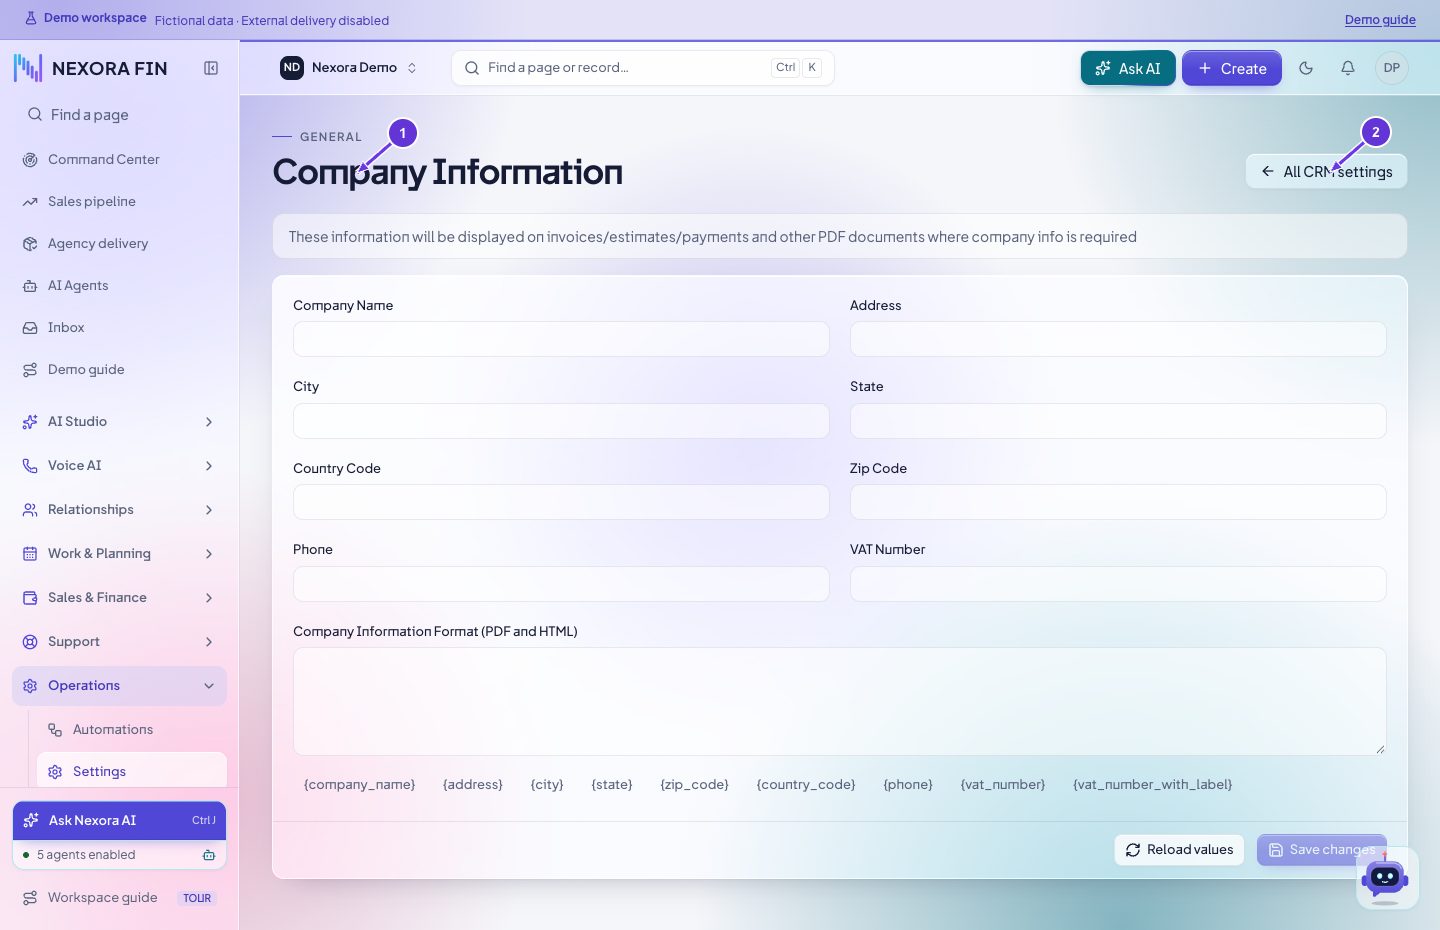
Company information
Review the legal name, address and contact details used on documents. Save and preview a document to confirm the company information.
- Company Information
- All CRM settings
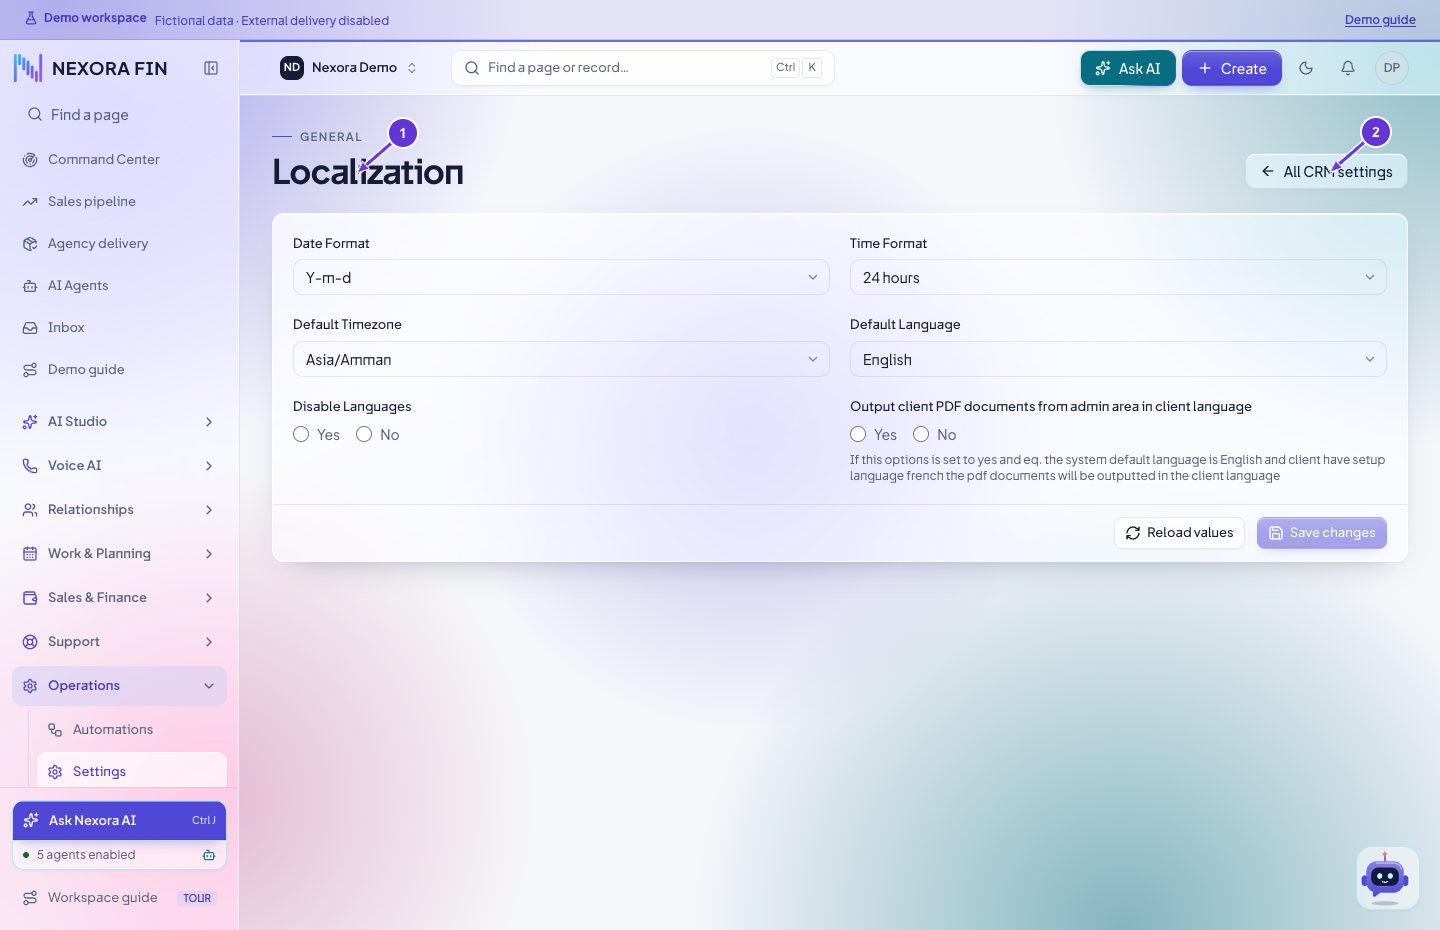
Localization
Choose the default language, timezone and date formats. Save and confirm the next calendar or document display.
- CRM settings
- All CRM settings
Sales defaults
Review sales currency, tax and document preferences. Save and preview a new sales document to verify the defaults.
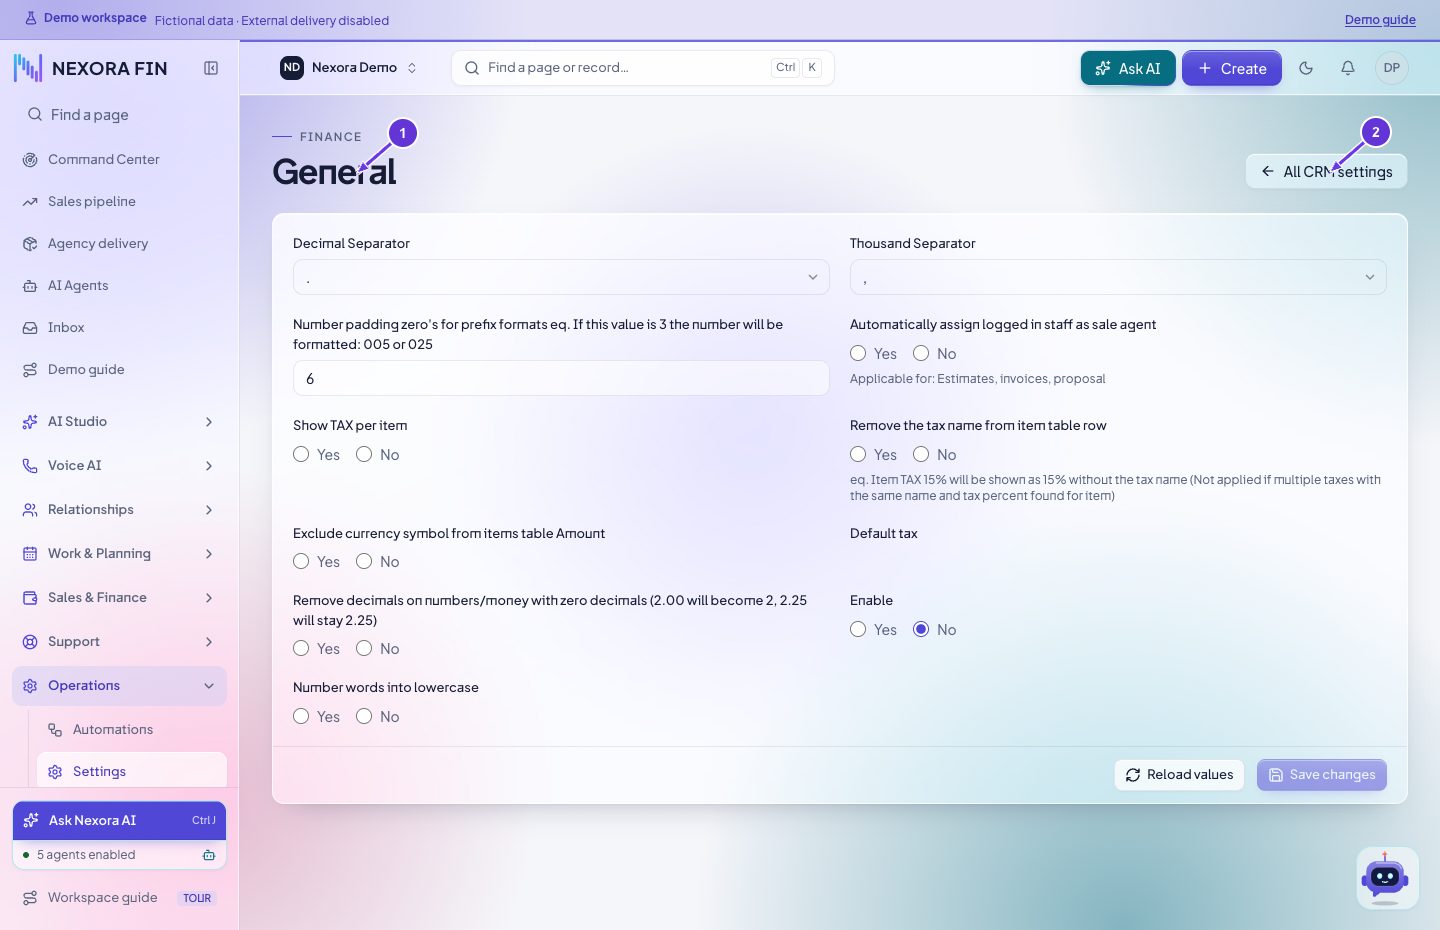
- General
- All CRM settings
Invoice defaults
Review invoice numbering, payment terms and display options. Save, then inspect a draft invoice.
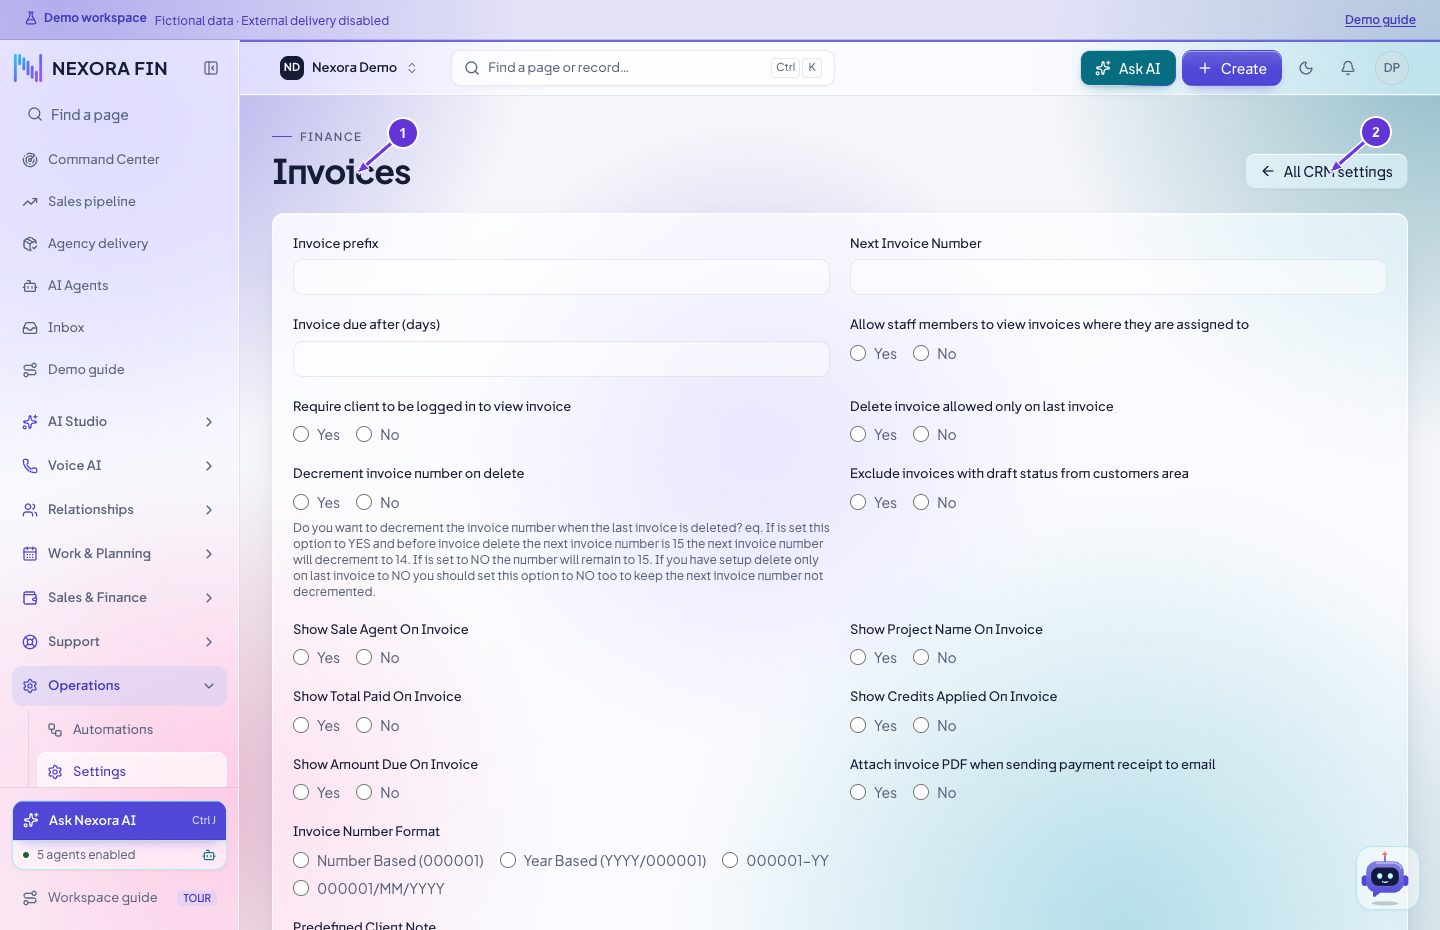
- Invoices
- All CRM settings
Proposal defaults
Review validity and proposal defaults, save, and verify in a new draft.
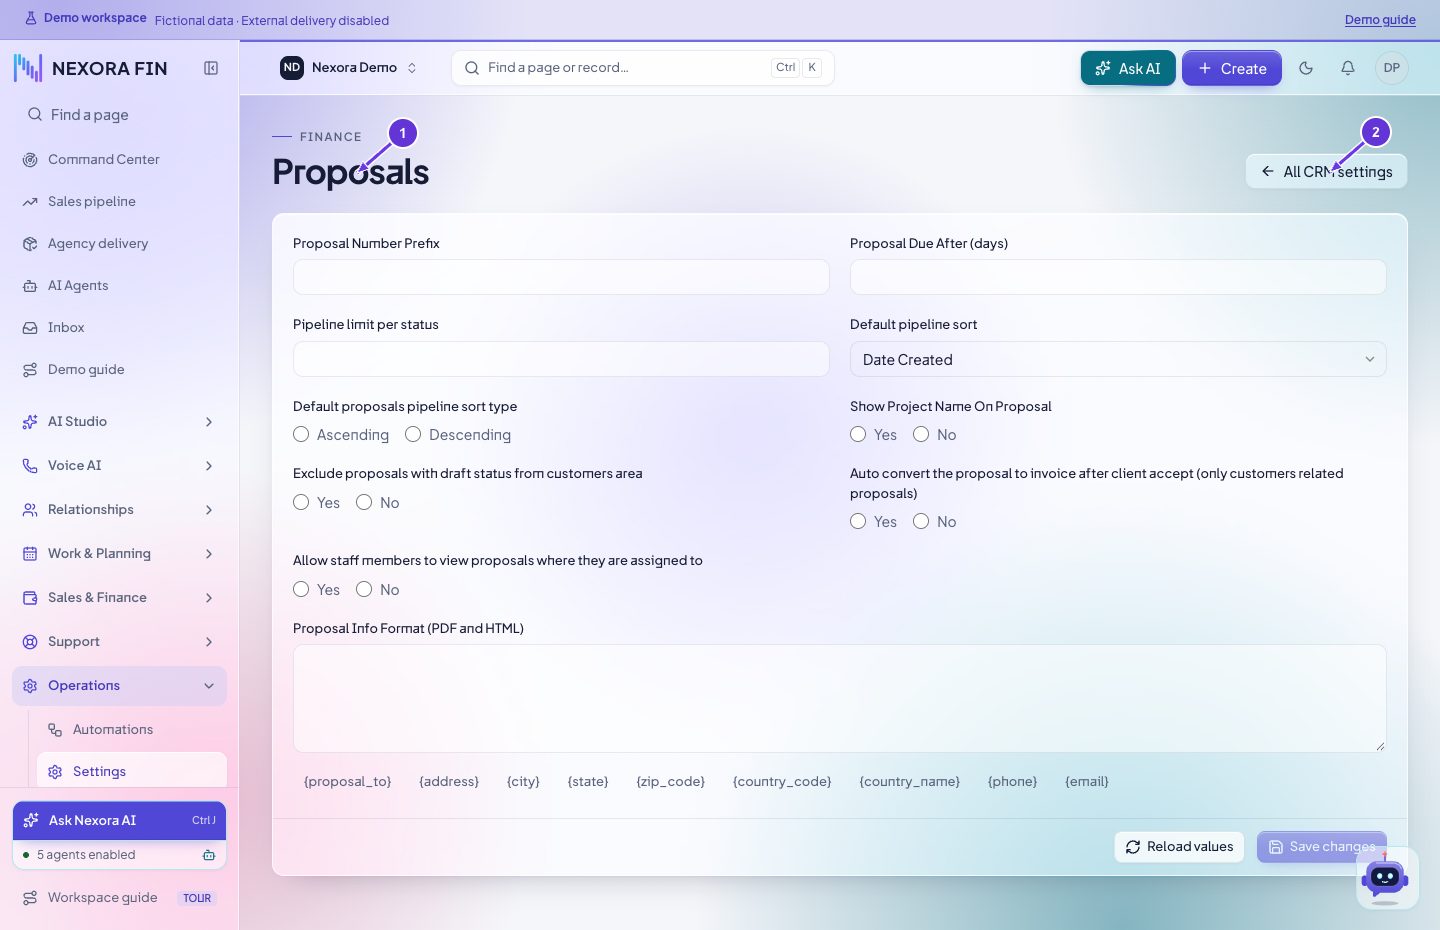
- Proposals
- All CRM settings
Estimate defaults
Review numbering, validity and other estimate defaults, save and verify a new estimate.
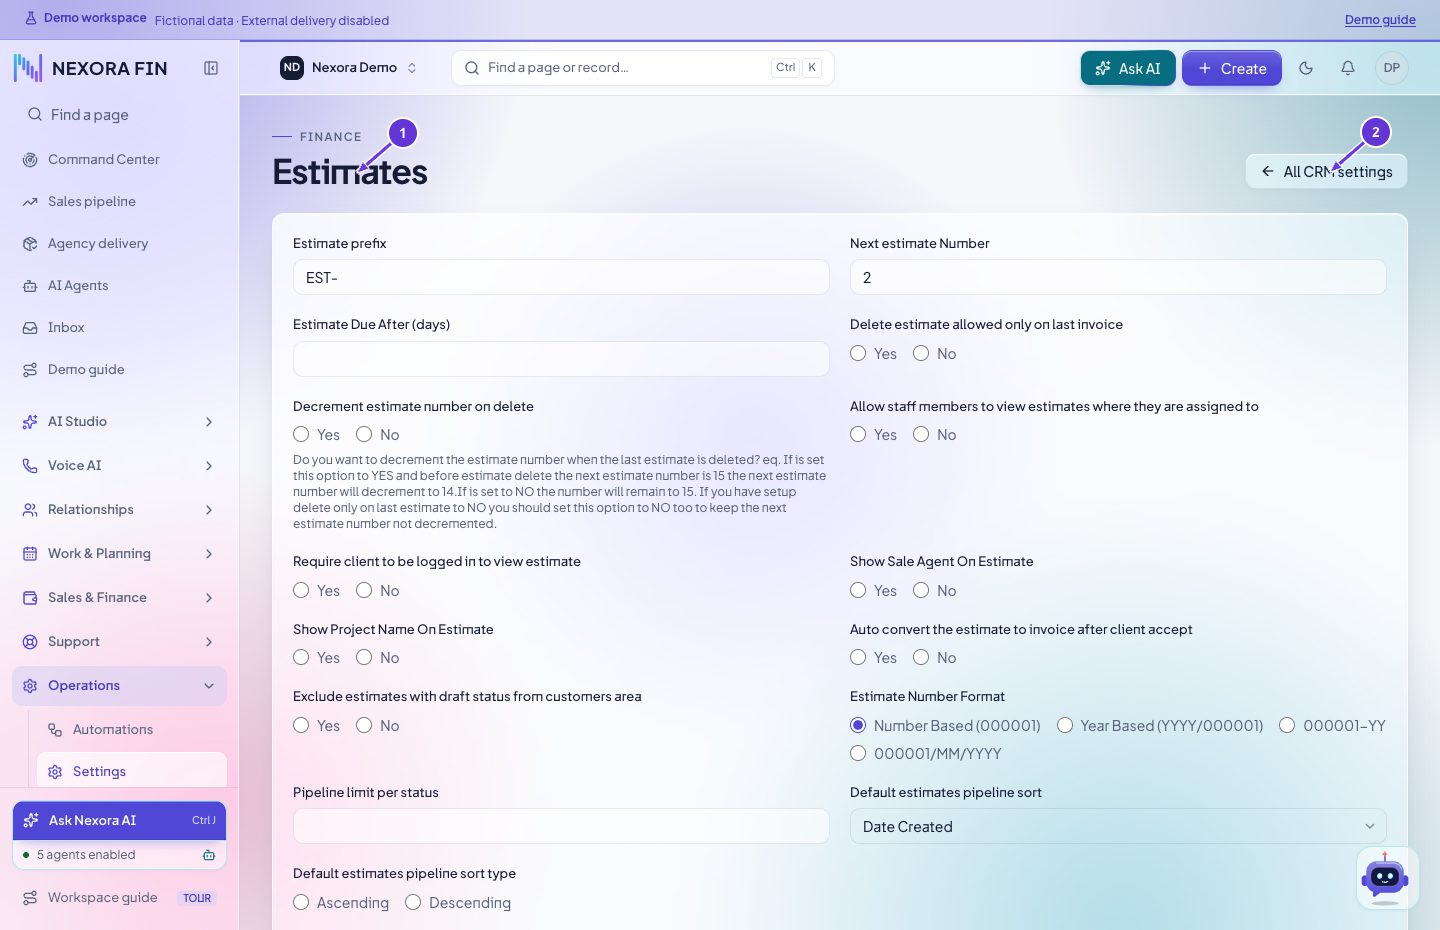
- Estimates
- All CRM settings
Credit note defaults
Review credit note numbering and document options. Save and inspect a draft before using the settings live.
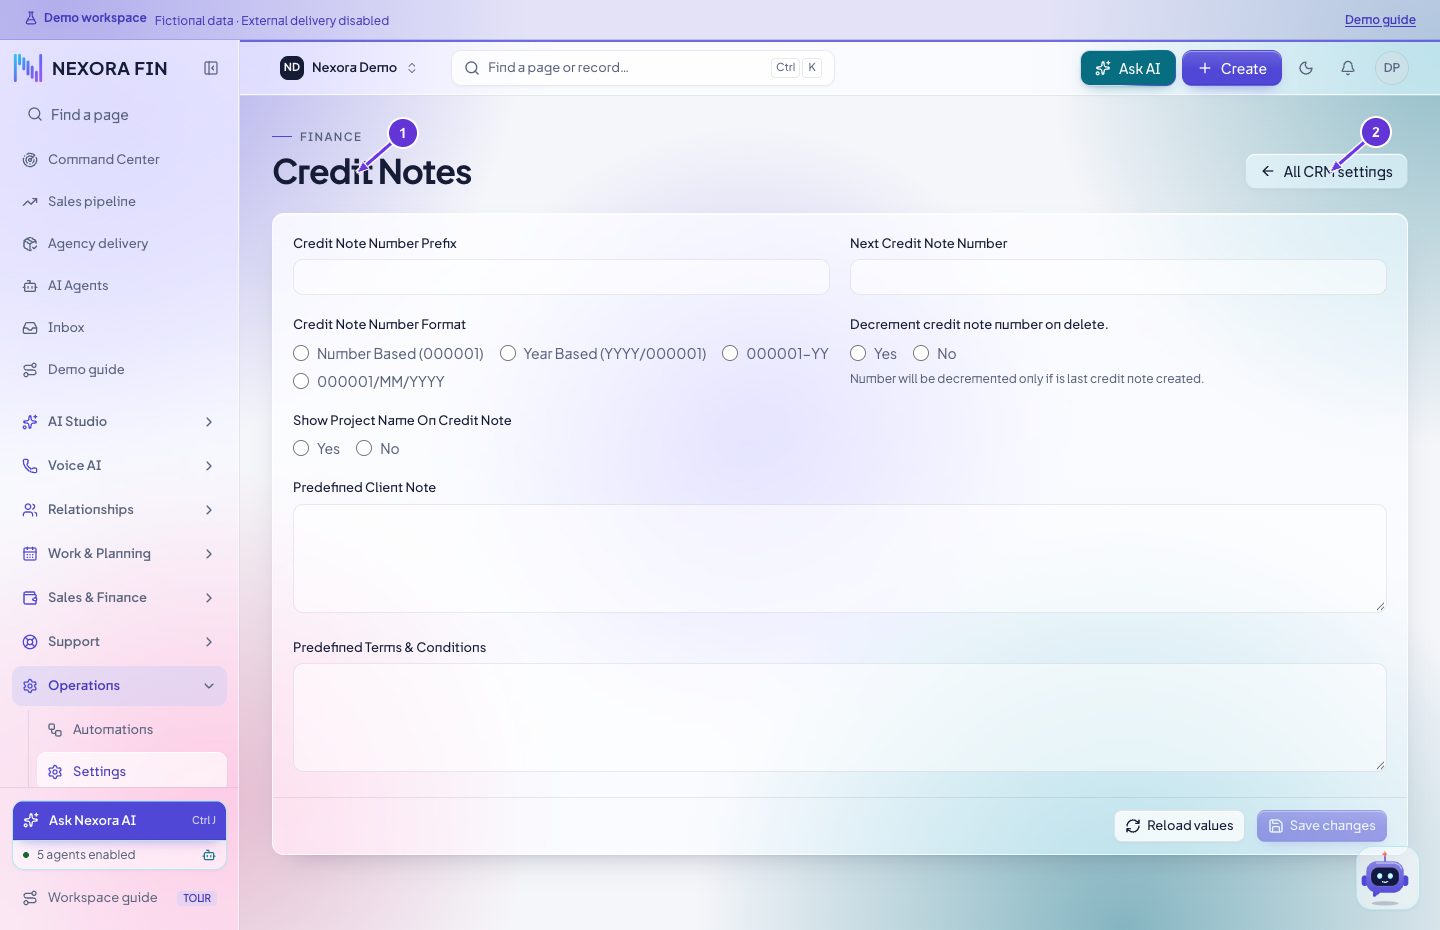
- Credit Notes
- All CRM settings
Subscription defaults
Review default subscription behavior and provider dependencies. Save and verify how the next draft appears.
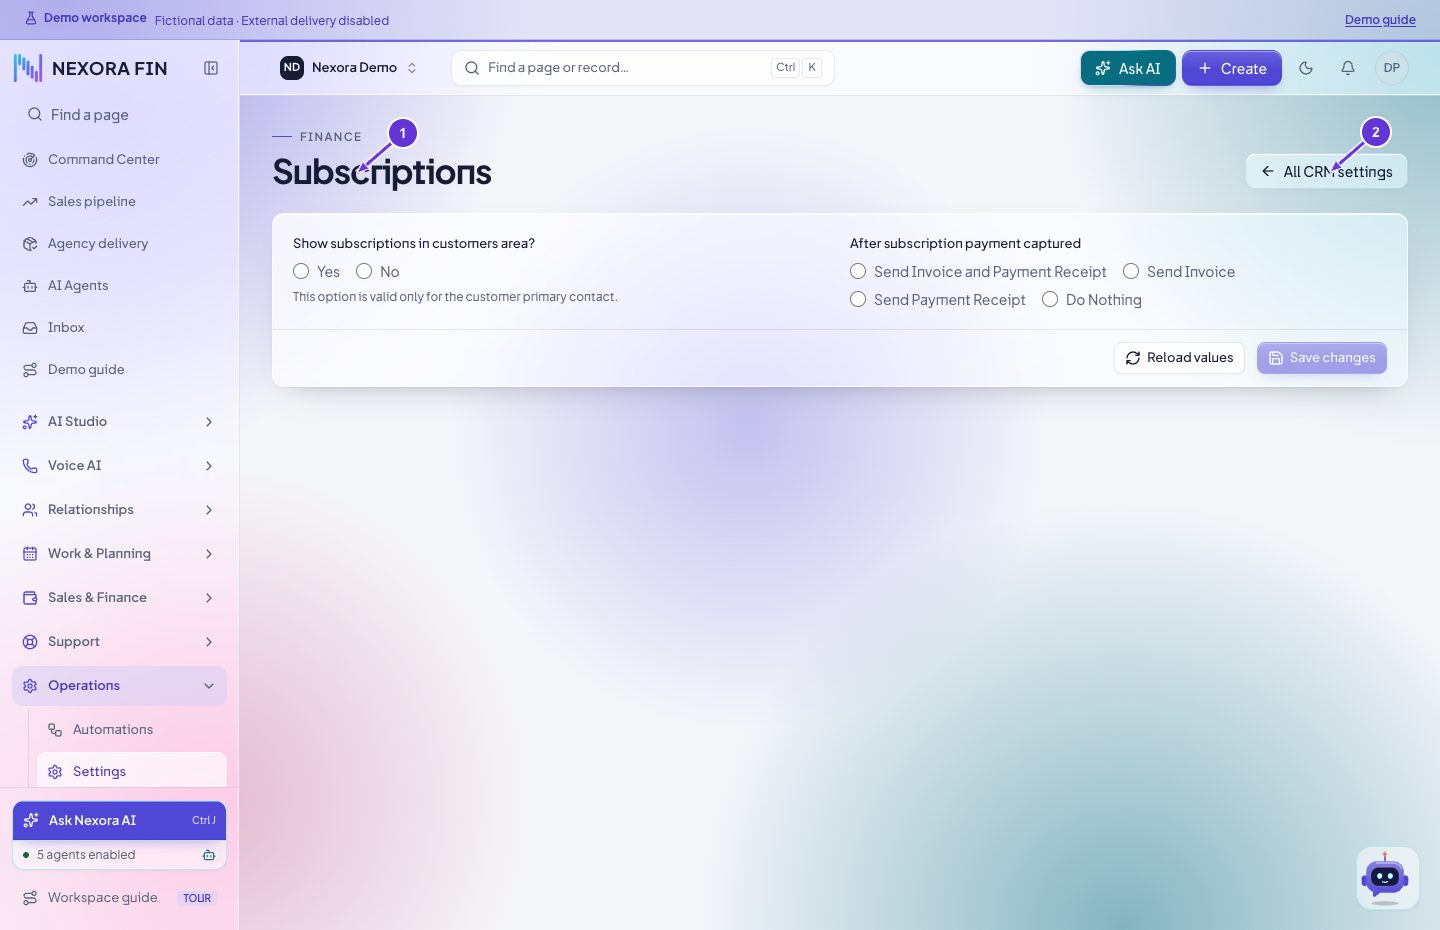
- Subscriptions
- All CRM settings
Payment gateways
Select the configured gateway, review mode and masked credentials, save and use the provider’s appropriate verification flow.
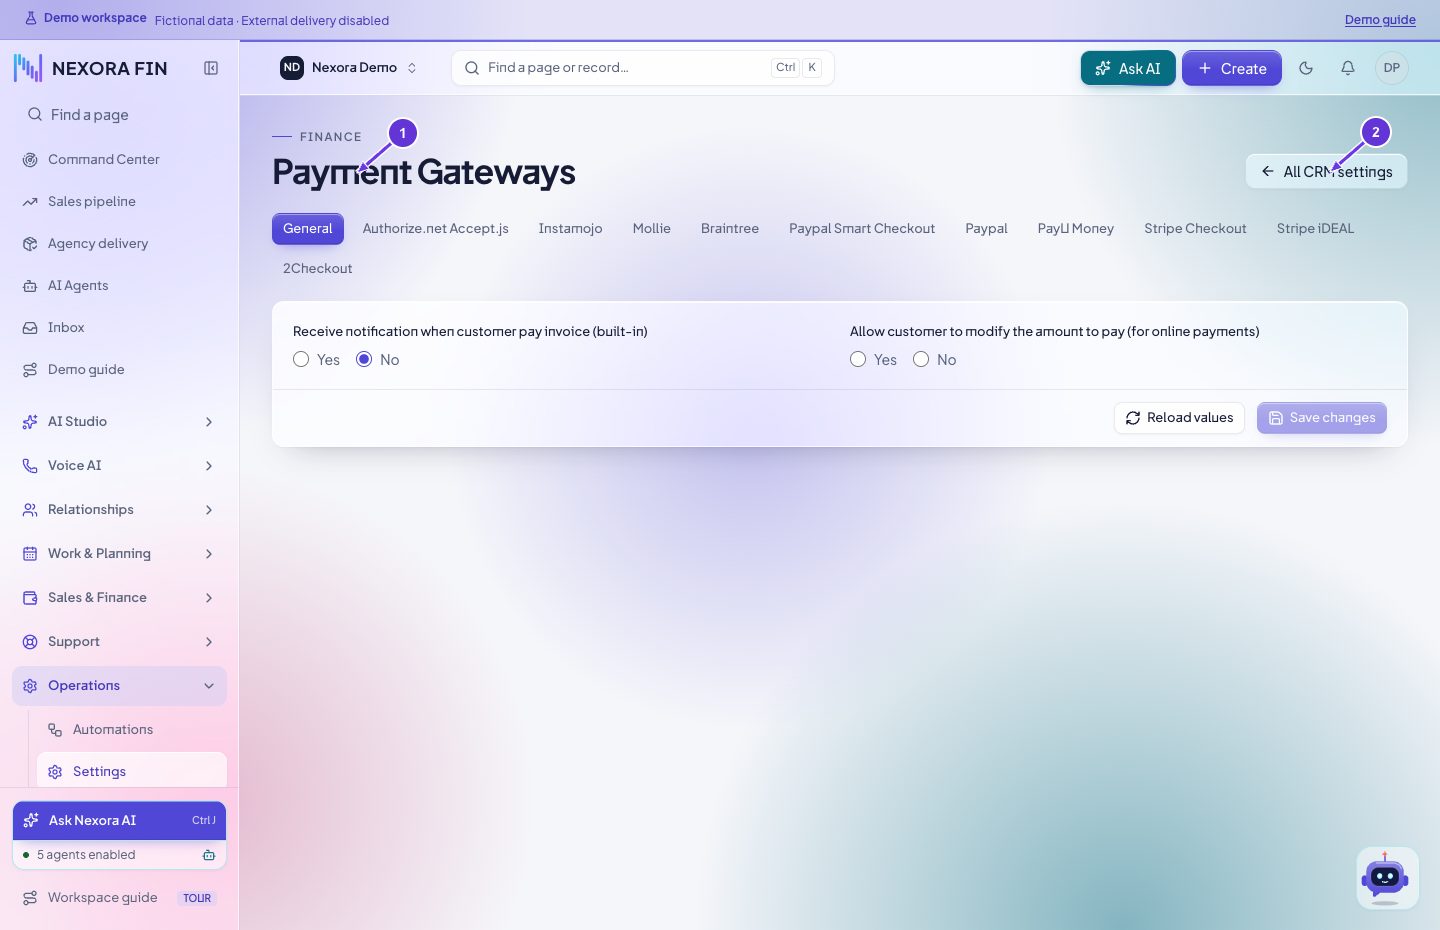
- Payment Gateways
- All CRM settings
Client portal settings
Review registration, client portal access and available features. Save and verify from an account with the intended client permissions.
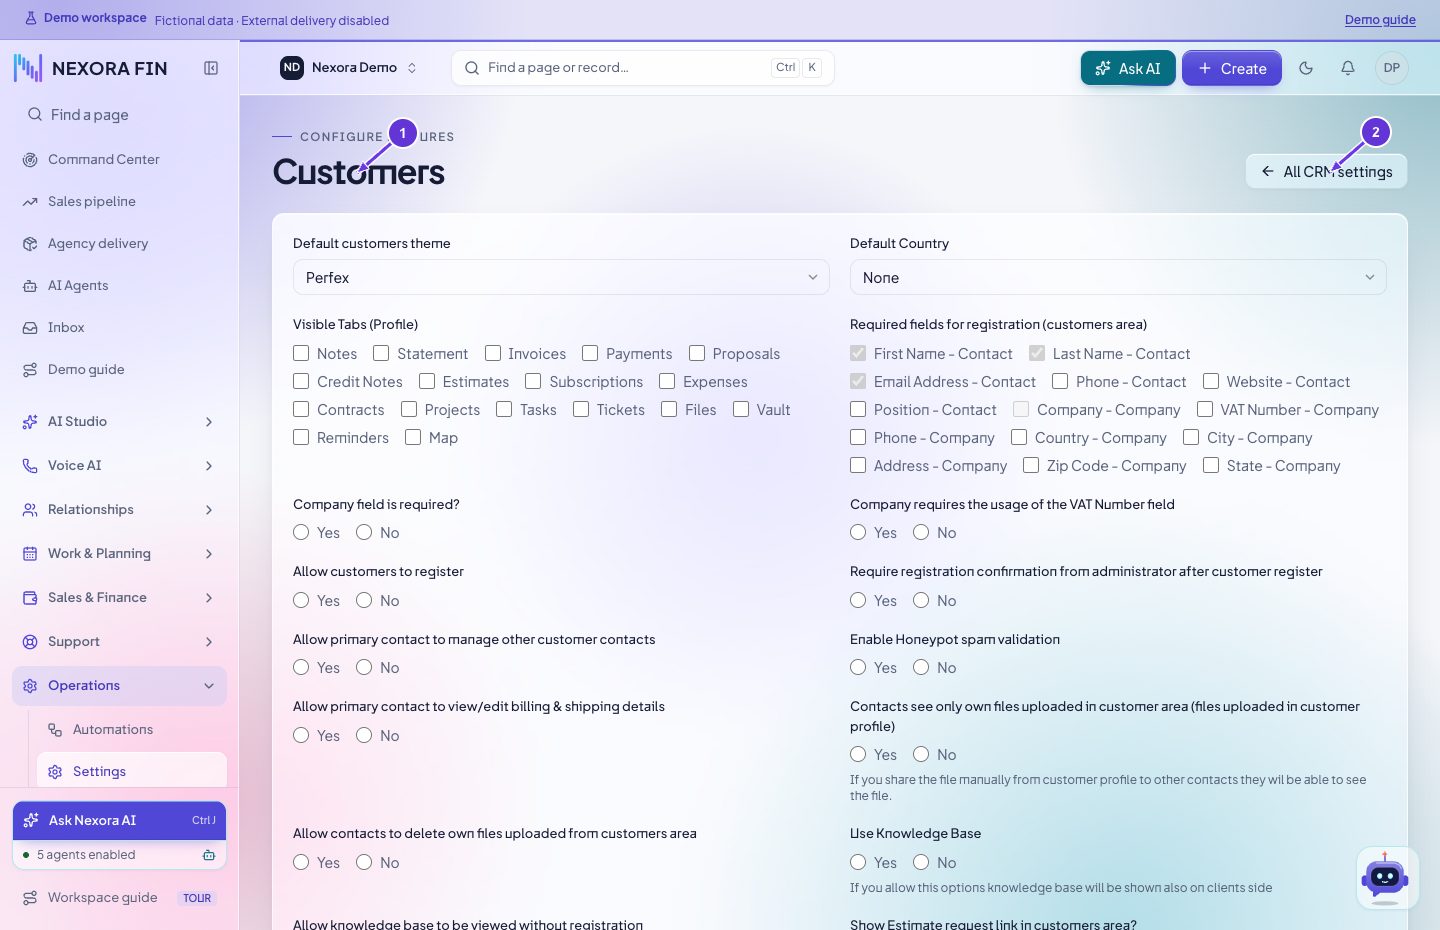
- Customers
- All CRM settings
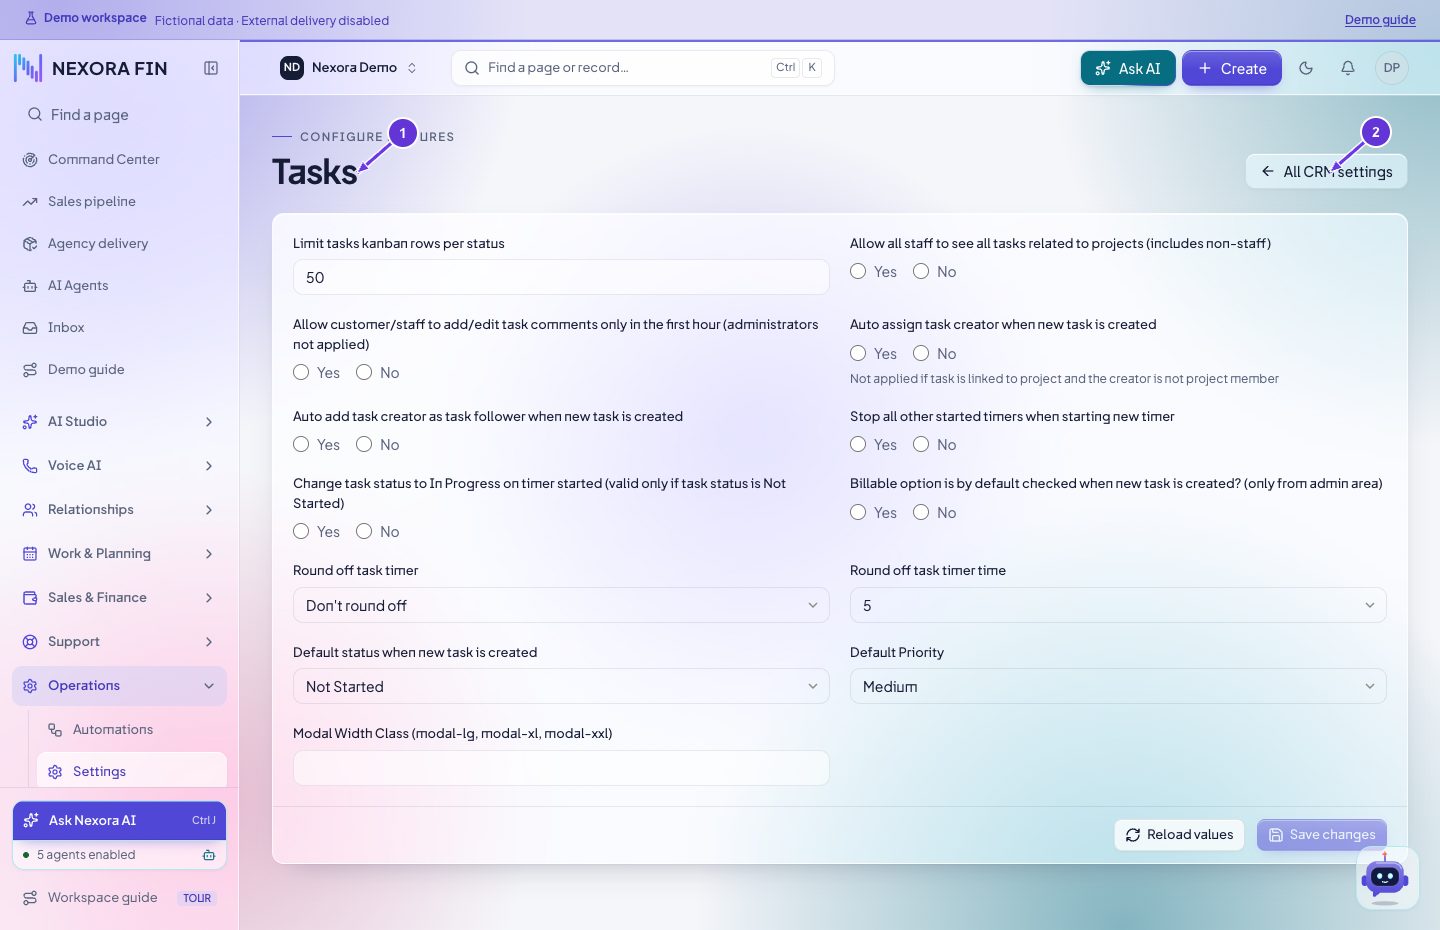
Task defaults
Review task visibility, reminders and default behavior. Save and verify with a task in the relevant role.
- Tasks
- All CRM settings
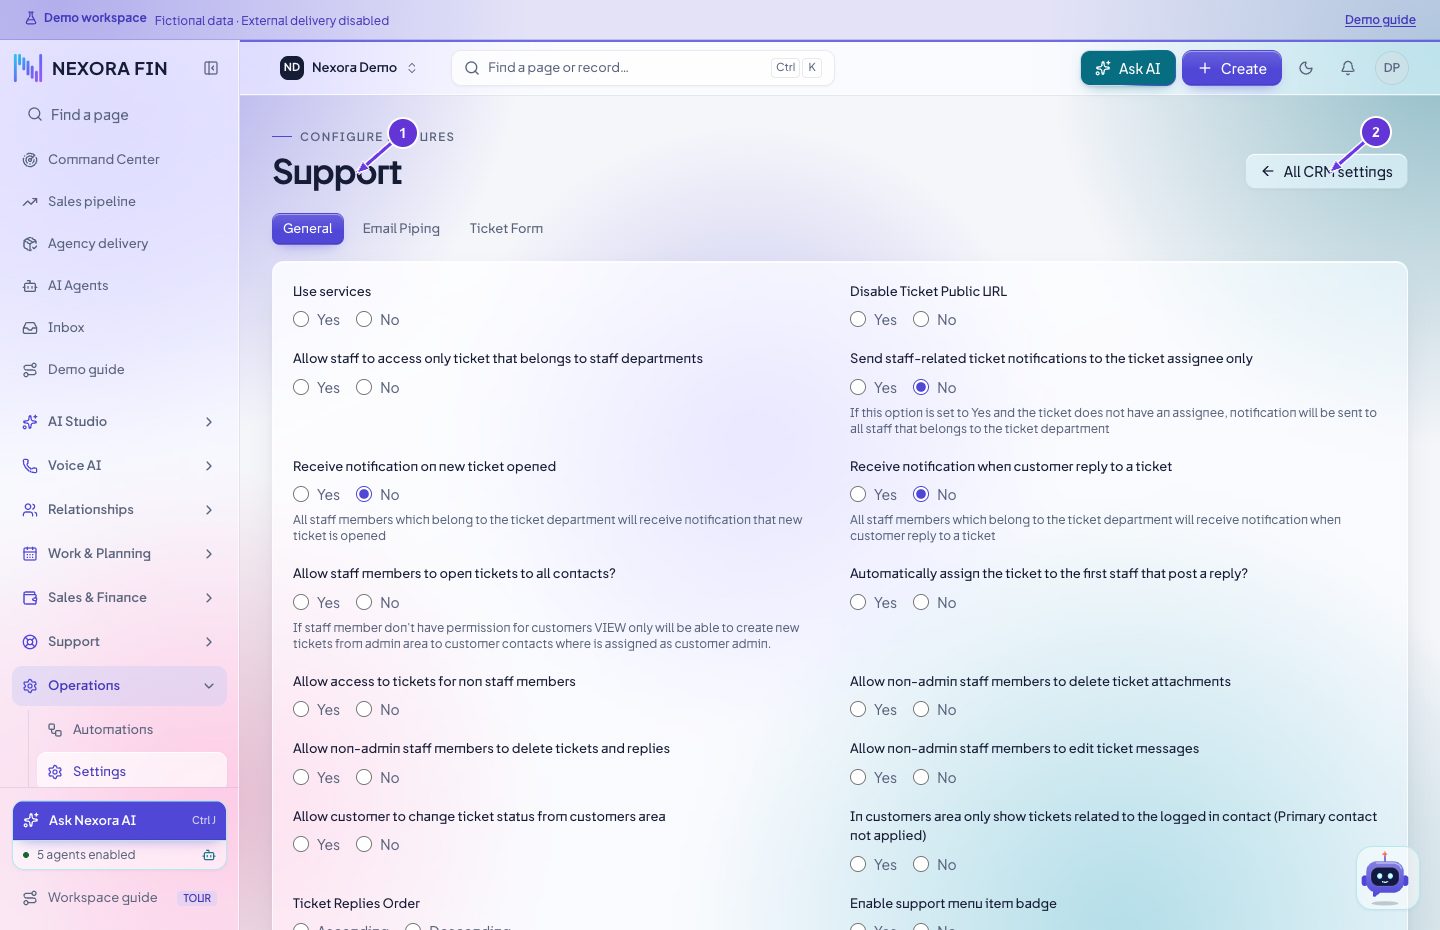
Ticket defaults
Review support behavior and ticket defaults. Save and verify a controlled ticket in the intended department.
- Support
- All CRM settings
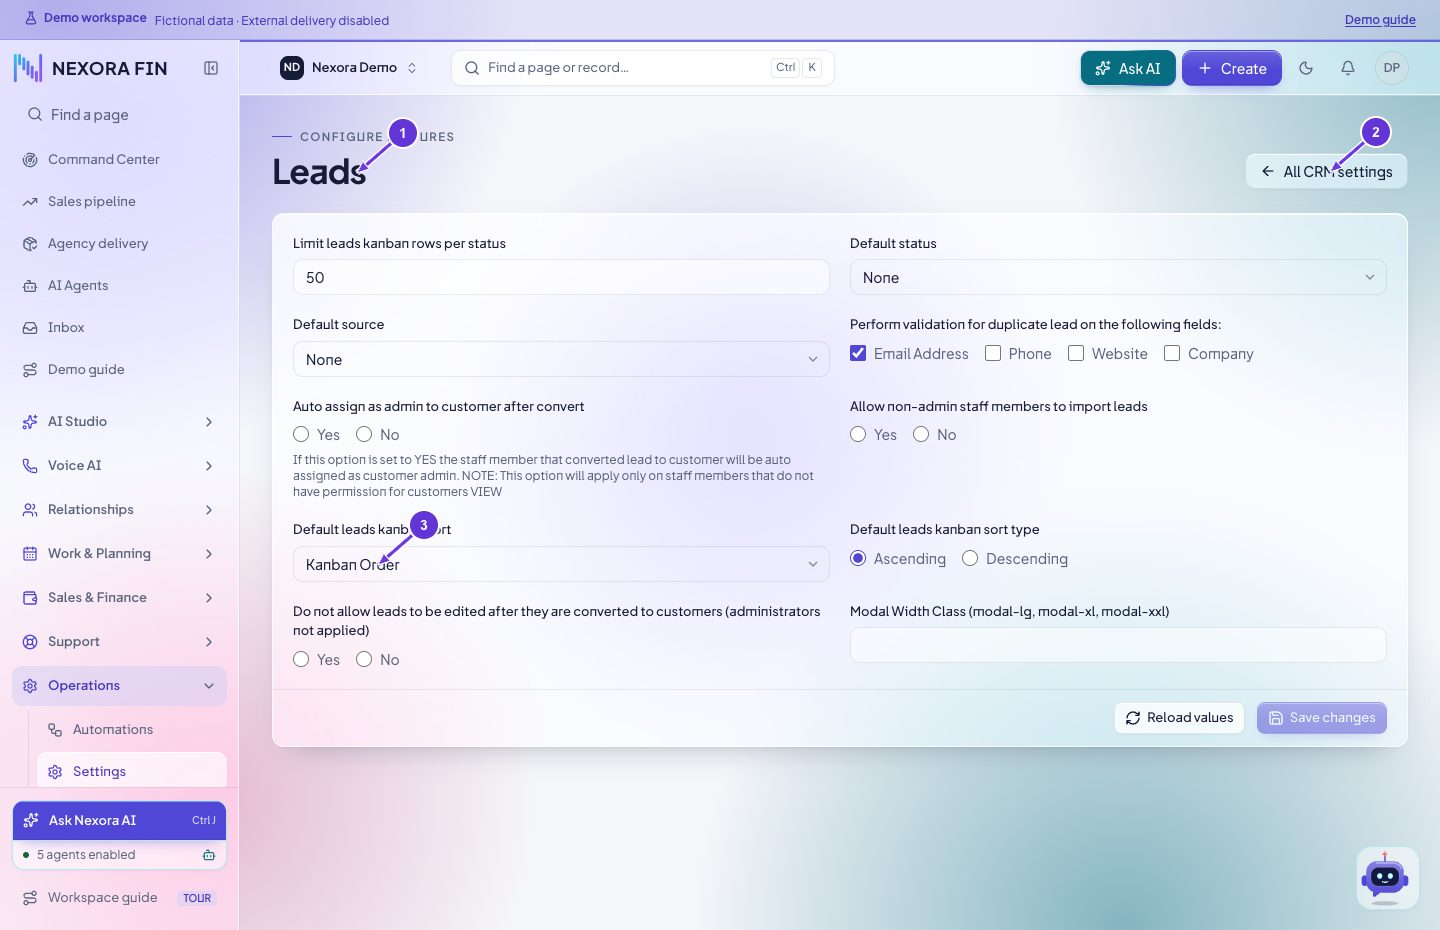
Lead defaults
Review lead assignment, status and related defaults. Save and verify with a controlled lead.
- Leads
- All CRM settings
- Date Created Kanban Order Last Contact
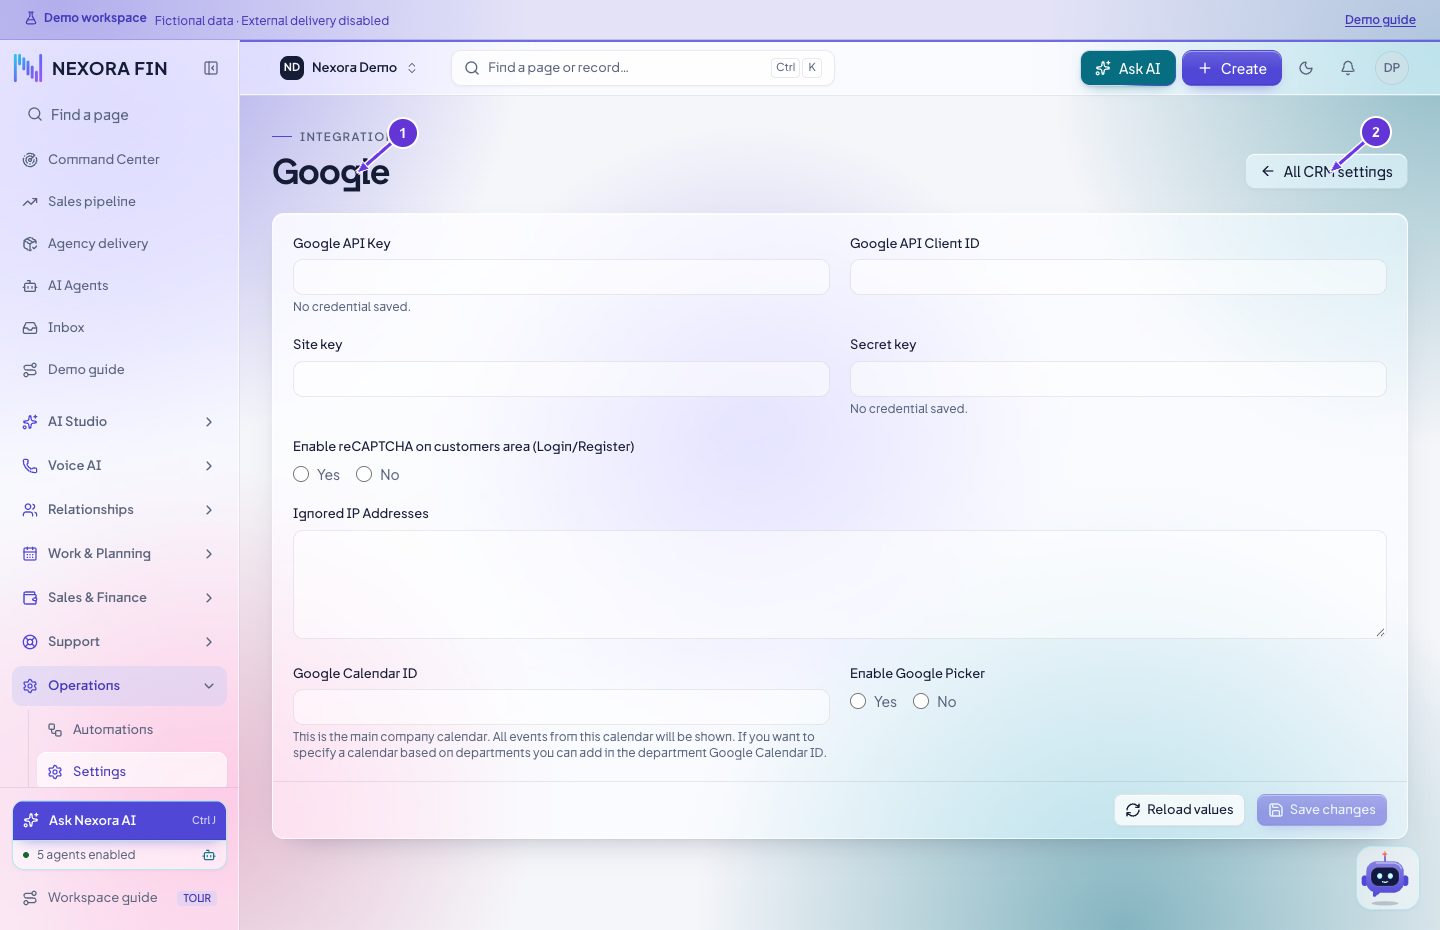
Google integration settings
Review the intended integration settings, save, then verify the connected feature using the appropriate account.
- All CRM settings
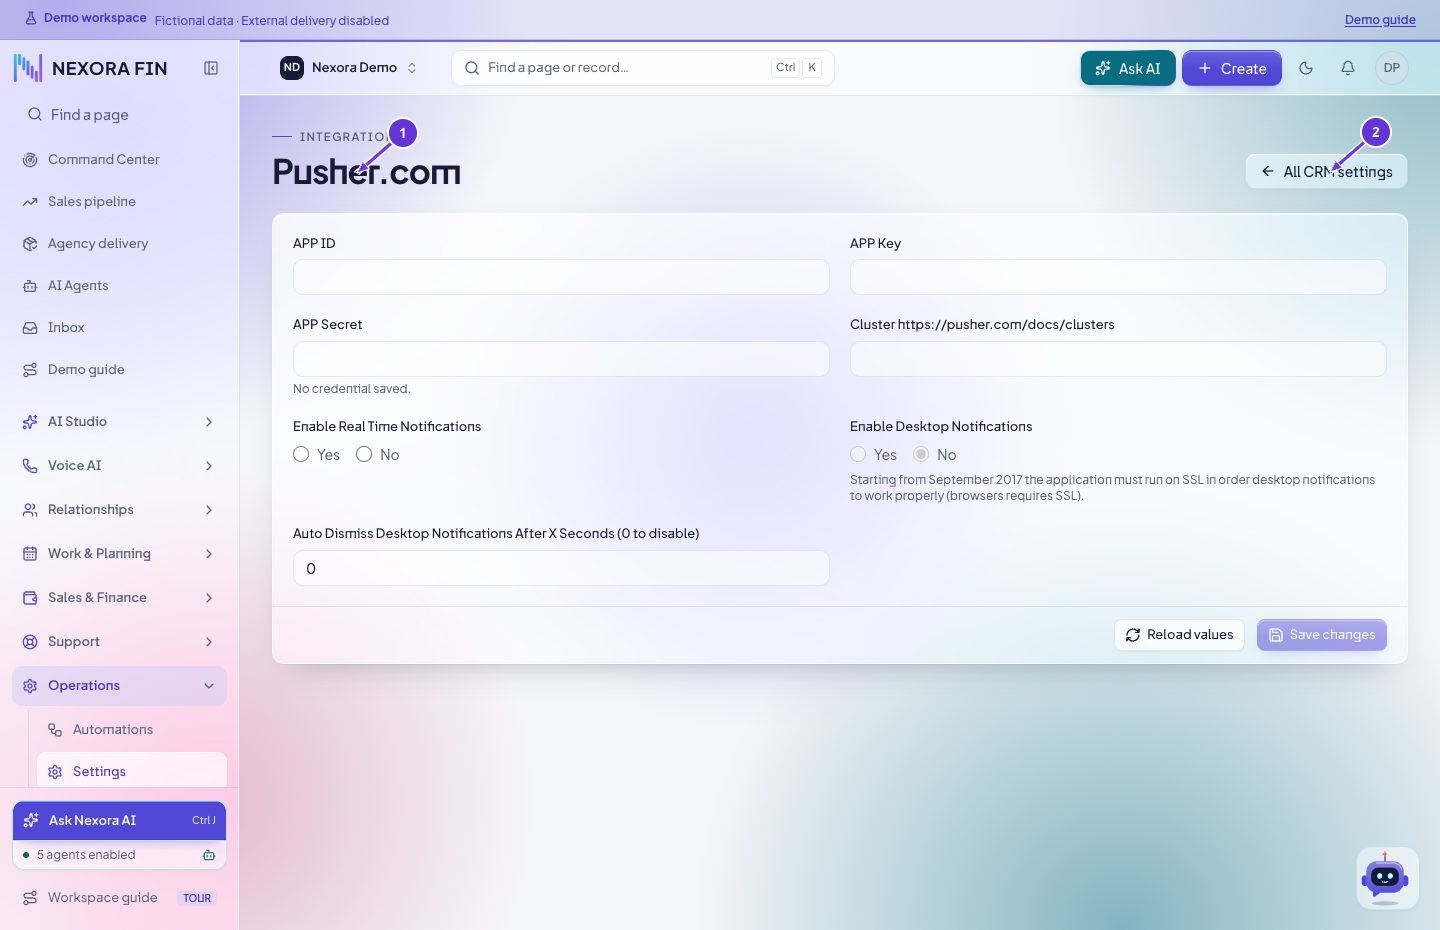
Pusher settings
Review the connection and notification options, save, then verify a permitted realtime notification.
- Pusher.com
- All CRM settings
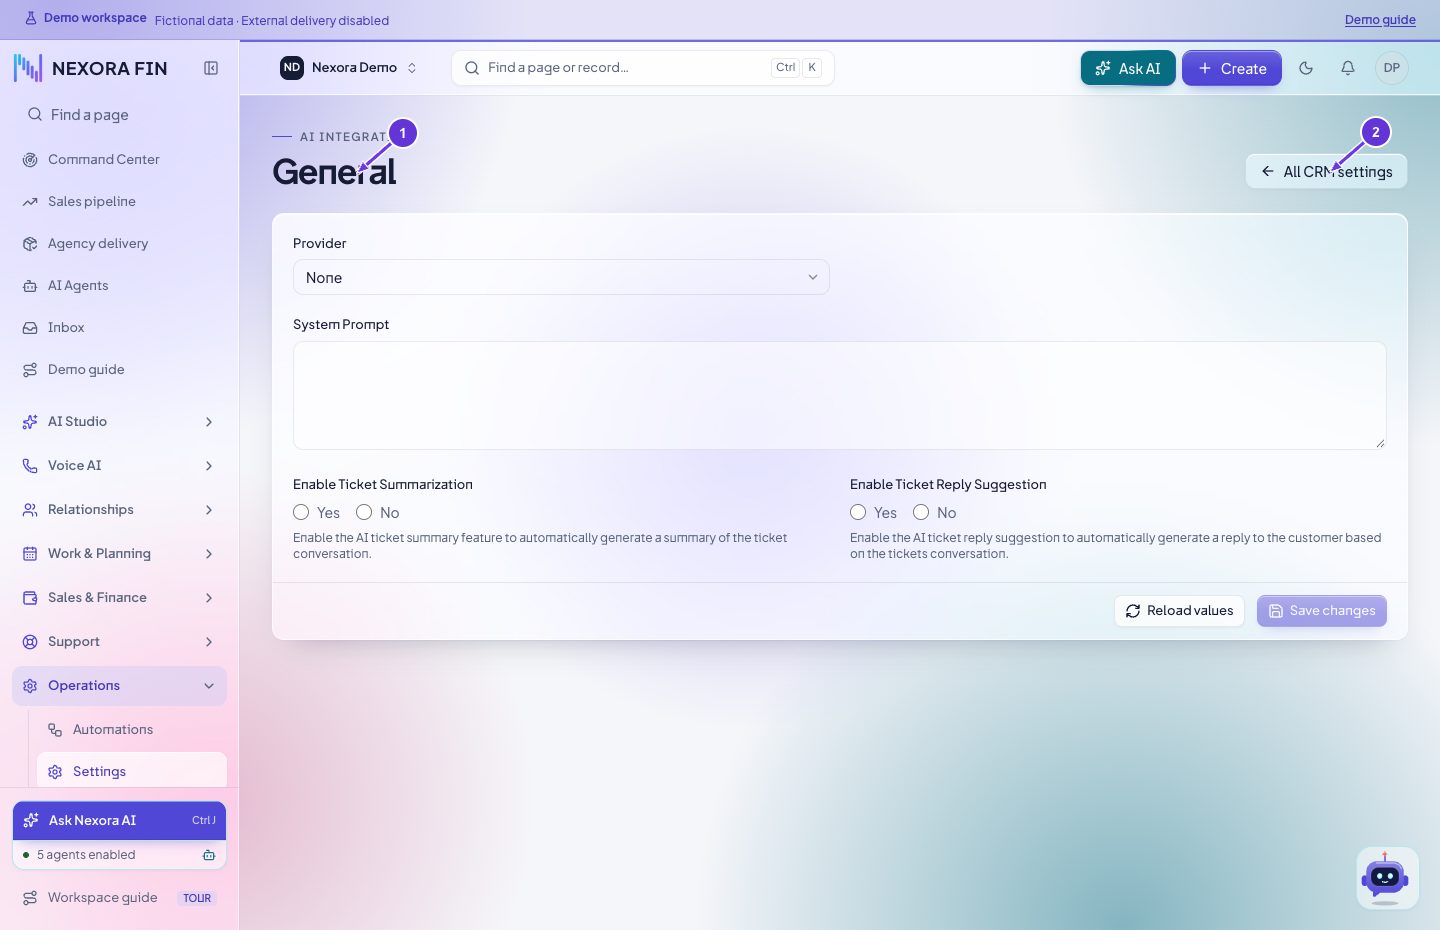
Core AI settings
Review the AI provider and allowed settings, save, and verify the current configuration using an actual assistant response.
- General
- All CRM settings
Calendar defaults and colors
Open General for calendar behavior or Colors for event colors. Save and verify the Calendar display.
- Calendar
- All CRM settings
PDF settings
Choose General, Signature or Formats as needed. Save and open a representative PDF to verify the result.
- All CRM settings
- Items table heading color color picker
Electronic signature
Review the signature and agreement options, save, and verify a controlled document preview before requesting signatures.
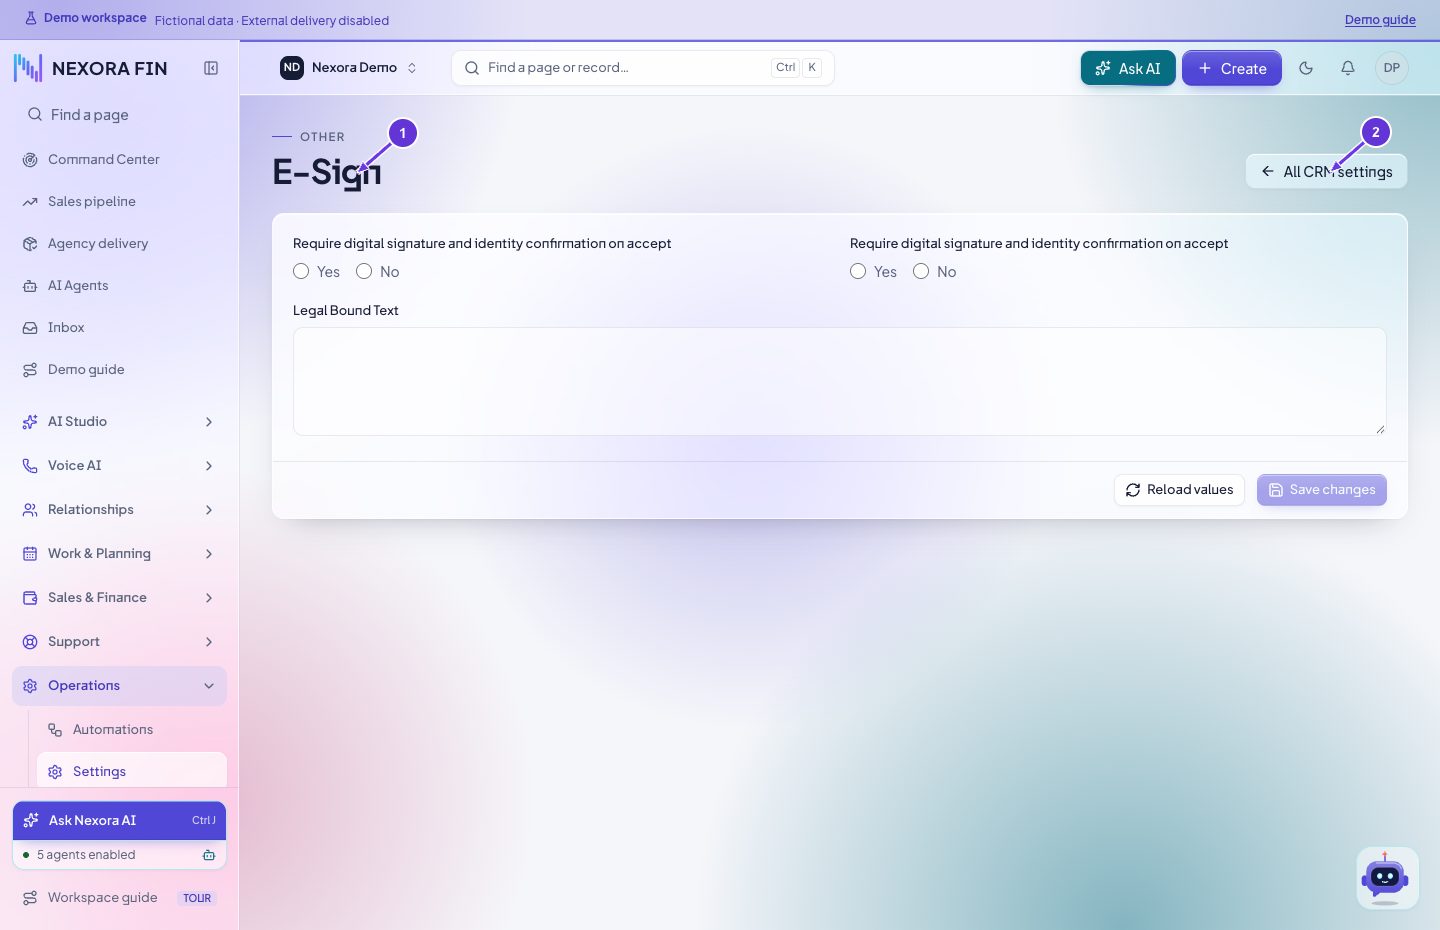
- E-Sign
- All CRM settings
Tag settings
Review available tags and how they are used in records. Save the intended change and verify tag selection on a record.
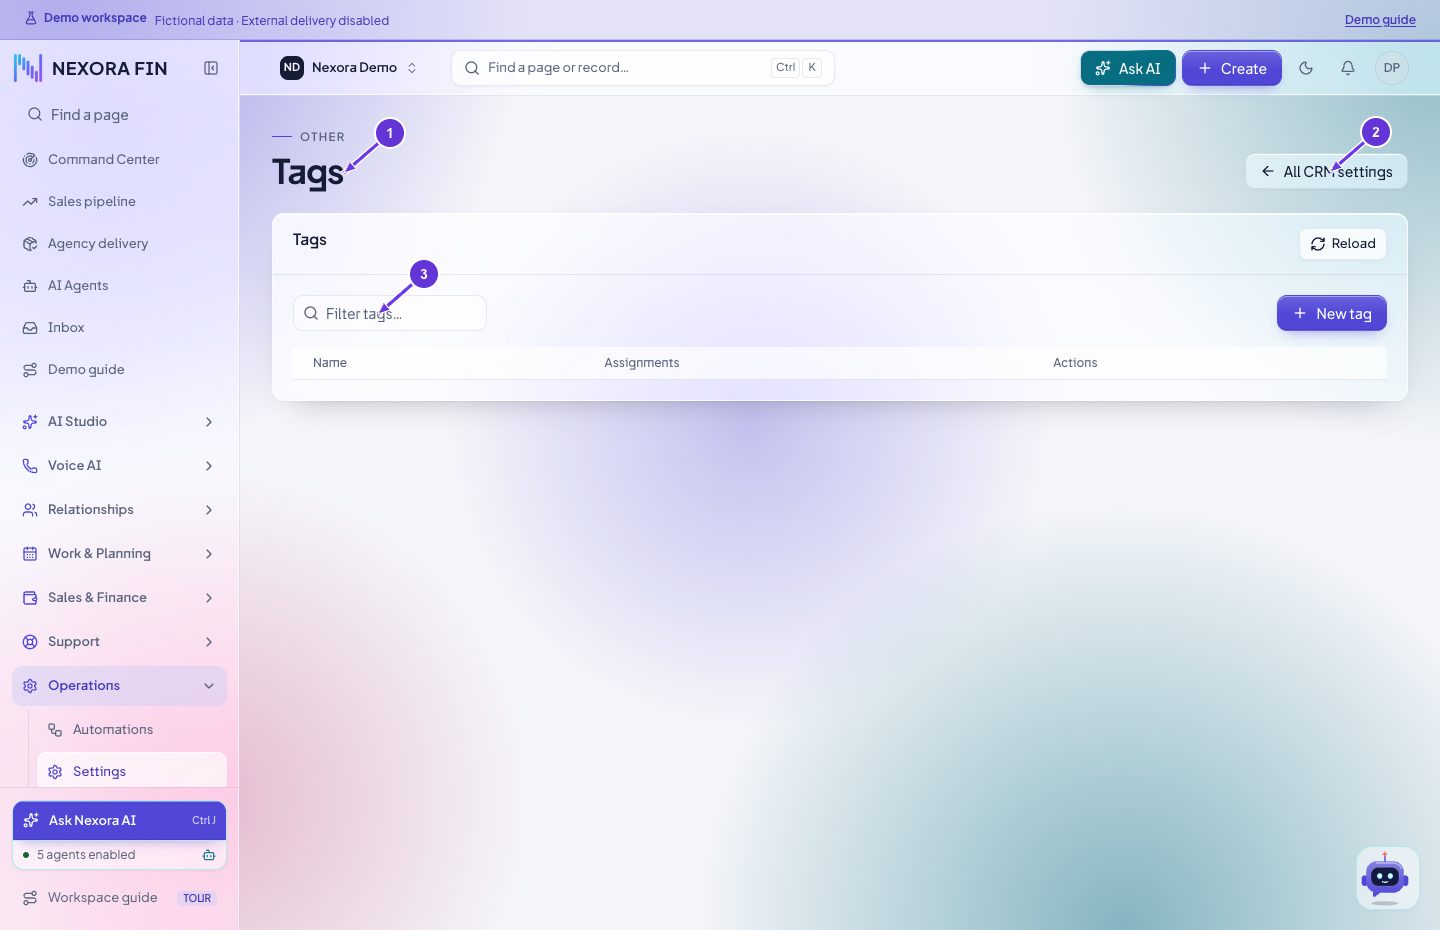
- Tags
- All CRM settings
- Filter tags
SMS settings
Review the enabled SMS provider and applicable triggers. Save and check the provider and destination before sending a controlled message.
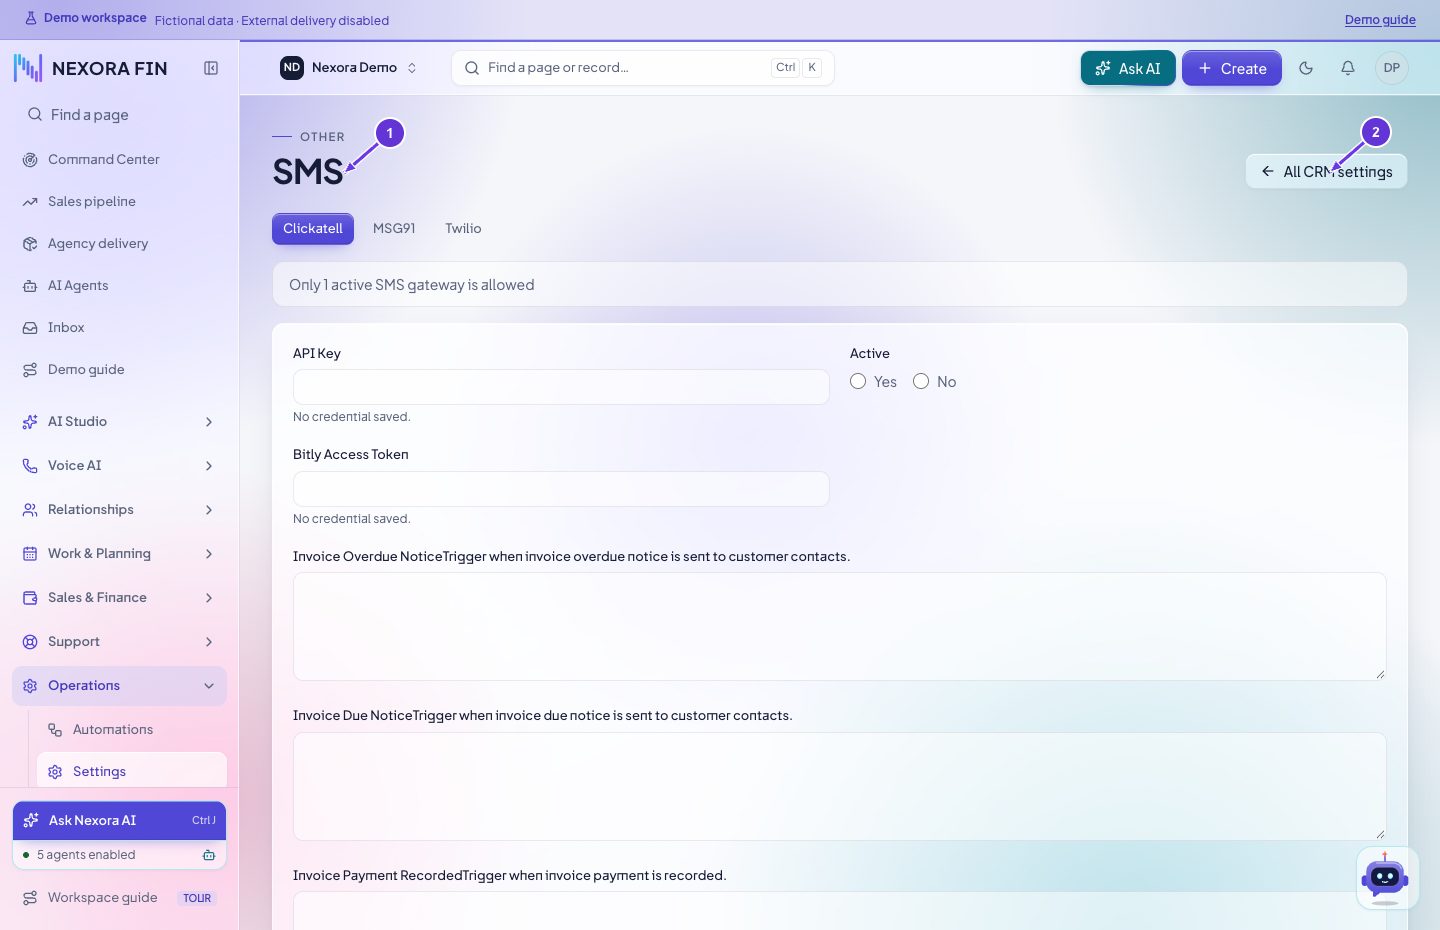
- SMS
- All CRM settings
Scheduled jobs
Review scheduled job options and the most recent execution. Verify the server scheduler and recorded results before assuming background jobs are running.
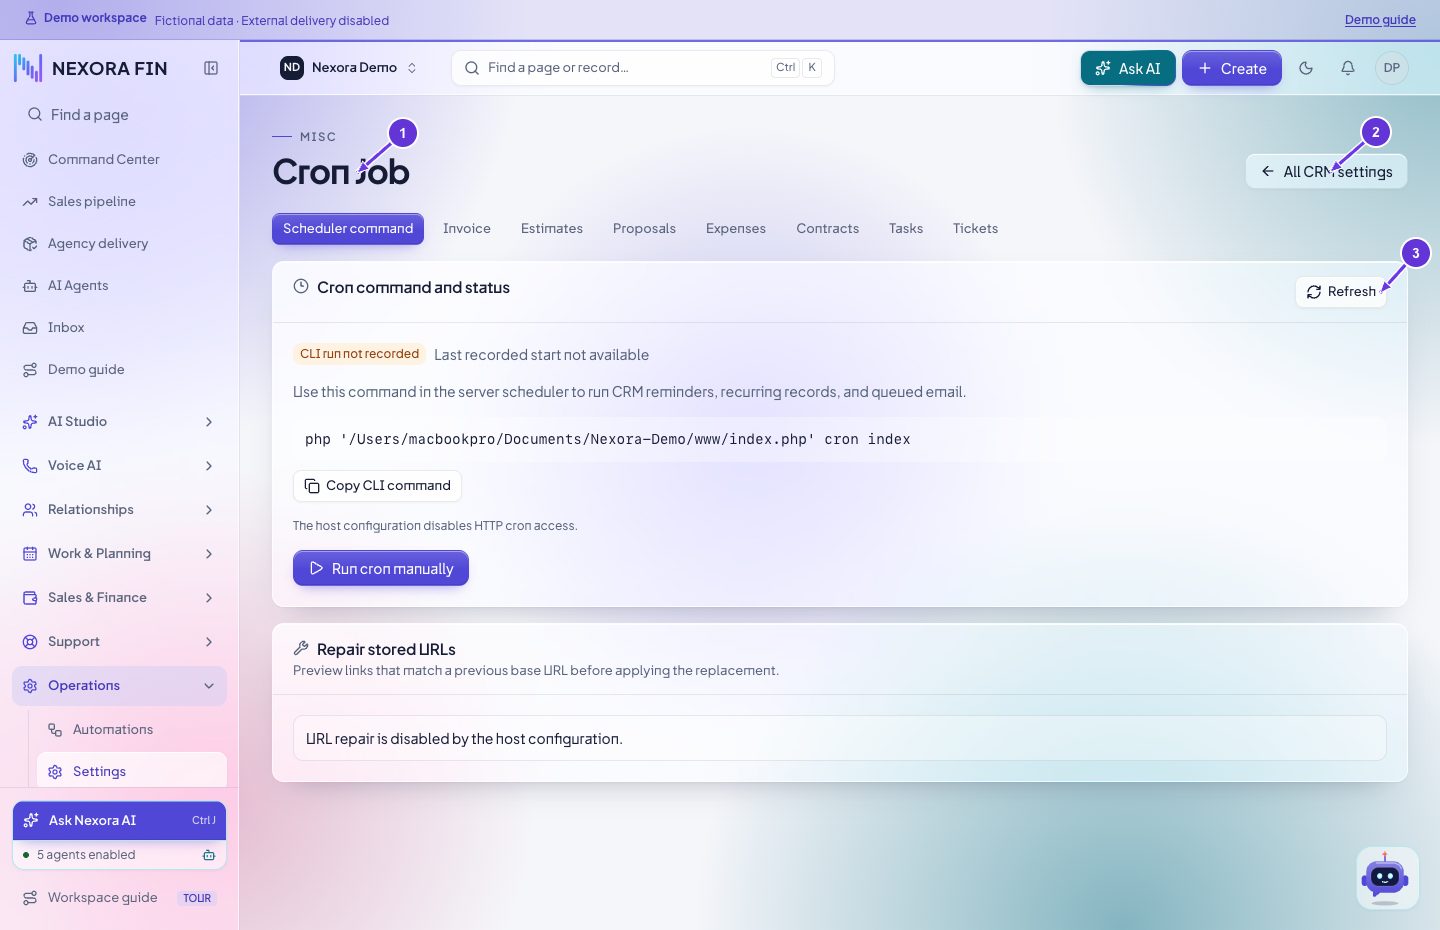
- Cron Job
- All CRM settings
- Refresh
Miscellaneous CRM settings
Find the named option in Miscellaneous, review its description and affected feature, save, and verify that feature.
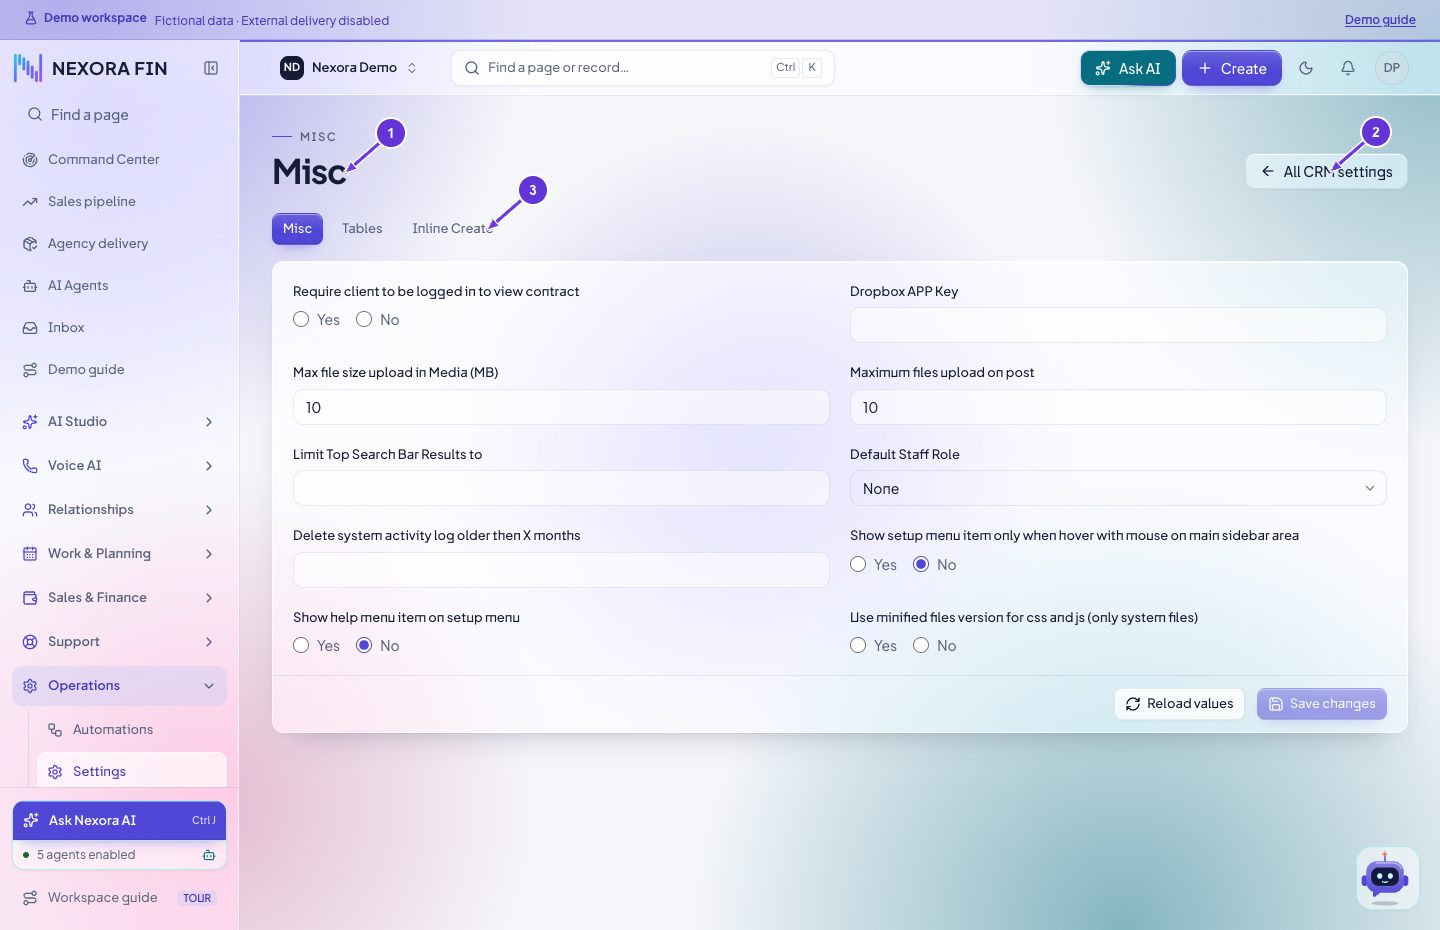
- Misc
- All CRM settings
- Inline Create